Magento 2 WYSIWYG Editor: Inserting Widget & Variable
Struggling to create the ideal content view for your Magento website? Using the Magento 2 WYSIWYG Editor simplifies the process. With its user-friendly interface and rich features, you can enhance your website's content effortlessly.
This tutorial explains how to insert a widget into Magento 2's WYSIWYG Editor. It also covers adding a variable to make your content more interactive and dynamic.
Key Takeaways
-
Explore Magento 2 WYSIWYG Editor for easy content creation and management.
-
Discover its features, from simple formatting to inserting Magento widgets and variables.
-
Enhance your site with rich media like images and videos.
-
Follow guides on using widgets and variables for dynamic content.
-
Gain tips on improving your Magento site's online presence.
What is Magento 2 WYSIWYG Editor?

Magento 2 WYSIWYG (What You See Is What You Get) Editor is a visual content editor.
It allows users to create and edit content on their Magento website. The interface is easy to use. It offers basic formatting options like bold, italic, and underline. There are also advanced features. These include tables, images, and videos.
The editor provides a WYSIWYG view for simple content entry and formatting. It allows switching to HTML code if needed. It is intended to create content for pages, blocks, and product descriptions. Users can access it via the "Show / Hide Editor" option for product details.
Why Use Magento Magento 2 WYSIWYG Editor?
| Reason | Explanation |
|---|---|
| Simplified Content Creation | Magento 2 WYSIWYG Editor offers a user-friendly interface. It enables easy creation and editing of content without extensive HTML knowledge. |
| Enhanced Visual Representation | Users can see exactly how their content will appear on the Magento website. It allows for precise formatting and layout adjustments. |
| Increased Product Descriptiveness | Utilizing the editor for product descriptions enables rich media integration. It includes images and videos, enhancing product presentation. |
| Seamless Content Management | The editor integrates with Magento's CMS pages, blocks, products, and categories. It streamlines content management tasks for a cohesive experience. |
| Empowerment of Non-Technical Users | Non-technical users can easily customize website content. They can do this using the intuitive controls and features of the Magento WYSIWYG Editor. |
How to Insert a Widget in the Editor
The widget tool allows users to add different content elements to a webpage. This includes links to Commerce content pages, nodes, products, or categories.
Users can format these links as blocks or embed them directly into the content. It's a flexible tool for connecting to content pages, catalog categories, and products. Steps to follow to insert a widget in the Magento 2 WYSIWYG editor:
-
Open a page, block, or dynamic block for editing.
-
In the Content section, click an element that supports editing.
-
Place the cursor where the widget should go and click the Insert Widget icon.

Note: If Page Builder isn't enabled and you prefer coding, click Show / Hide Editor. Place the cursor where the widget should go, then click Insert Widget.
-
Select the Widget Type. For more details, visit Widget Types. Below are examples of steps for adding a product link:
-
If you want to use the product name, don't fill in the Anchor Custom Text field.
-
Input a Custom Anchor Title for optimal SEO results. The title cannot be seen on the webpage.
-
Choose a Template from the options below:
-
To add the link, choose Product Link Inline Template.
-
To put the link on its own line, choose the Product Link Block Template.
- Click Select Product and proceed:
-
Navigate to your desired category in the tree.
-
Choose the linked product from the list.
- Click Insert Widget to add the link to the page.
Note: When working with HTML code, a markup tag for the link is at the top of the page. It's within double curly braces. If necessary, use "Cut and Paste" to place the tag in your code. Put it where the link should go.
- After editing, click Save.
How to Insert a Variable in Magento 2 WYSIWYG Editor
-
Access and edit a page, block, or dynamic block.
-
Navigate to the Content section and click on any element that supports WYSIWYG editor.
-
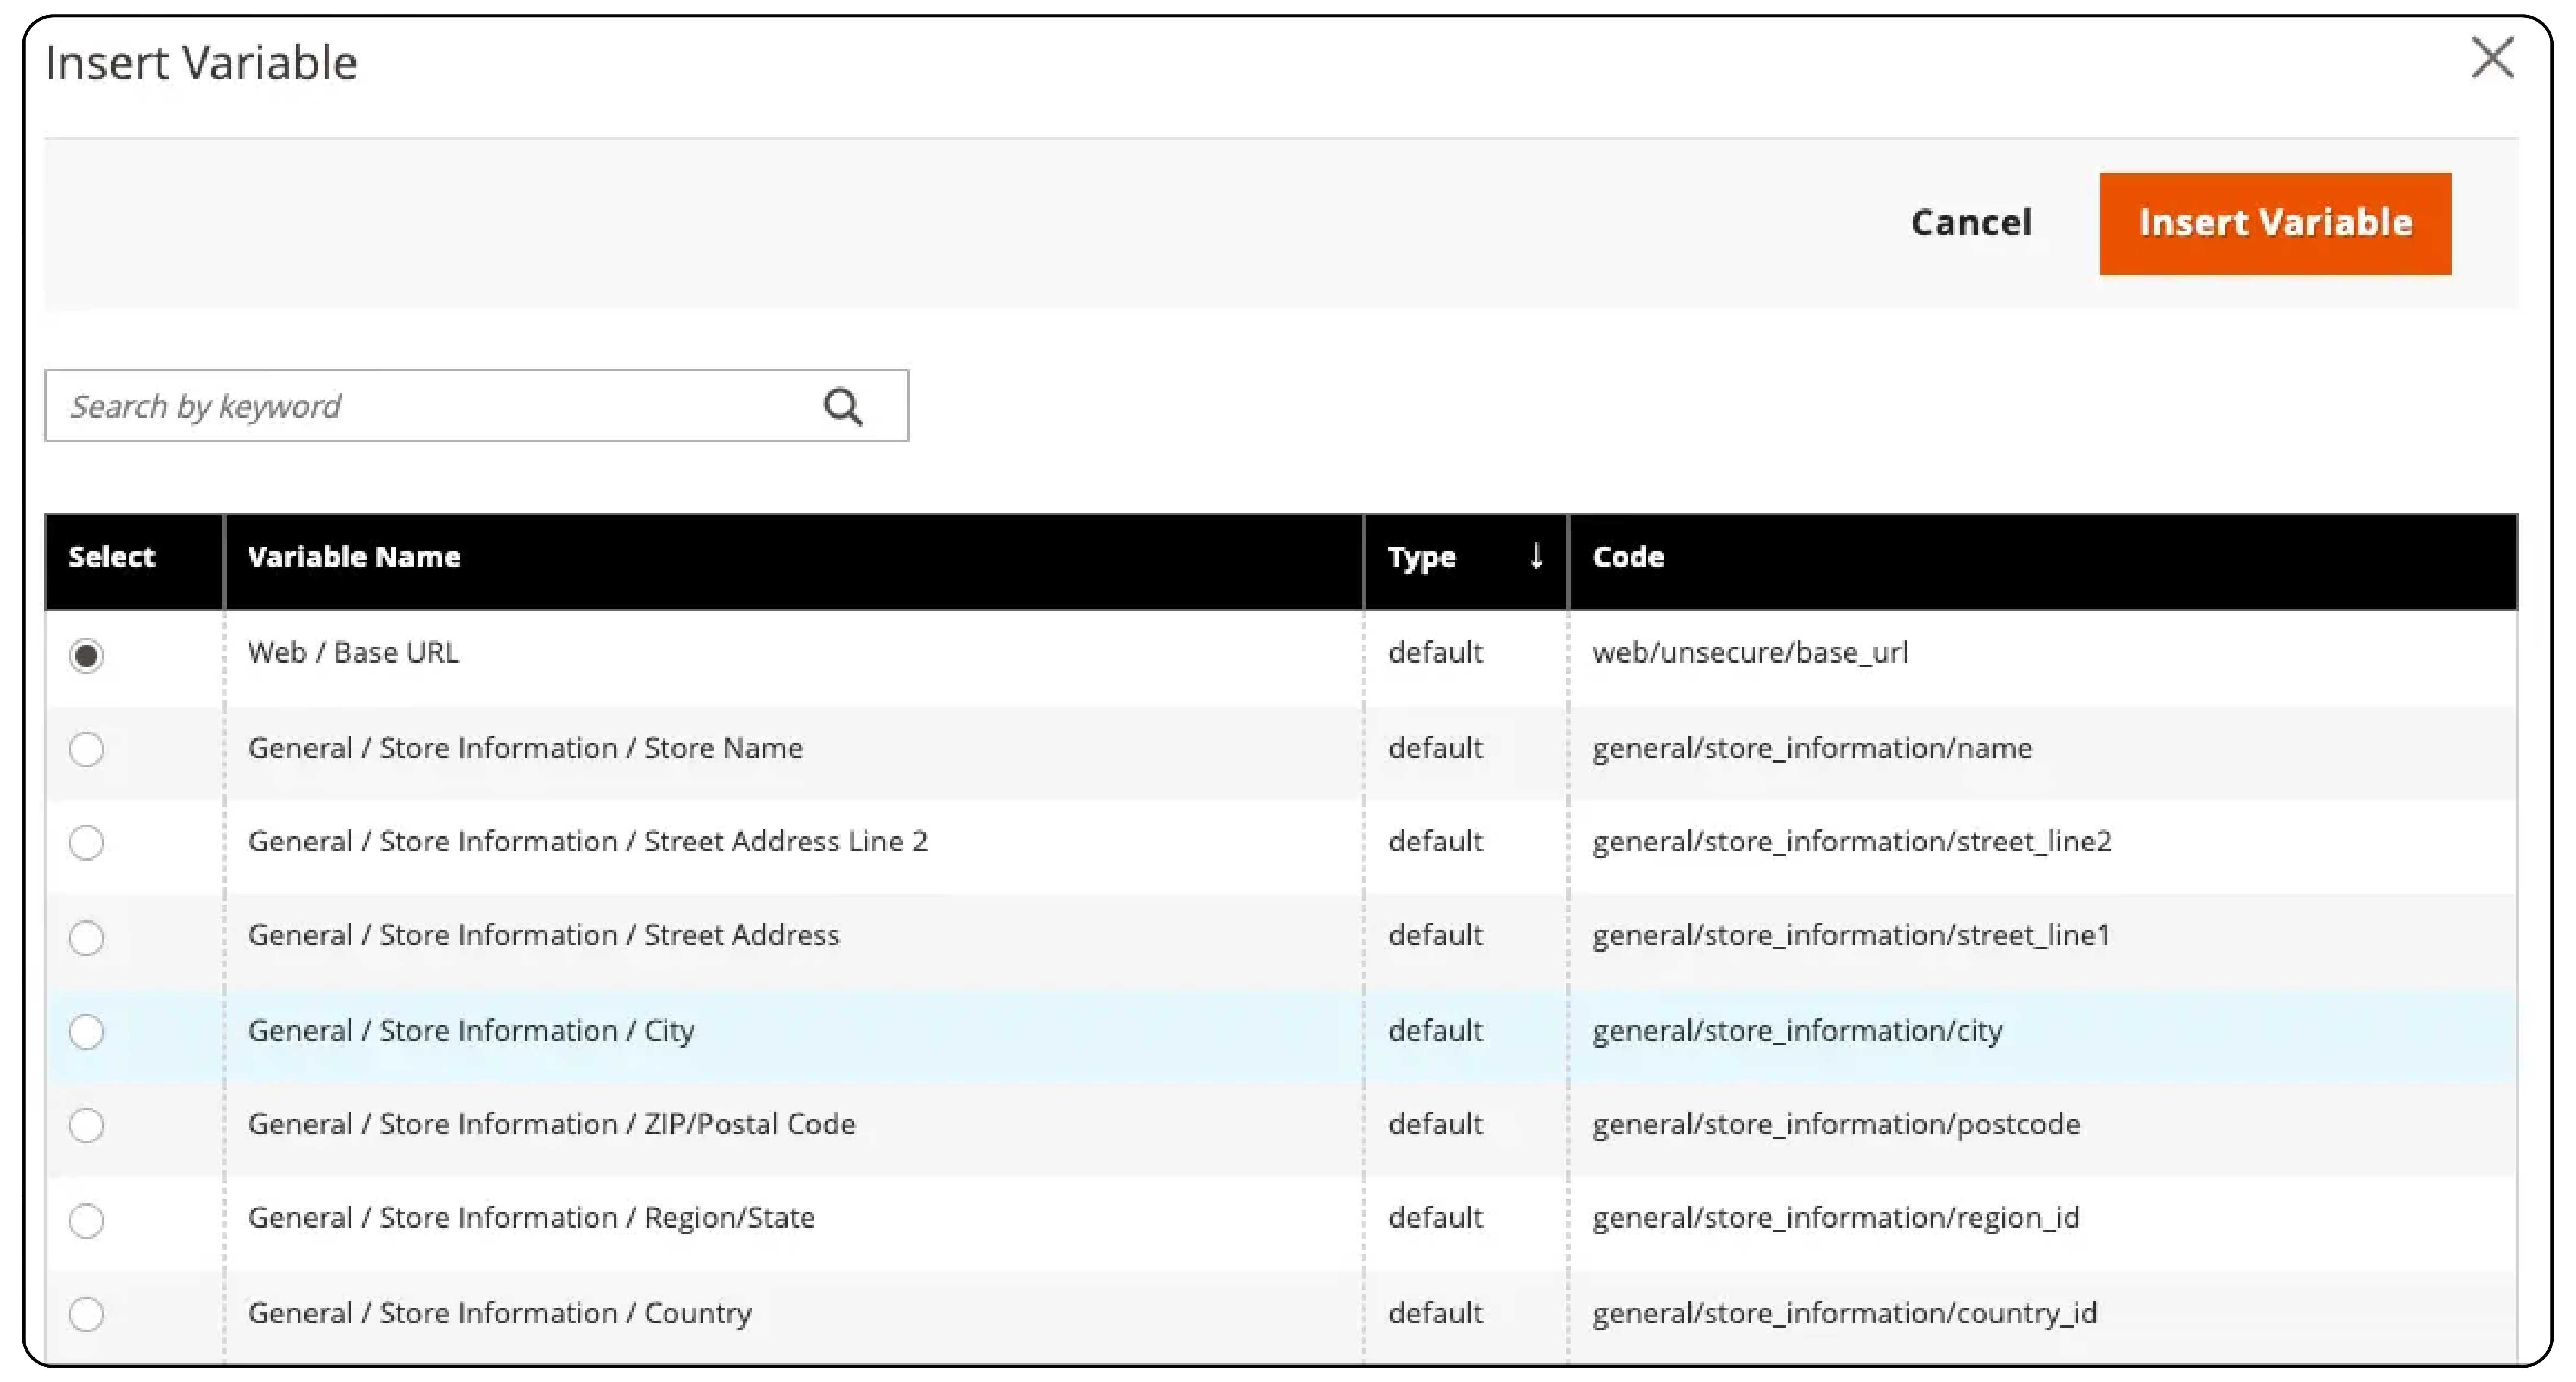
Place the cursor where you need the variable and click the Insert Variable icon.

Note: If Page Builder is off and you prefer HTML, click Show / Hide Editor. Place the cursor where you want the variable, then click Insert Variable.
- In the list of variables, select the one you want and click Insert Variable.

- After editing your content, click Save.
FAQs
1. Is the widget functionality enabled by default in the Magento WYSIWYG Editor?
Yes, the widget functionality is enabled by default. It allows users to add and configure widgets easily. They can enhance interactivity within their content.
2. Can I use custom HTML markup in the Magento WYSIWYG Editor?
Yes, custom HTML markup is allowed in the Magento WYSIWYG Editor. It offers flexibility for advanced customization. Dedicated Magento hosting also provides more control over design.
3. Are there limitations on the types of media I can insert using the Magento WYSIWYG Editor?
No, there are no inherent limitations. Users can insert various types of media, including images and videos, to enrich their content presentation.
4. How can I ensure my media content maintains static URLs in the Magento WYSIWYG Editor?
To keep static URLs for media content, adjust a specific setting. Change the "Static URLs for Media Content in WYSIWYG" in the editor's configuration.
5. Is it possible to temporarily disable the WYSIWYG Editor in Magento?
Yes, the WYSIWYG Editor can be temporarily disabled. It is done by toggling the 'Enable WYSIWYG Editor' option. You can find this option in the content management settings. It allows for direct HTML and text input.
Summary
The Magento 2 WYSIWYG editor lets you easily create, edit, and manage content. By adding widgets and variables, you can make your pages interactive and dynamic. Key benefits are:
-
Enhanced user engagement through interactive content elements.
-
Increased site personalization with the use of dynamic variables.
-
Streamlined content creation process for non-technical users.
-
Improved SEO capabilities through optimized media and HTML customization.
Choose managed Magento hosting to optimize the view of your e-commerce website's content.


