How to Secure Magento Cron PHP?
Do you know how Magento Cron PHP ensures the smooth functioning of e-stores? Magento Cron PHP automates tasks. It sends transactional emails and generates reports. It boosts store efficiency and customer experience. In this tutorial, we cover securing Magento Cron PHP with practical steps to secure your site.
Key Takeaways
-
Magento Cron PHP automates key tasks, enhancing e-store efficiency.
-
Secure Magento Cron PHP to prevent unauthorized access and data breaches.
-
Implement password authentication and user group management for enhanced security.
-
Regular monitoring of cron job logs ensures smooth e-store operation.
-
Consider dedicated Magento hosting for hassle-free cron task management.
What is Magento Cron PHP?

Magento Cron PHP is a feature that automates tasks at specific intervals. This feature is important for Magento's proper functioning. It handles processes such as sending transactional emails. It also indexes data and generates reports.
Why Secure Magento Cron PHP?
It's important to secure pub/cron.php to avoid malicious exploits. This script operates with elevated privileges and can run any PHP code. If a hacker accesses it, they could take over your website. They might also steal sensitive information.
Failing to secure cron properly could make your Commerce application vulnerable to attacks. This vulnerability allows any user to exploit it. Cron jobs are essential to your Commerce setup. They execute various scheduled tasks essential to the application's functionality.
These tasks encompass a variety of actions. They include reindexing, generating newsletters, and creating e-mails. Also, they involve generating sitemaps. You can run a cron job as follows:
-
Run magento cron:run from the command line or crontab
-
Visit
pub/cron.php?[group=<name>]in a browser
How to Secure Cron with Apache
1. Create a Password File
Due to Magento security concerns, placing the password file in your web server's document root is not advisable. In this example, the password file is stored in a newly created directory.
Input the commands below as a user with administrator rights:
mkdir -p /usr/local/apache/password
htpasswd -c /usr/local/apache/password/passwords <username>
Where
Follow the on-screen prompts to create a user password.
To include an additional user in your password file, execute the following command with root privileges:
htpasswd /usr/local/apache/password/passwords <username>
Add Users to Create an Authorized Cron Group (optional)
Enable multiple Magento users for cron by adding them to your password file and a group file. To add a user to your password file:
htpasswd /usr/local/apache/password/passwords <username>
To establish an authorized group, generate a group file at any location outside the web server's document root. This file defines the group's name and its members. In this instance, the group is named:
MagentoCronGroup.
vim /usr/local/apache/password/group
The file contents are:
MagentoCronGroup: <username1> ... <usernameN>
How to Secure Cron in .htaccess
Secure cron with .htaccess:
-
Log in to your Commerce server as the file system owner.
-
Edit <magento_root>/pub/.htaccess with a text editor. (Only modify this .htaccess for cron.php in the pub directory.)
-
Allow cron access for specific users. Replace
directive with:
<Files cron.php>
   AuthType Basic
   AuthName "Cron Authentication"
   AuthUserFile /usr/local/apache/password/passwords
   Require valid-user
</Files>
- For group cron access, replace the
directive with:
<Files cron.php>
   AuthType Basic
   AuthName "Cron Authentication"
   AuthUserFile /usr/local/apache/password/passwords
   AuthGroupFile <path to optional group file>
   Require group <name>
</Files>
-
Save changes to .htaccess and close the editor.
-
Proceed to Verify cron is secure.
How to Secure Cron with Nginx
To do so:
-
Create an encrypted Nginx password file.
-
Update your nginx config to use the password file to access pub/cron.php.
Creating a Password File
Before continuing, create a password file using one of these guides:
-
Set Up Password Authentication with Nginx on Ubuntu 14.04
-
Perform HTTP Authentication with Nginx
Secure Cron in nginx.conf.sample
Commerce offers a sample nginx configuration file ready-to-use. We suggest adjusting it for cron security.
- Modify your nginx.conf.sample file by adding:
#Securing cron
location ~ cron\.php$ {
   auth_basic "Cron Authentication";
   auth_basic_user_file /etc/nginx/.htpasswd;

   try_files $uri =404;
   fastcgi_pass   fastcgi_backend;
   fastcgi_buffers 1024 4k;

   fastcgi_read_timeout 600s;
   fastcgi_connect_timeout 600s;

   fastcgi_index  index.php;
   fastcgi_param  SCRIPT_FILENAME  $document_root$fastcgi_script_name;
   include        fastcgi_params;
}
- Now Restart Niginx:
systemctl restart nginx
Proceed with Ensuring cron security.
How to Verify Cron is Secure
To ensure the security of pub/cron.php, first confirm it generates rows in the cron_schedule database table. It should follow the password authentication setup. Use SQL commands or any preferred tool for database checking.
To ensure cron's security:
- Sign into the database using the Commerce database user credentials or as root. For instance,
mysql -u magento -p
- Next you need to use the Commerce database:
use <database-name>;
For instance:
use magento;
- Remove all entries from the cron_schedule table in the database:
TRUNCATE TABLE cron_schedule;
- Execute cron jobs through a web browser:
http[s]://<Commerce hostname or ip>/cron.php?group=default
For instance:
http://magento.example.com/cron.php?group=default
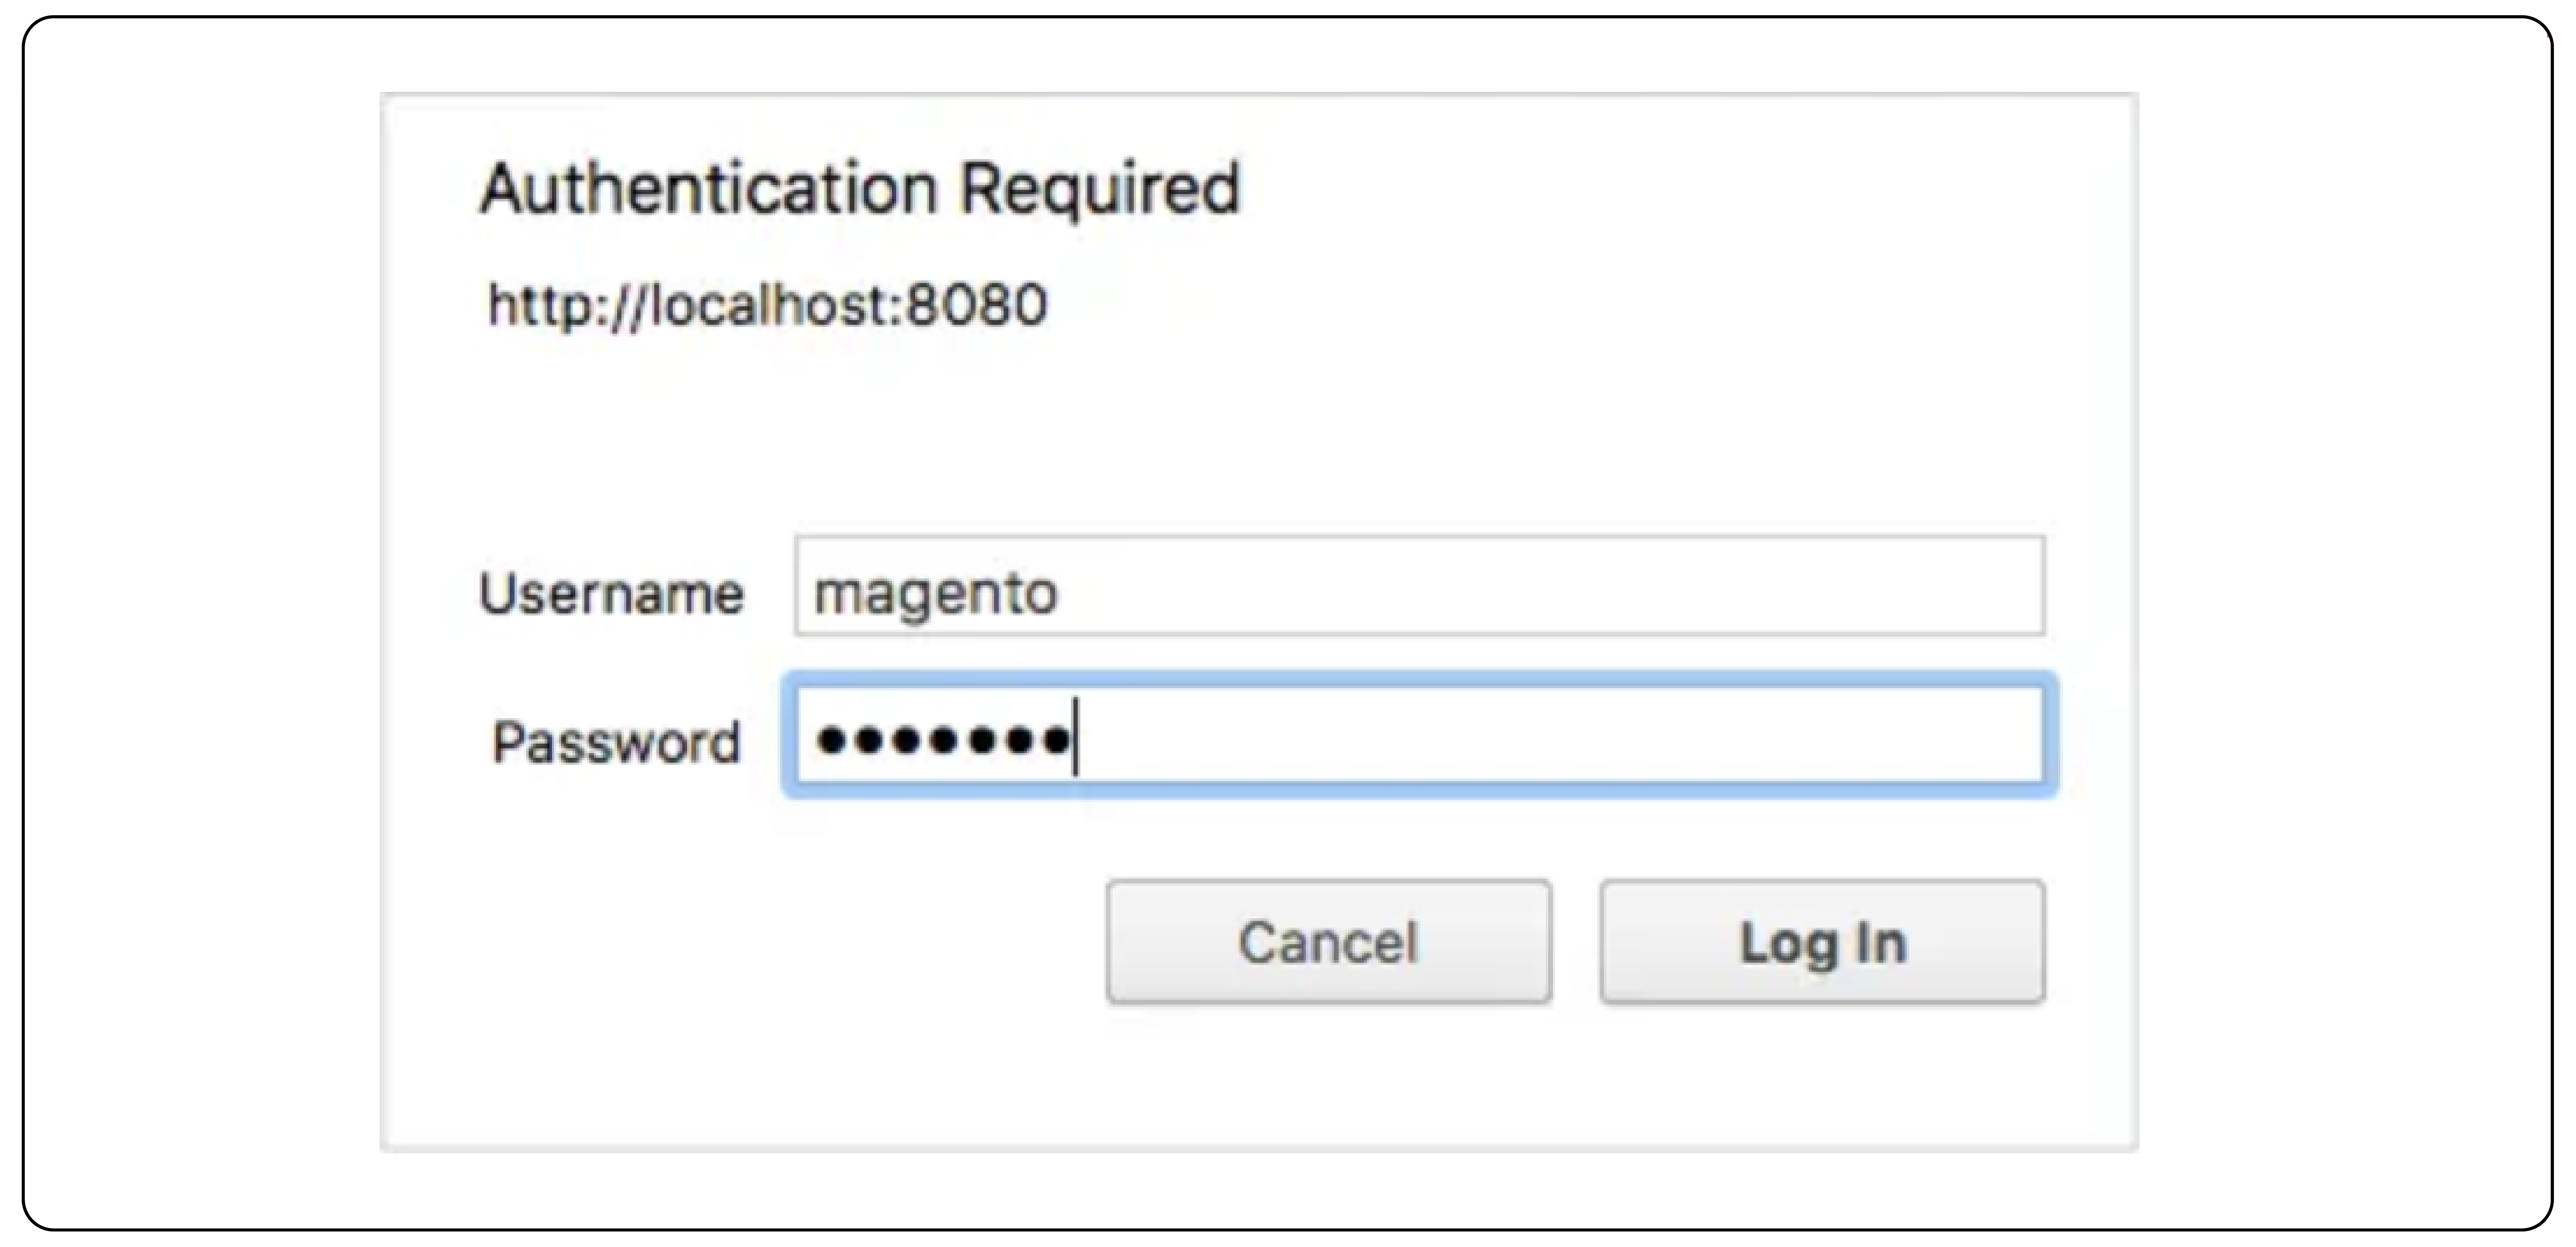
- Upon request, input the name and password of an authorized user. The example below illustrates this.

- Confirm that rows have been added to the table:
SELECT * from cron_schedule;

mysql> SELECT * from cron_schedule;
+-------------+-----------------------------------------------+---------+----------+---------------------+---------------------+-------------+-------------+
| schedule_id | job_code                             | status  | messages | created_at        | scheduled_at      | executed_at | finished_at |
+-------------+-----------------------------------------------+---------+----------+---------------------+---------------------+-------------+-------------+
|         1 | catalog_product_outdated_price_values_cleanup | pending | NULL    | 2017-09-27 14:24:17 | 2017-09-27 14:24:00 | NULL      | NULL      |
|         2 | sales_grid_order_async_insert             | pending | NULL    | 2017-09-27 14:24:17 | 2017-09-27 14:24:00 | NULL      | NULL      |
|         3 | sales_grid_order_invoice_async_insert       | pending | NULL    | 2017-09-27 14:24:17 | 2017-09-27 14:24:00 | NULL      | NULL      |
|         4 | sales_grid_order_shipment_async_insert      | pending | NULL    | 2017-09-27 14:24:17 | 2017-09-27 14:24:00 | NULL      | NULL      |
|         5 | sales_grid_order_creditmemo_async_insert     | pending | NULL    | 2017-09-27 14:24:17 | 2017-09-27 14:24:00 | NULL      | NULL      |
|         6 | sales_send_order_emails                  | pending | NULL    | 2017-09-27 14:24:17 | 2017-09-27 14:24:00 | NULL      | NULL      |
|         7 | sales_send_order_invoice_emails            | pending | NULL    | 2017-09-27 14:24:17 | 2017-09-27 14:24:00 | NULL      | NULL      |
|         8 | sales_send_order_shipment_emails           | pending | NULL    | 2017-09-27 14:24:17 | 2017-09-27 14:24:00 | NULL      | NULL      |
|         9 | sales_send_order_creditmemo_emails         | pending | NULL    | 2017-09-27 14:24:17 | 2017-09-27 14:24:00 | NULL      | NULL      |
|        10 | newsletter_send_all                     | pending | NULL    | 2017-09-27 14:24:17 | 2017-09-27 14:25:00 | NULL      | NULL      |
|        11 | captcha_delete_old_attempts               | pending | NULL    | 2017-09-27 14:24:17 | 2017-09-27 14:30:00 | NULL      | NULL      |
|        12 | captcha_delete_expired_images             | pending | NULL    | 2017-09-27 14:24:17 | 2017-09-27 14:30:00 | NULL      | NULL      |
|        13 | outdated_authentication_failures_cleanup     | pending | NULL    | 2017-09-27 14:24:17 | 2017-09-27 14:24:00 | NULL      | NULL      |
|        14 | magento_newrelicreporting_cron            | pending | NULL    | 2017-09-27 14:24:17 | 2017-09-27 14:24:00 | NULL      | NULL      |
+-------------+-----------------------------------------------+---------+----------+---------------------+---------------------+-------------+-------------+
14 rows in set (0.00 sec)
How to Run Cron from a Web Browser
If using an Apache server, remove the .htaccess restriction to run cron in a browser:
-
Log into your Adobe Commerce server with permission to write in the file system.
-
Open any of these in a text editor based on your Magento entry point:
<magento_root>/pub/.htaccess
<magento_root>/.htaccess
- Next you need to delete or comment out these:
## Deny access to cron.php
  <Files cron.php>
     order allow,deny
     deny from all
  </Files>
For instance:
## Deny access to cron.php
  <Files cron.php>
     order allow,deny
     deny from all
  </Files>
- Store your modifications and close the text editing program.
Run cron in a web browser like this:
<your hostname or IP>/<Commerce root>/pub/cron.php[?group=<group name>]
Where:
-
represents the hostname or IP address where your Commerce setup is located. -
refers to the directory relative to the web server's document root where the Commerce software has been installed. -
The specific URL used to access the Commerce application varies based on the configuration of your web server and virtual host.
-
"
" can be any valid name for a cron group (this is optional).
For example,
https://magento.example.com/magento2/pub/cron.php?group=index
Benefits of Securing Magento Cron Job
Sure, here's the information presented in a table format with the same sentences:
| Benefits | Explanations |
|---|---|
| Enhanced Security | Securing Magento Cron PHP prevents unauthorized access to key scripts. It reduces the risk of malicious exploits. |
| Protection of Sensitive Data | By implementing authentication measures, sensitive information handled by cron jobs remains protected. It includes customer data. |
| Prevention of Unauthorized Access | Password authentication ensures that only authorized users can execute cron jobs. It mitigates the risk of unauthorized system access. |
| Mitigation of Security Threats | Secure cron setup minimizes the potential for security breaches. It safeguards the integrity and confidentiality of your Magento application. |
FAQs
1. How do I configure and run cron jobs in Magento?
To configure and run cron jobs in Magento, first log in to your Magento hosting control panel. Then, navigate to the Magento root directory. Use the command php bin/magento cron:install to configure cron settings. This command creates a crontab in your system.
2. What command should I use to run cron tasks for a specific cron group in Magento?
Use the following command from the Magento root directory: php bin/magento cron:run --group="<cron group name>". Replace <cron group name> with the name of the specific cron group for which you wish to run tasks.
3. How can I ensure my cron jobs are running as expected?
After configuring cron in Magento, check the var/log directory. Look for cron logs in this directory. These logs offer details on the execution of cron tasks. They help make sure your cron jobs are running as expected.
4. What steps are required to secure the cron.php file in Magento?
To secure the cron.php file, configure your web server settings. Restrict direct access to the cron.php file. Allow access only from trusted IP addresses or after authentication. It enhances your Magento application's security.
5. How do I install Magento 2 cron setup on a new Magento site?
To install Magento 2 cron setup, first install Magento. Then, run php bin/magento cron:install from the Magento root directory. This command adds the necessary cron configuration to your system's crontab. It ensures Magento's cron tasks are scheduled properly.
Summary
Securing Magento Cron PHP maintains the integrity and security of an online store. Ensure the smooth operation of your Magento store by following these steps:
-
Set up password authentication for cron access.
-
Create authorized cron user groups.
-
Configure server settings to restrict direct access to cron.php.
-
Regularly monitor cron job execution logs for any anomalies.
For easy Magento hosting and cron task management, consider managed Magento hosting solutions.


