Magento WordPress Integration

Integrating WordPress to your Magento store allows for more customer engagement.
WordPress blog helps interact with users and offers additional information on the products.
It can be used to direct the customers to the Magento store.
We cover the steps on Magento WordPress Integration.

Steps for Magento WordPress Integration
3-Phase Magento-WordPress Integration Blueprint
From Download to Full Activation - Complete Technical Workflow
PHASE 1: Download and Install WordPress
Set up WordPress at Magento root with database configuration
URL Structure: http://www.example.com/wordpress
NOTE: Database credentials found in app/etc/env.php
PHASE 2: Install Magento WordPress Integration Module
Create directory structure and execute CLI commands
Directory Structure:
app/code/FishPig/
Required CLI Commands (5):
$ bin/magento module:enable FishPig_WordPress
$ bin/magento setup:upgrade
$ bin/magento setup:di:compile
$ bin/magento cache:clean
$ bin/magento cache:flush
CRITICAL: Execute commands in exact sequence shown
PHASE 3: Configure FishPig Theme
Install and activate theme for seamless integration
Copy FishPig theme to wp-content/themes directory
Go to WordPress Admin → Appearance → Themes → Activate FishPig
Configure settings in both Magento and WordPress admin panels
SUCCESS: Integration complete - both platforms now work seamlessly together
Troubleshooting Tip:
If you encounter an error during WordPress installation, manually create the wp-config.php file in your directory with the database credentials from app/etc/env.php
1. Download and Install WordPress
To successfully integrate Magento with a WordPress website, it's essential to establish clear goals, choose the right integration plugin, configure the settings, test the integration, and monitor performance.
Working with a WordPress agency can provide expert guidance and support throughout this process, helping you achieve a seamless and effective integration that supports your business goals and enhances the user experience.
Without further ado, here is a breakdown on how to successfully connect your online store with your content management system, creating a unified and enhanced platform for your customers.
- Go to the official WordPress website and download the latest version.
You will receive a zip file with all the files and folders of the WordPress application.
Upload the zip file to your server at the root of the Magento store and extract it.
You get the folder named WordPress, which contains all application files. Rename the folder to wp.
- Open a web browser and add your Magento store’s URL.
Add WordPress at the end of the URL.
For example -
The store’s URL is http://www.example.com/ then you add http://www.example.com/wordpress
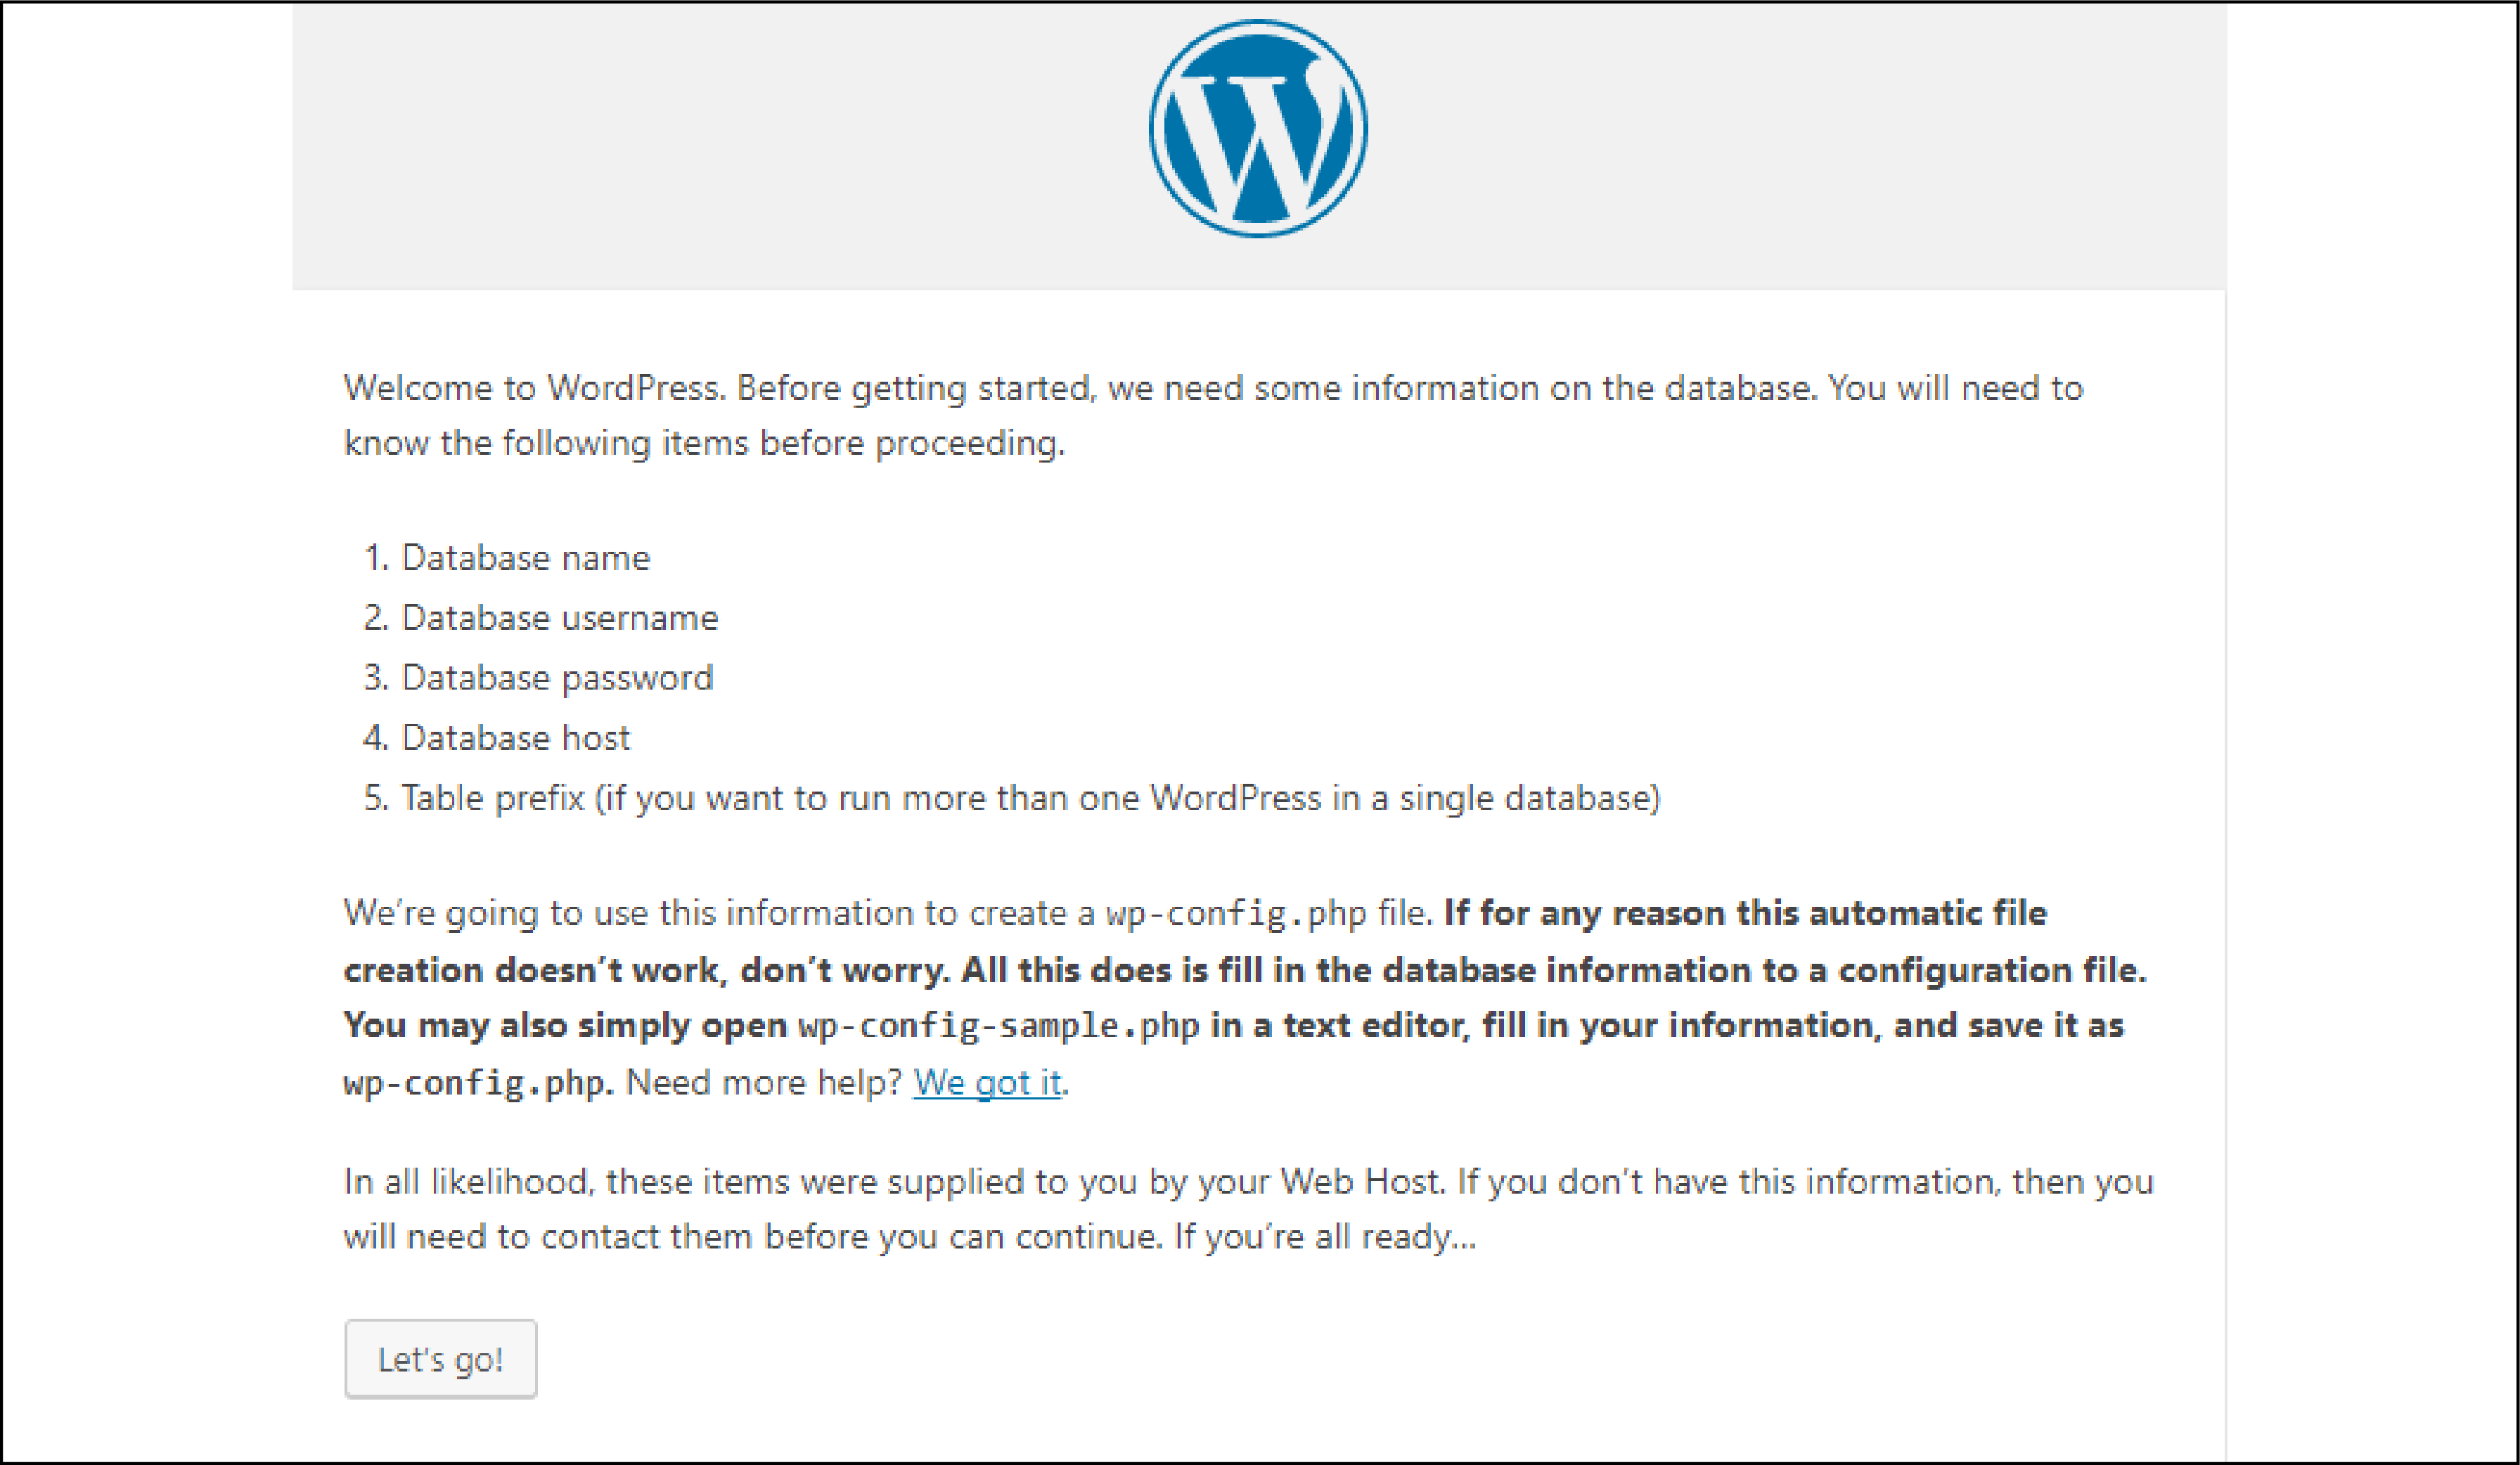
You will see a WordPress installation screen. Click on the Let’s Go tab to continue the installation.
For your Magento 2 database, go to app/etc/env.php from the Magento 2 directory.
Add the information in the installation form and then click submit.
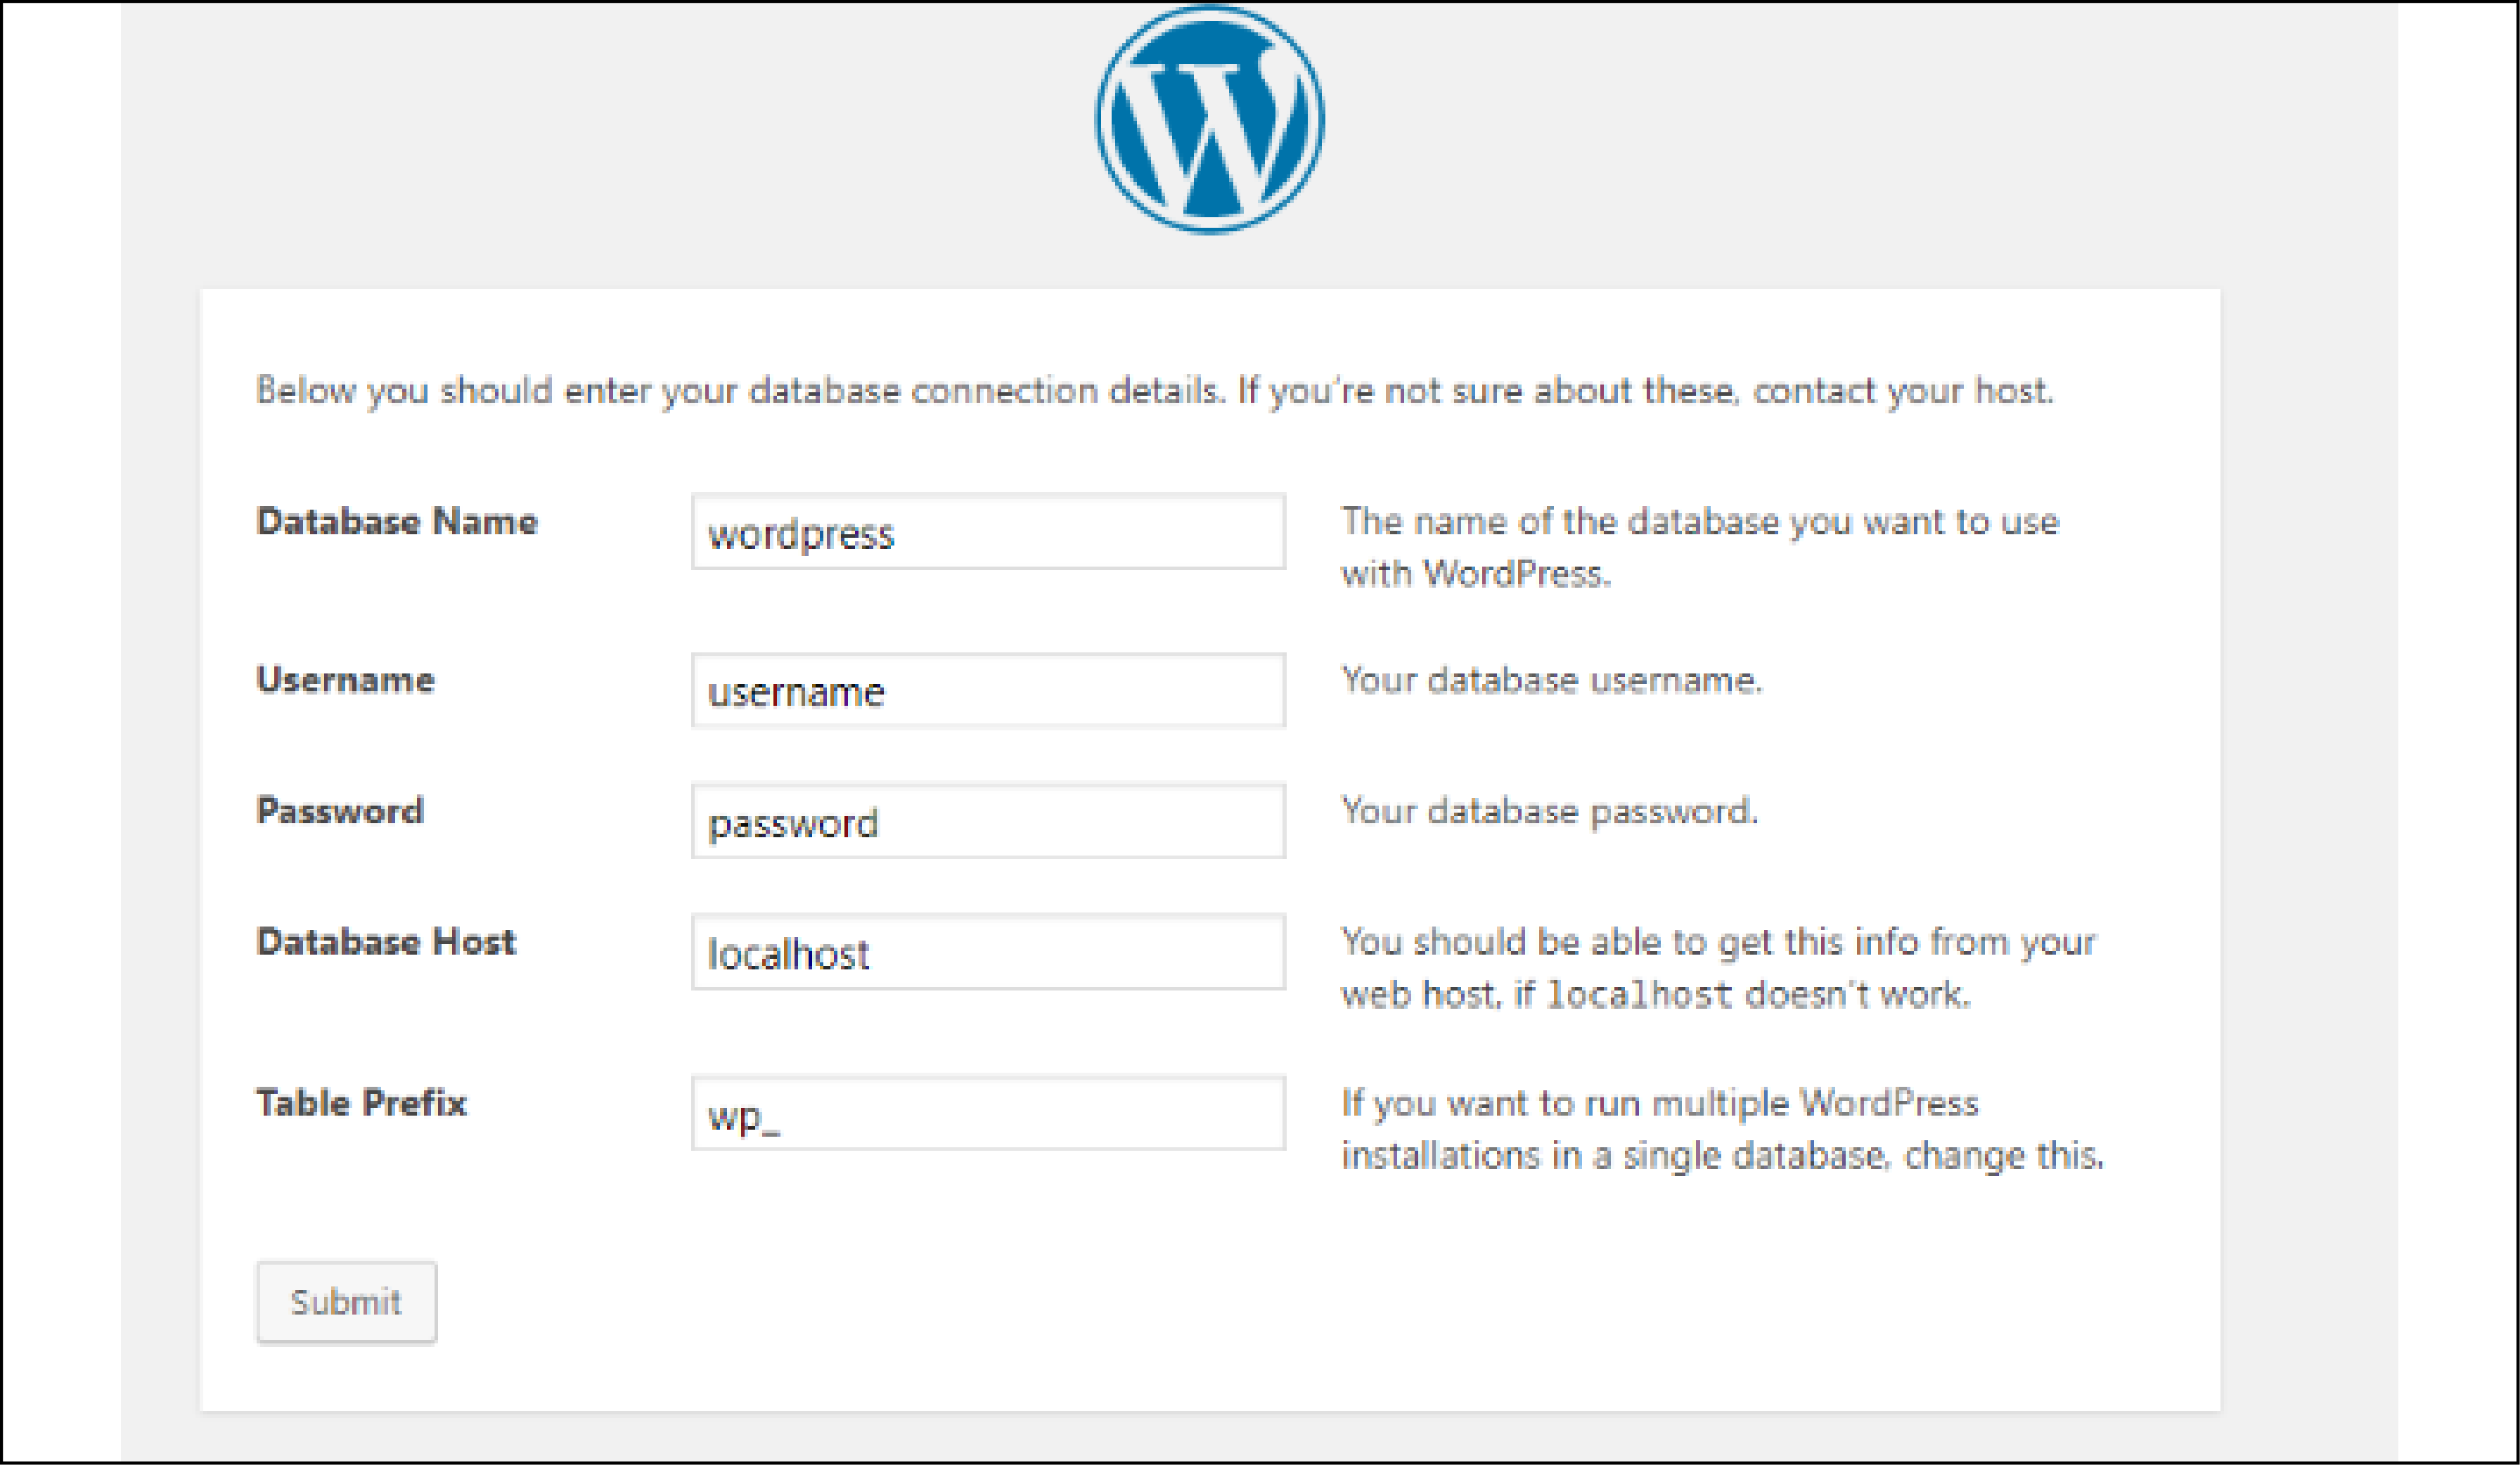
In case of an error, create the wp-config.php file in your directory.
The error may look like this -

Copy the code that is on the screen and paste it to the wp-config.php and click Run the install.
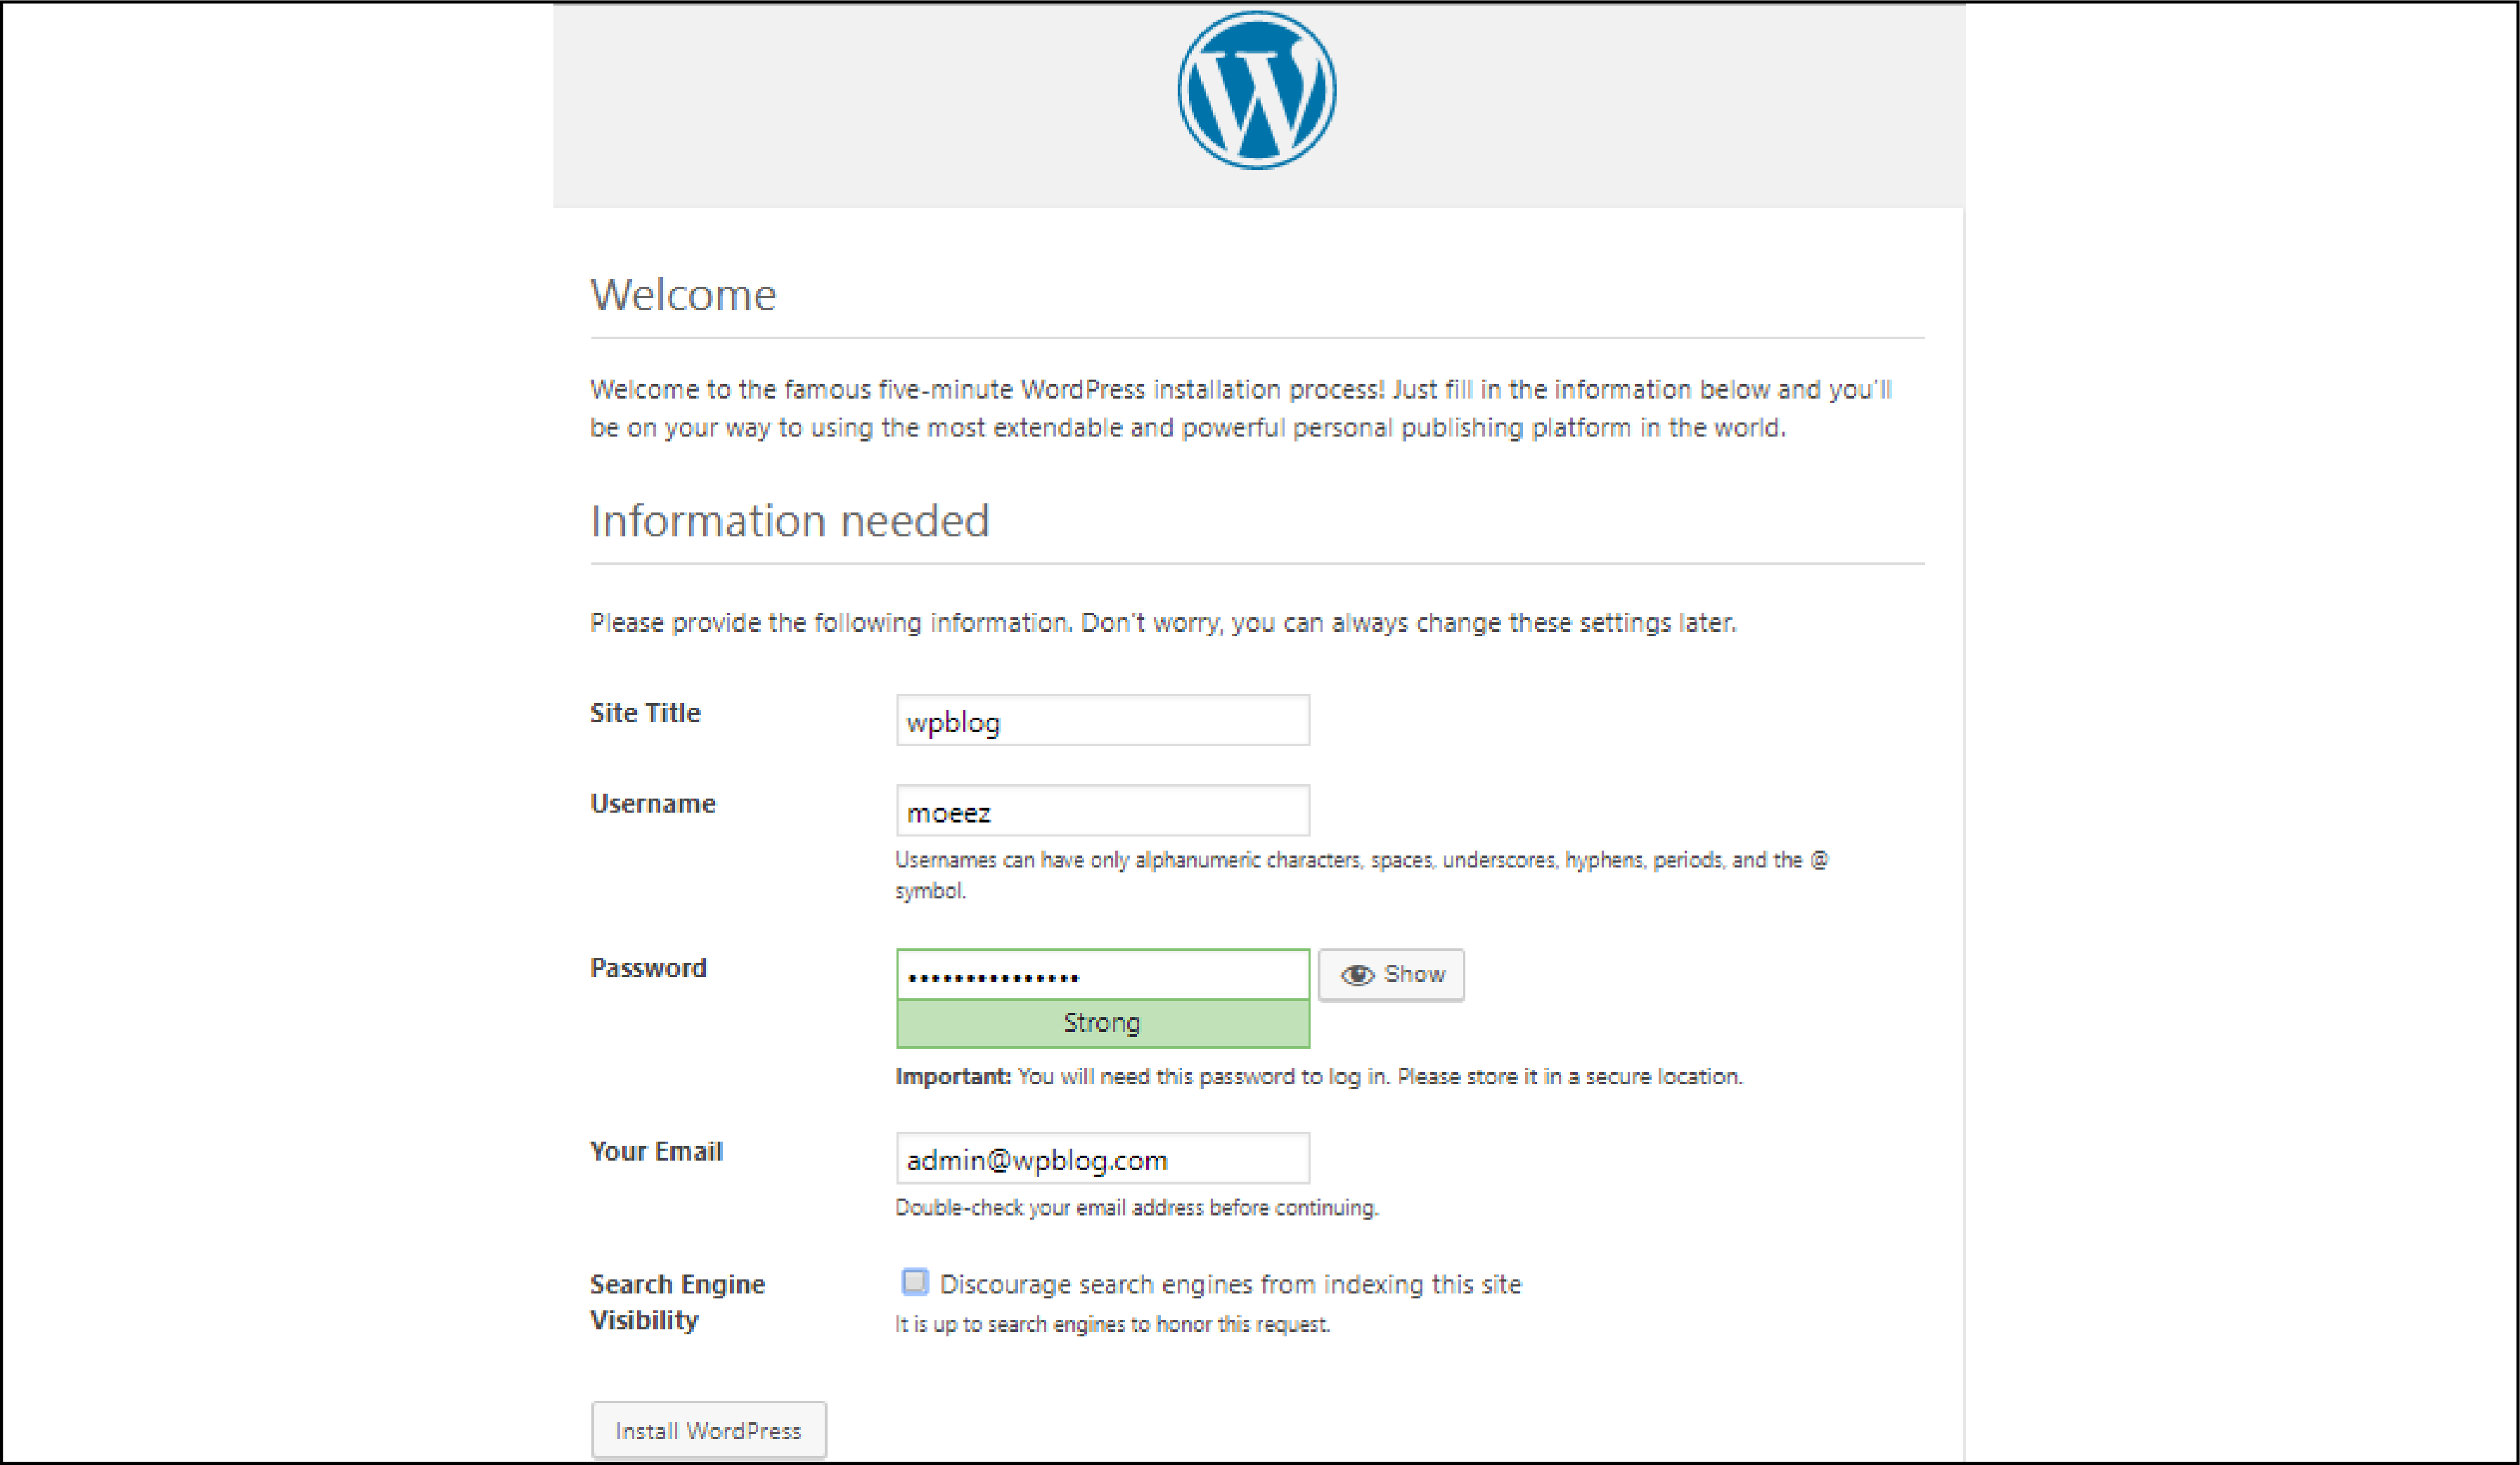
You will see a welcome page where you can add the WordPress details.
After adding the information, click on Install.
2. Install the Magento WordPress Integration Module
5 Essential CLI Commands: Your Magento-WordPress Integration Checklist
Execute in exact sequence for guaranteed module activation
IMPORTANT: Execute these commands from the Magento root directory in the exact sequence shown. Each command builds upon the previous one's changes to ensure proper module integration.
Go to the app folder from the root directory of your store.
Create a code/FishPig directory.
After downloading the FishPig extension, you may have extracted the archived folder.
You will now see a folder magento2-wordpress-integration-master.
You can rename it WordPress or WP for easy reference.
Upload this folder to the Magento 2 store using app/code/FishPig.
You will see the following -

Next, you go the root directory and run the following commands:
php bin/magento module:enable FishPig_WordPress
php bin/magento setup:upgrade
php bin/magento setup:di:compile
php bin/magento cache:clean
php bin/magento cache:flush
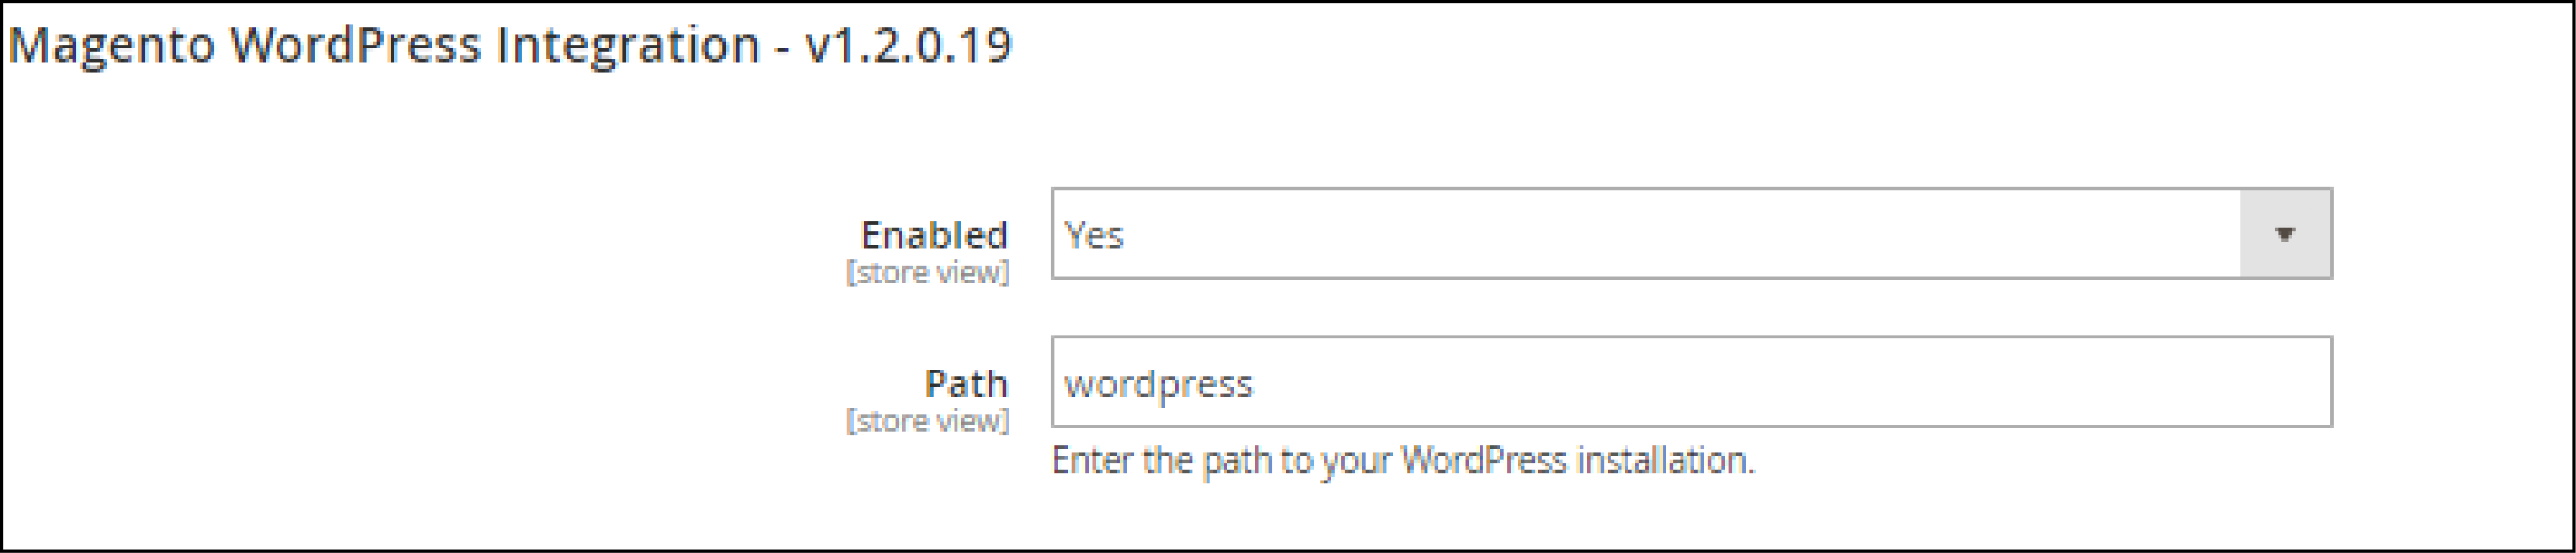
Select WordPress from the Magento admin panel.
Select the Enabled and Path options in the WordPress integration setup:
3. FishPig Theme
You have downloaded WordPress on the Magento Store and installed Magento WordPress Integration Module.
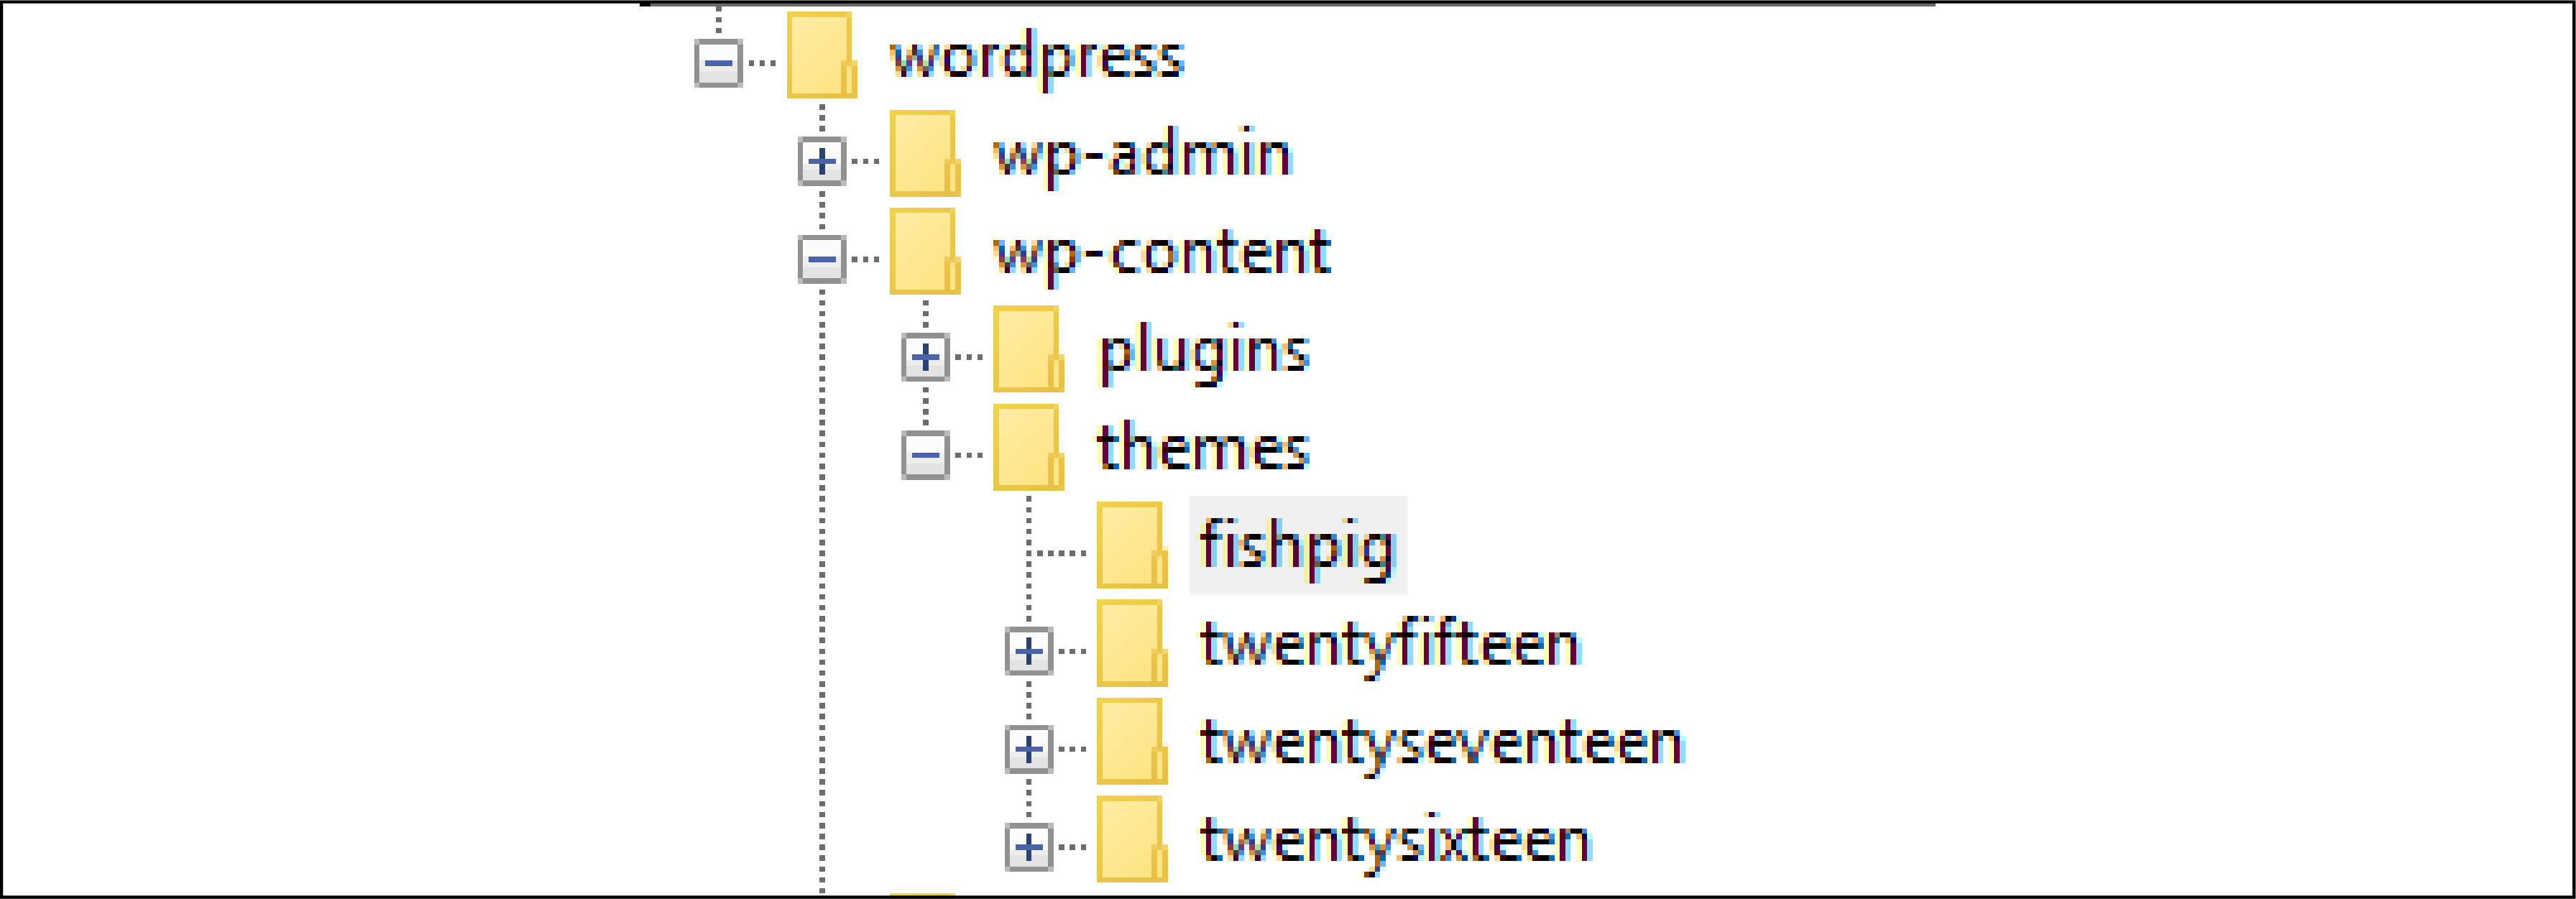
The next step is to copy the FishPig theme. Go to app/code/FishPig/WP, which you can access from the root directory.

You will see the wptheme folder in the directory. Copy and paste the folder into the WordPress folder.
Find the folder on wordpress/wordpress-content/themes. For reference, you can rename the folder to FishPig.
After logging in to the WordPress admin panel, go to Settings > General.
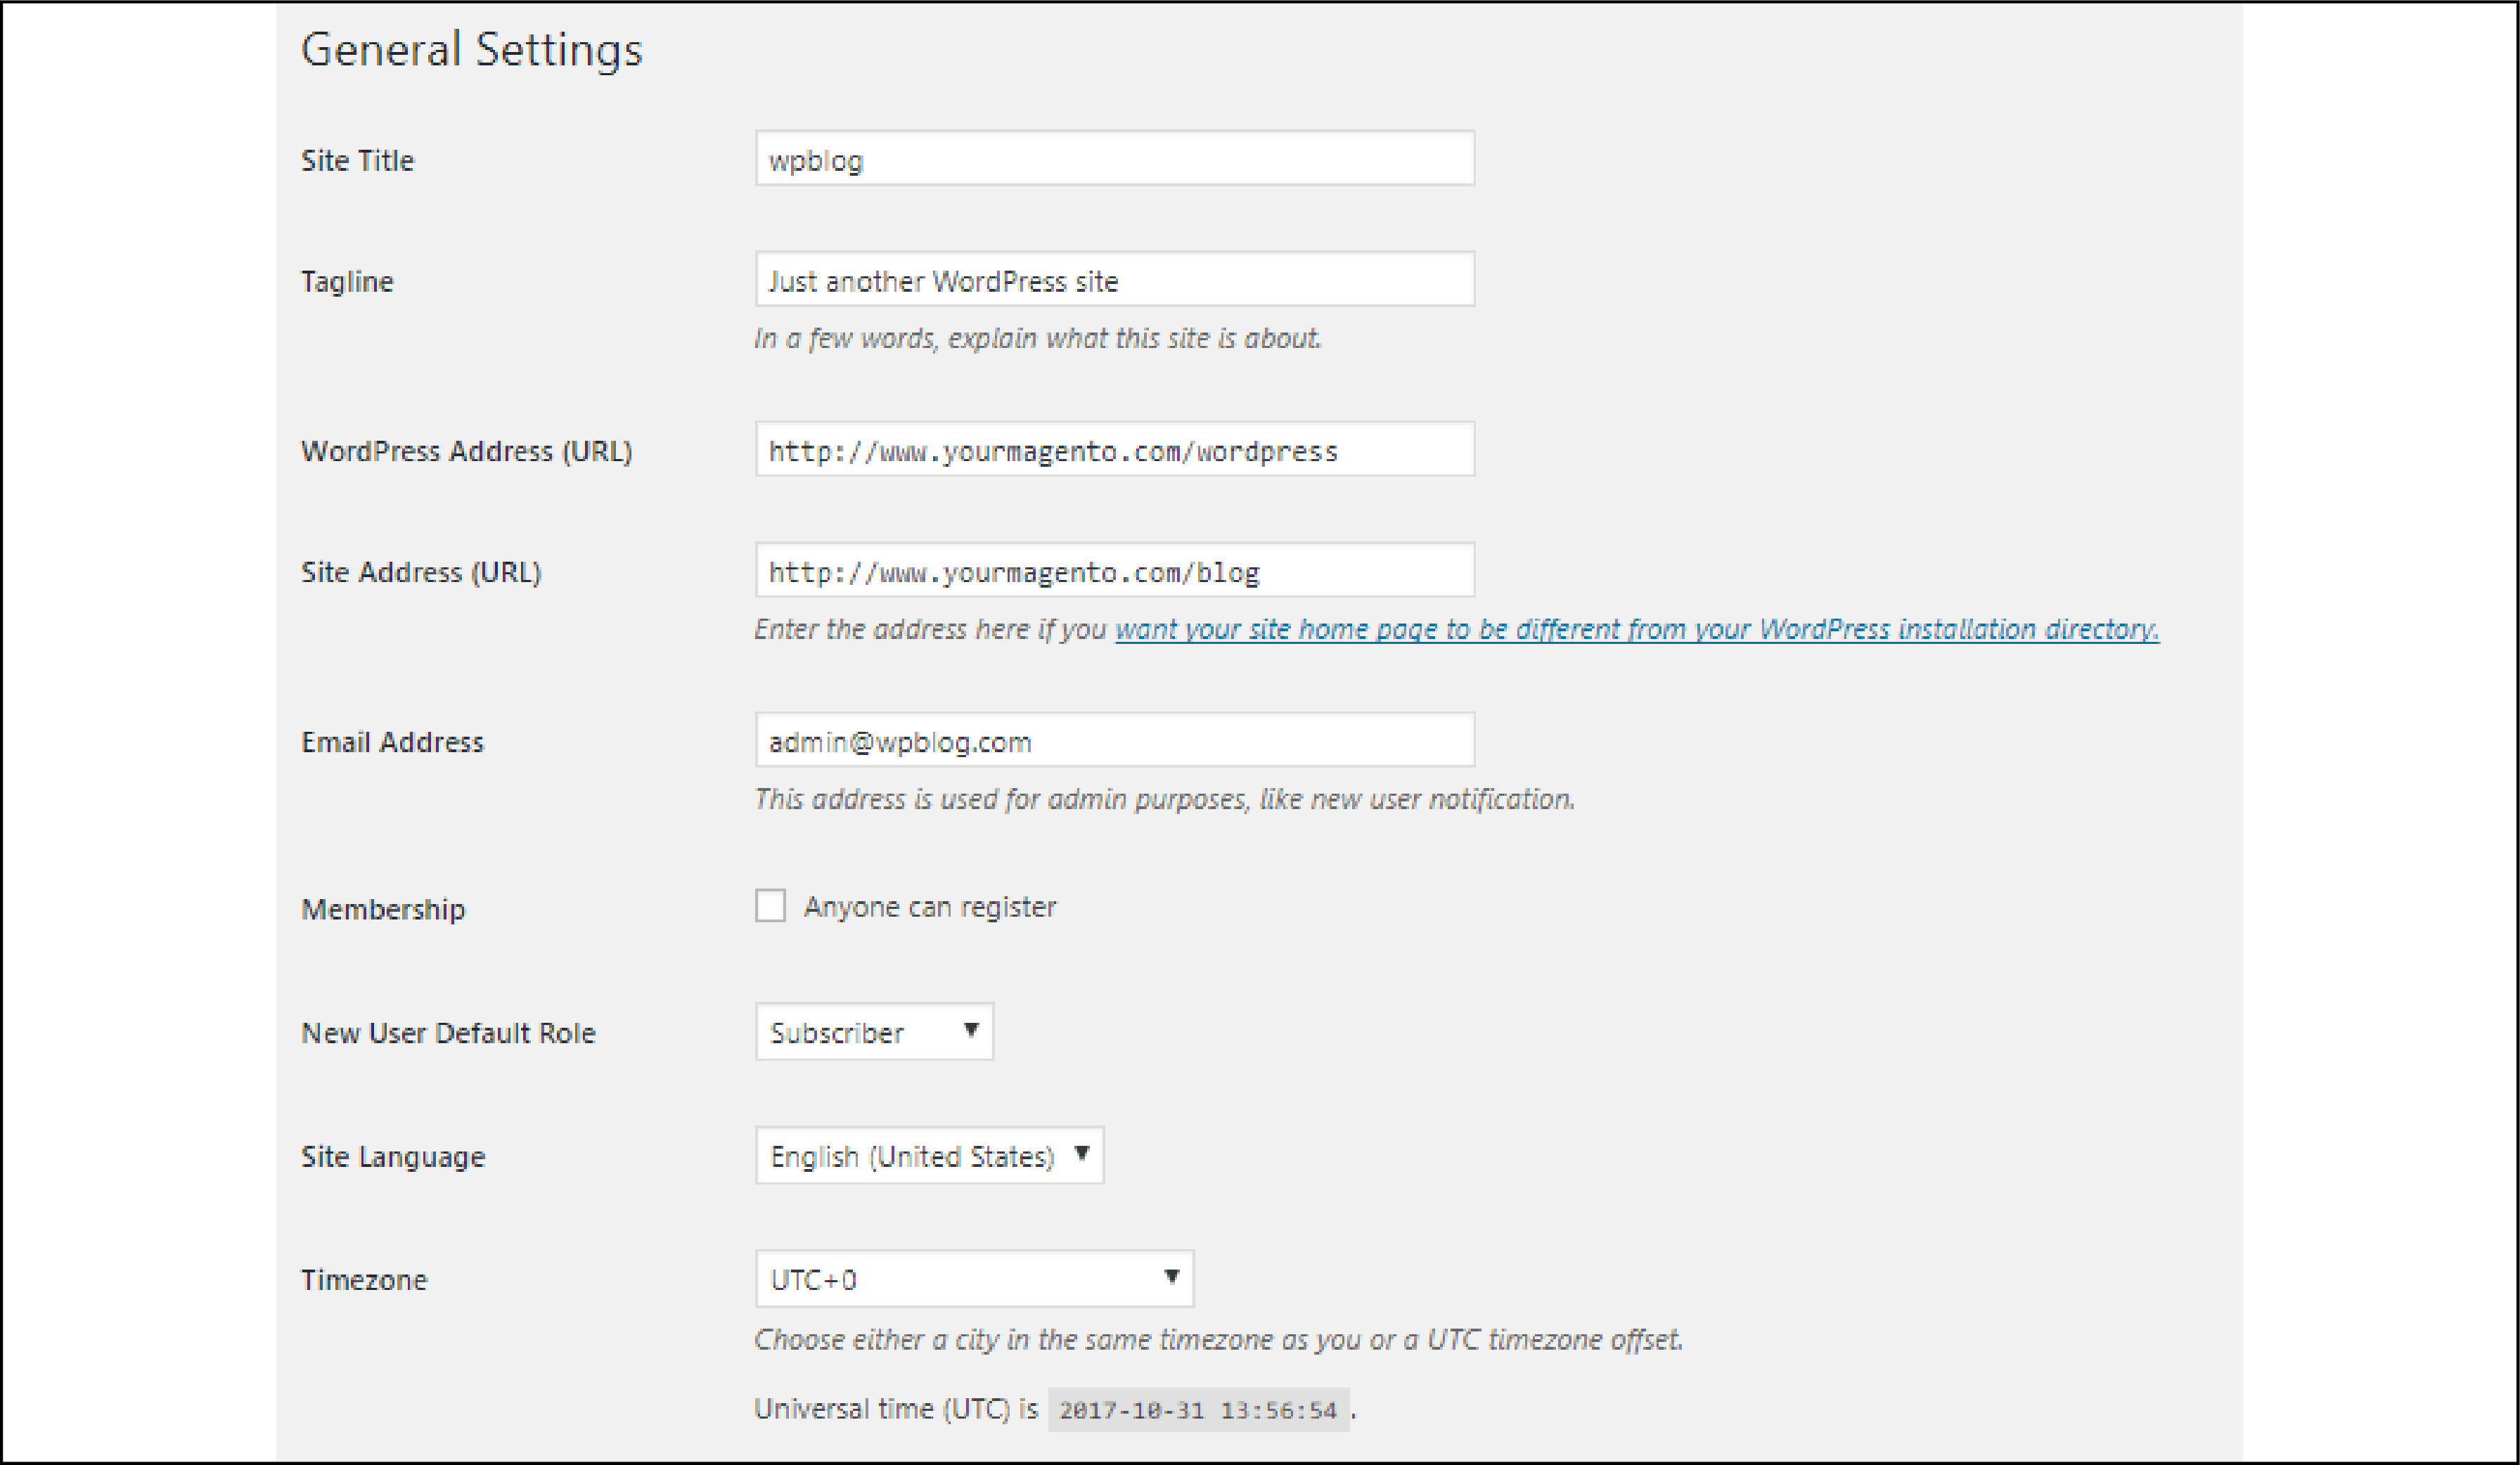
Scroll down and click on Save Changes.
Go to Appearance > Themes and select the FishPig theme to activate.
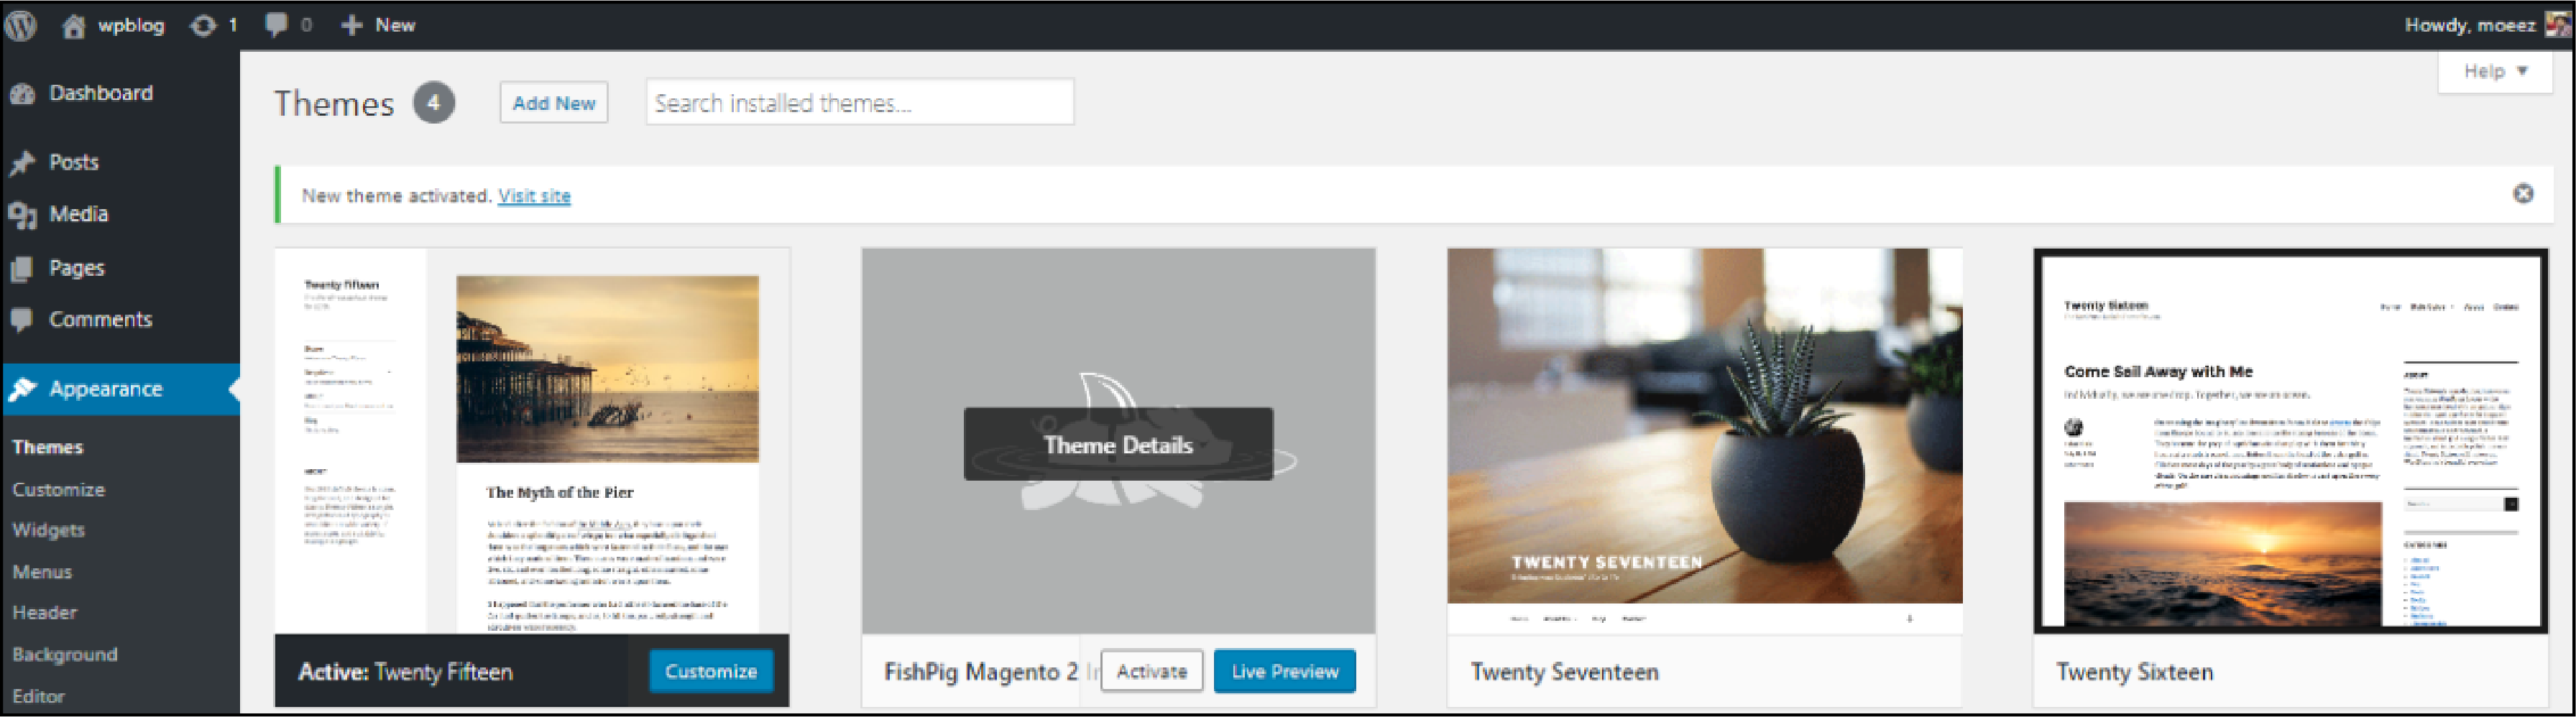
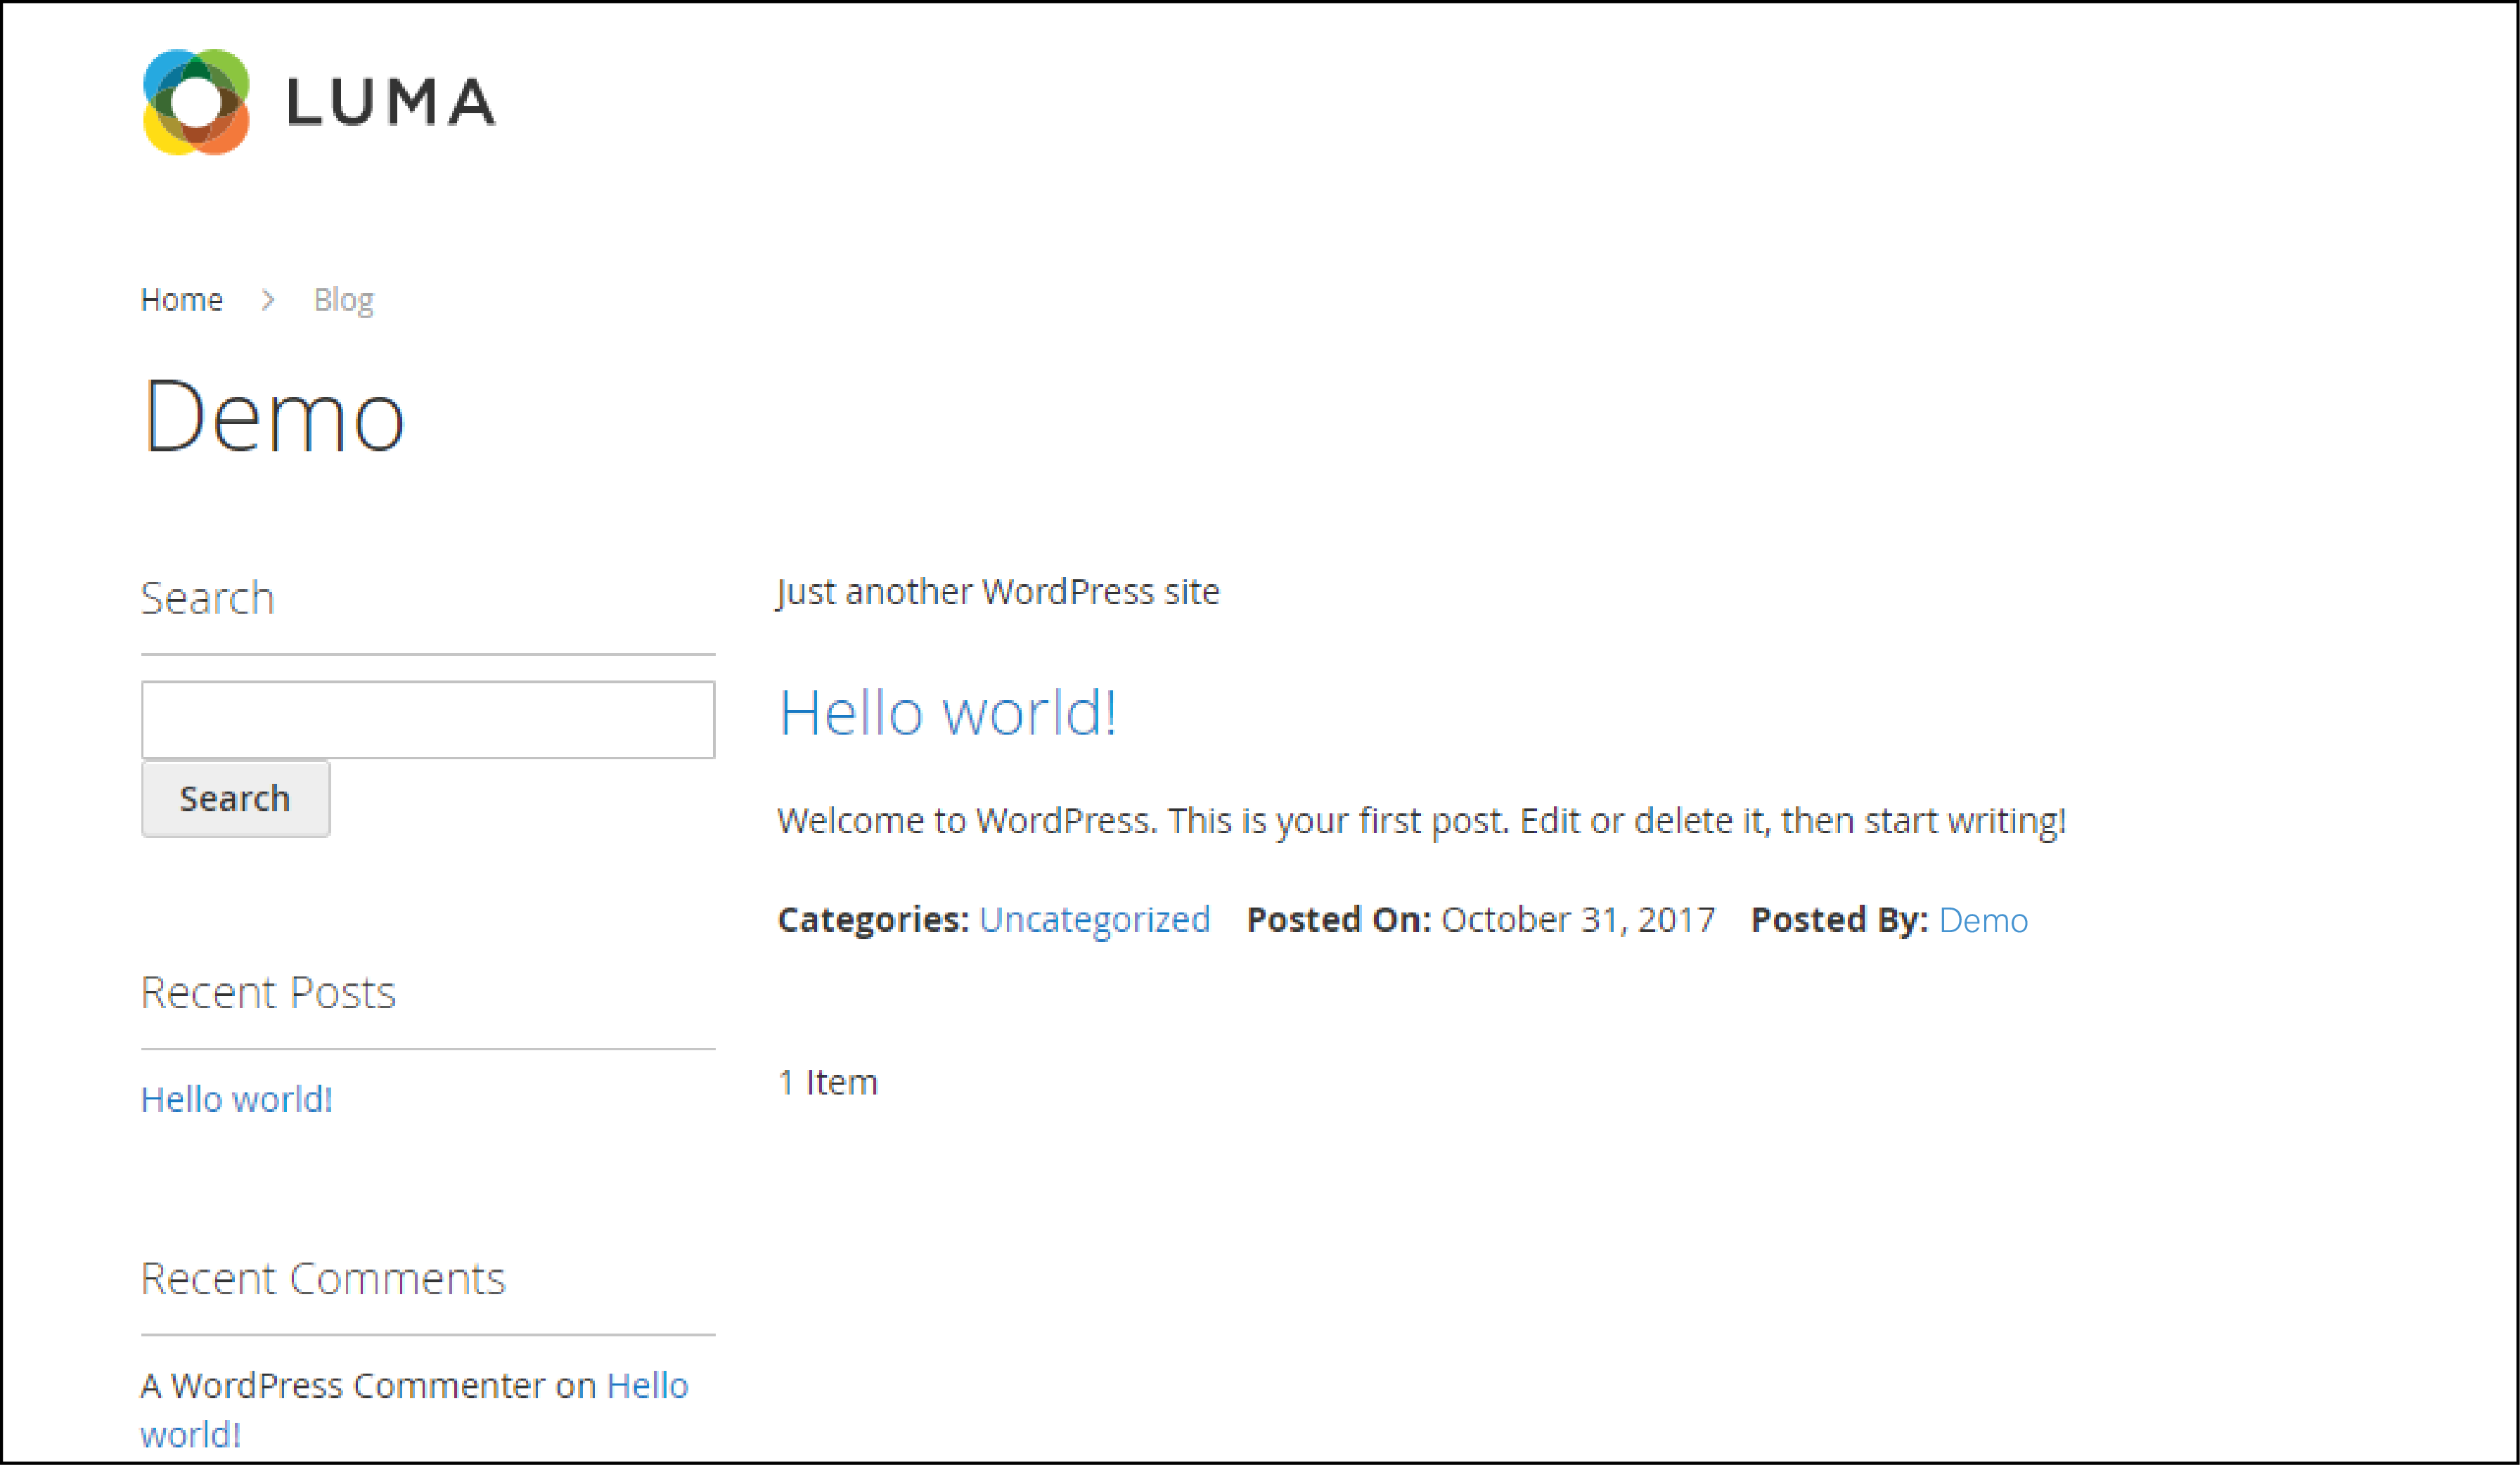
You can see that WordPress has been successfully integrated into the Magento 2 store.
The Magento 2 blog would look like this -
Benefits of the Magento WordPress Integration
4 Revenue-Driving Benefits of Magento-WordPress Integration
Transform your e-commerce platform into a content-powered sales engine
Result: Transform traditional e-commerce into a content-driven commerce powerhouse where engaging content directly feeds the sales funnel while maintaining operational efficiency.
1. Increased Traffic
Store owners can use WordPress SEO techniques to optimize the Magento store. A WordPress blog is helpful for customer interactions with the store.
You can inform the customers on products, latest campaigns, discounts, etc. Create funnels for content marketing that lead customers to buy Magento products.
2. Blog to Cart Function
The Magento WordPress integration offers a Blog to Cart functionality. You can convert readers into buyers via WordPress content.
For example -
The blog post that promotes the products can be linked to the Magento store. The customers can be directed to the product pages via WordPress.
It improves the overall conversion rate and customer loyalty to the store.
3. Platform Features
Make use of the features from both platforms to enhance the user experience. It includes static Magento blocks, navigation menus, and cart data.
You can access both WordPress and Magento themes. It allows for more customizing options with WordPress and Magento extensions.
4. Order Completion
Single login option allows for smooth order completion. You can process more orders efficiently by combining the two platforms.
EndNote
Magento and WordPress are both scalable open-source software for building websites.
Integrating WordPress blog with Magento helps enhance the shopping experience.
It informs the customers about the store’s products and upcoming promotions.
You can utilize the features of both platforms to improve sales for your store.
To learn more about Magento, check out MGT-Commerce tutorials.