3 Steps to Configure Magento Connector For Your Ecommerce
Are you ready to enhance your e-commerce efficiency? Magento Connector can streamline operations and improve customer experience. It lets you synchronize data between your Magento store and various third-party systems.
This tutorial will guide you on configuring the Magento Connector for your e-commerce platform.
Key Takeaways
-
Understand the benefits of integrating Magento Connector with your e-commerce platform.
-
Learn step-by-step how to set up Magento Connector for seamless integration.
-
Optimize your e-commerce operations and enhance customer experience.
-
Gain insights into managing and troubleshooting Magento Connector effectively.
-
Explore tips for maximizing the performance and scalability of your Magento integration.
Key Features Of Magento Connector
| Feature | Description |
|---|---|
| Compatibility | Compatible with Magento Community Edition, Enterprise Edition, and Adobe Commerce |
| Data Synchronization | Automatic synchronization of product catalogs, inventory updates, orders, and customer data |
| Order Management | Integration with order management systems for seamless order processing |
| Inventory Management | Real-time inventory updates and accurate stock levels across integrated platforms |
| Attribute Mapping | Mapping of custom attributes for consistent data transfer |
| API Integration | RESTful APIs for easy data exchange and custom functionality implementation |
| Asynchronous Processing | Asynchronous data transfers are used to maintain the performance of the Magento storefront. They also help maintain the performance of integrated systems. |
| Error Handling & Logging | Robust error handling and detailed logs for easy troubleshooting |
| Customization | Highly customizable and extensible to meet specific business requirements |
| Security | Secure authentication methods and encryption of sensitive data during transmission |
Requirements To Setup Magento Connector
-
Disable Multi-source Inventory (MSI) in Magento v2.3 to use OMS and the Connector.
-
Acquire the Magento repository access credentials (for composer) from the appropriate source.
-
Gain access to the Magento 2 server via SSH to perform the necessary installations and configurations.
-
Install Composer on your Magento 2 server. It will help manage dependencies and facilitate the installation process.
-
Configure your Magento 2 server to access the Magento repository using the obtained credentials.
3 Steps To Configure Magento Repository in Composer
Step 1: Configure Magento Repository in Composer
-
The OMS connector modules are now available in the Magento repository. It is the same repository used for
magento/product-enterprise-editionandmagento/product-community-edition. -
Ensure that you have access to this repository in your
composer.jsonfile. -
Connect to your Magento installation and navigate to the Magento root directory.
If present, remove the mcom-connector.bcn.magento.com repository from the composer.json file:
{
    "repositories": [
        {
            "type": "composer",
            "url": "https://mcom-connector.bcn.magento.com"
        }
    ]
}
Add the Adobe Commerce repository to the composer.json file if it's not already included:
{
      "repositories": [
          {
              "type": "composer",
              "url": "https://repo.magento.com"
          }
      ]
  }
Step 2: Update the Magento Installation
Method 1:
After configuring the repository, run the following commands in the Magento root directory. These commands will update the installation:
composer require magento/mcom-connector
bin/magento setup:upgrade
Note: The setup:upgrade command is not required for Magento Cloud installations.
Method 2:
Alternatively, you can update specific Connector modules by running:
composer require --ignore-platform-reqs \magento/mcom-connector ~4.2
bin/magento setup:upgrade
Note: Replace ~4.2 with the desired version of the Connector module.
Step 3: Verify the Connector Version
-
Access the Magento Commerce Admin panel. Users can find information about the installed Connectors, including the module version.
-
Navigate to the System Reports section to view the details.
-
You can also check the changelog in MCOM > Change log to see the changes released in each version of the Connector.
6 Steps to Configure OMS Connector
Step 1: Set Up Sales Channel ID
-
Navigate to the Magento Commerce Admin panel.
-
Go to Stores > Configuration > MCOM CONNECTOR > General.
-
Enter the sales channel ID (external ID of the defined sales channel in your OMS) in the Sales Channel ID field.
-
Save the configuration.
Step 2: Configure Asynchronous Communication

-
Asynchronous communication helps avoid application timeouts and concurrency issues.
-
Go to Stores > Configuration > MCOM Connector > Configuration > Transport in the Admin Panel.
-
Enable asynchronous order processing by toggling the option to No.
-
Save the configuration.
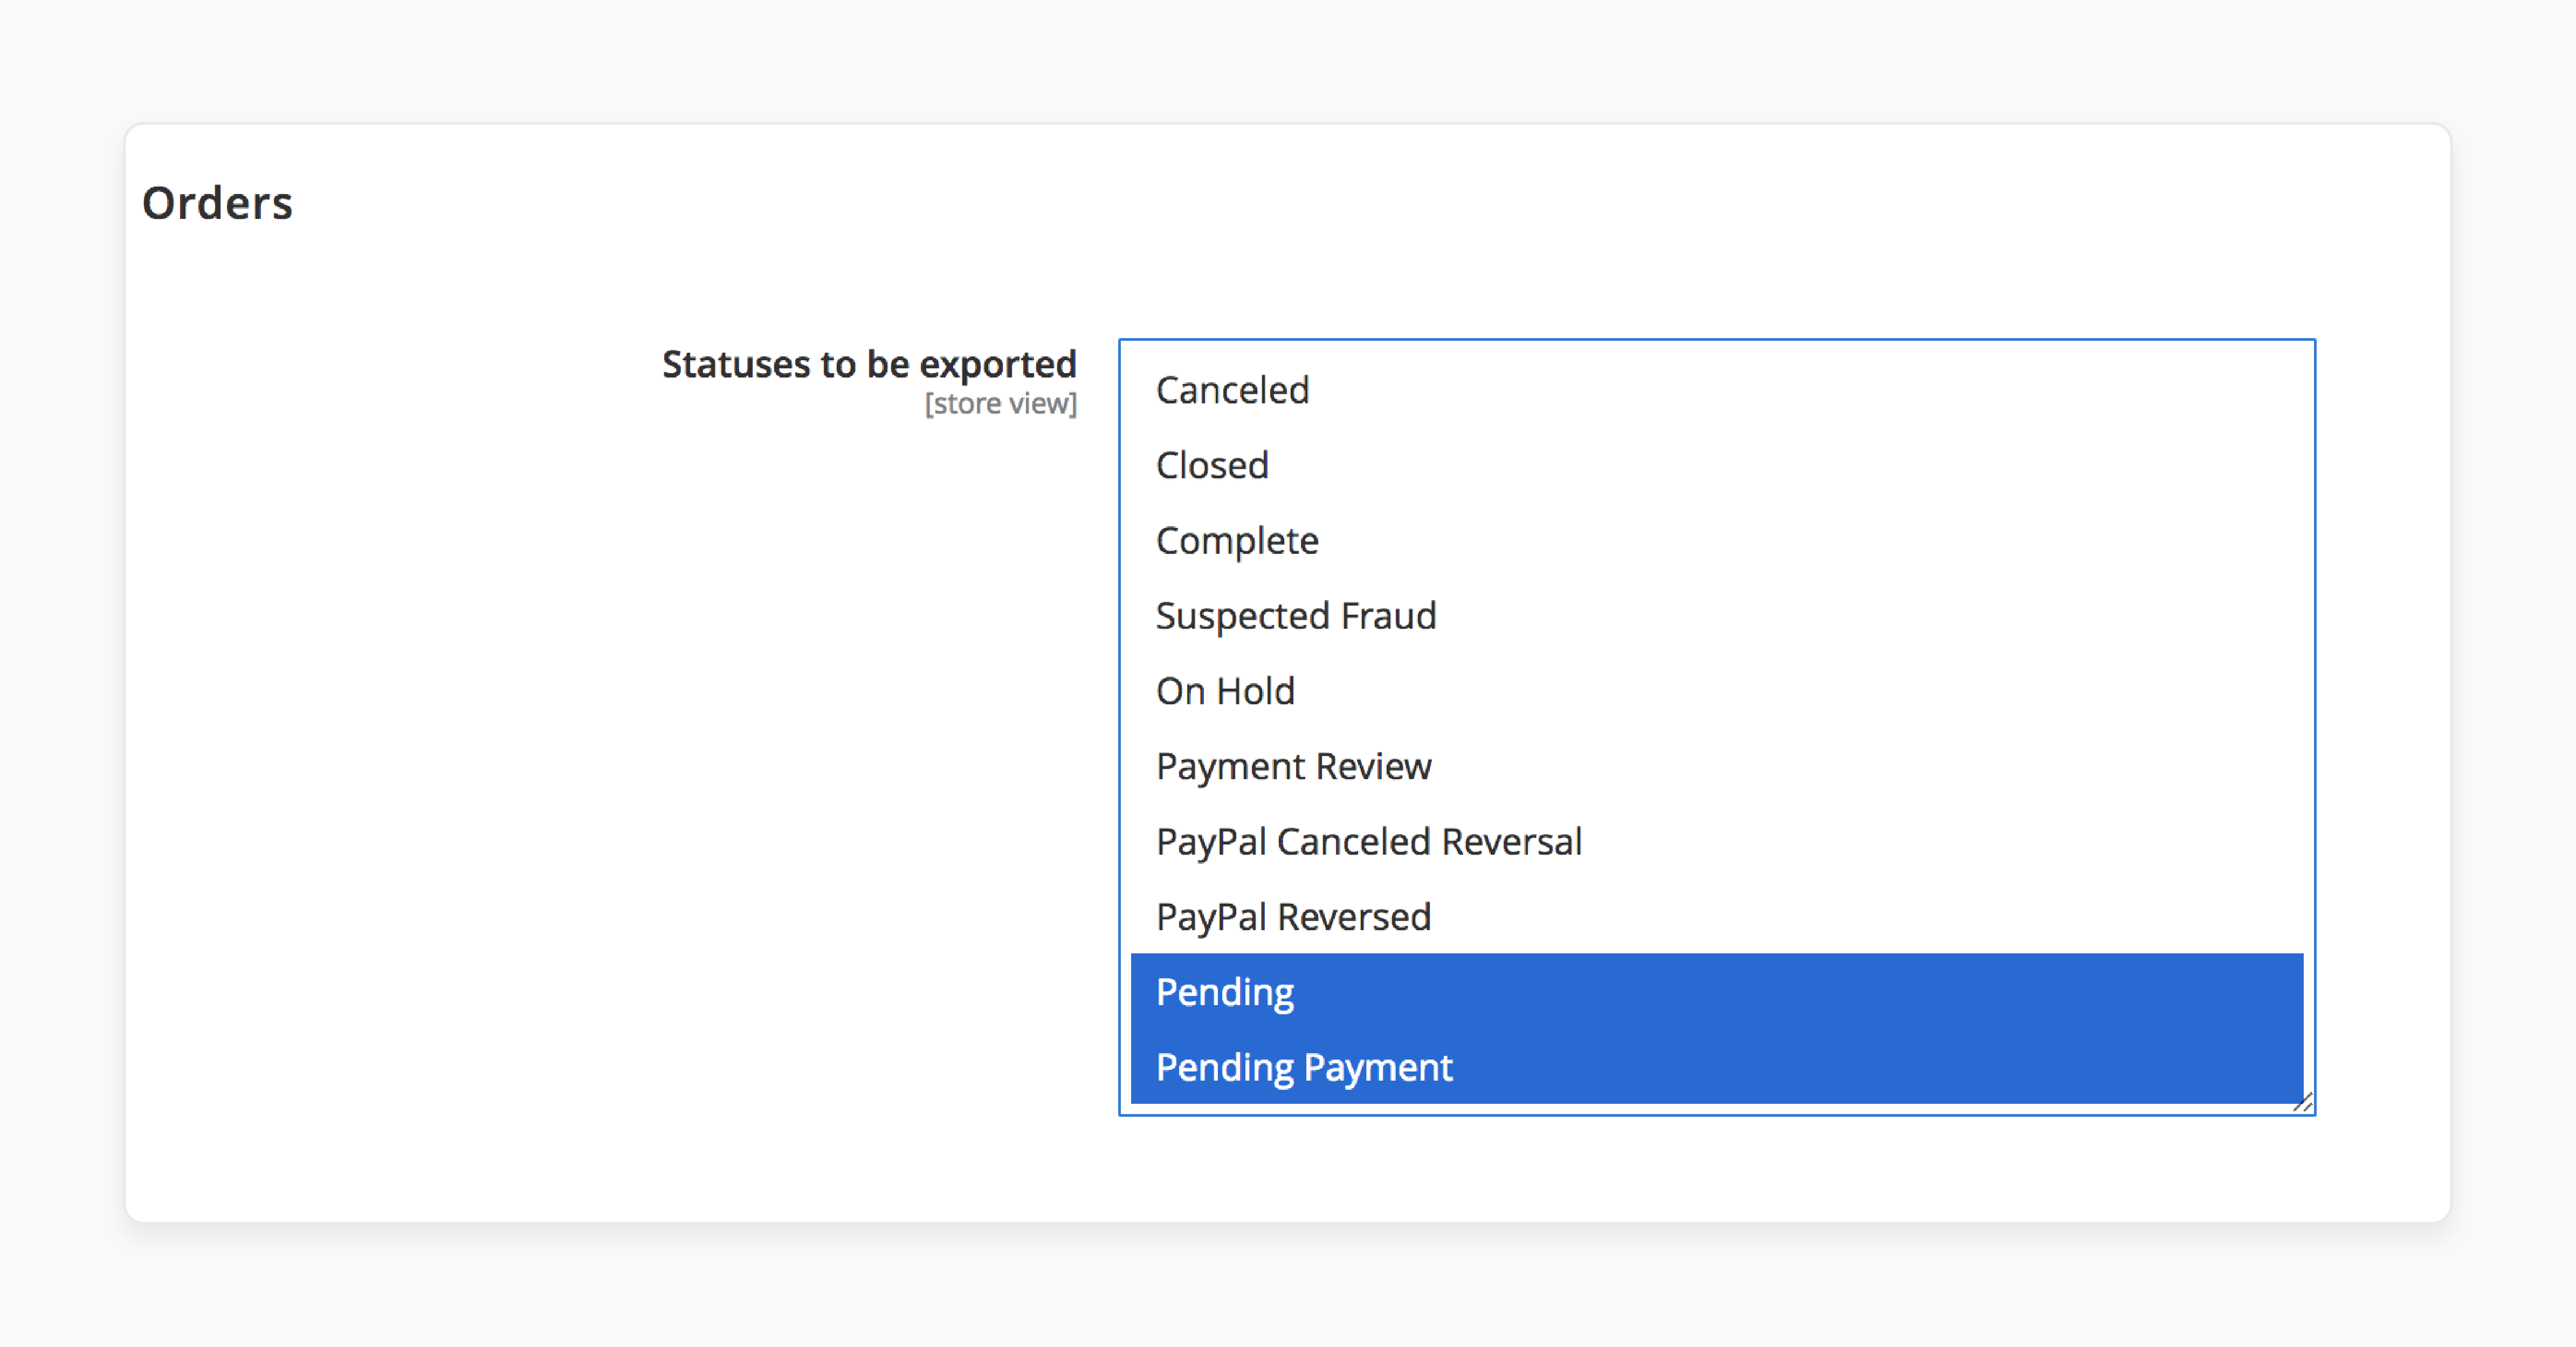
Step 3: Configure Order Statuses for Export

-
Define which order statuses should be exported to the OMS, such as Pending.
-
Navigate to Stores > Configuration > MCOM Connector > Configuration > Orders.
-
Select the desired order statuses to be exported.
-
Save the configuration.
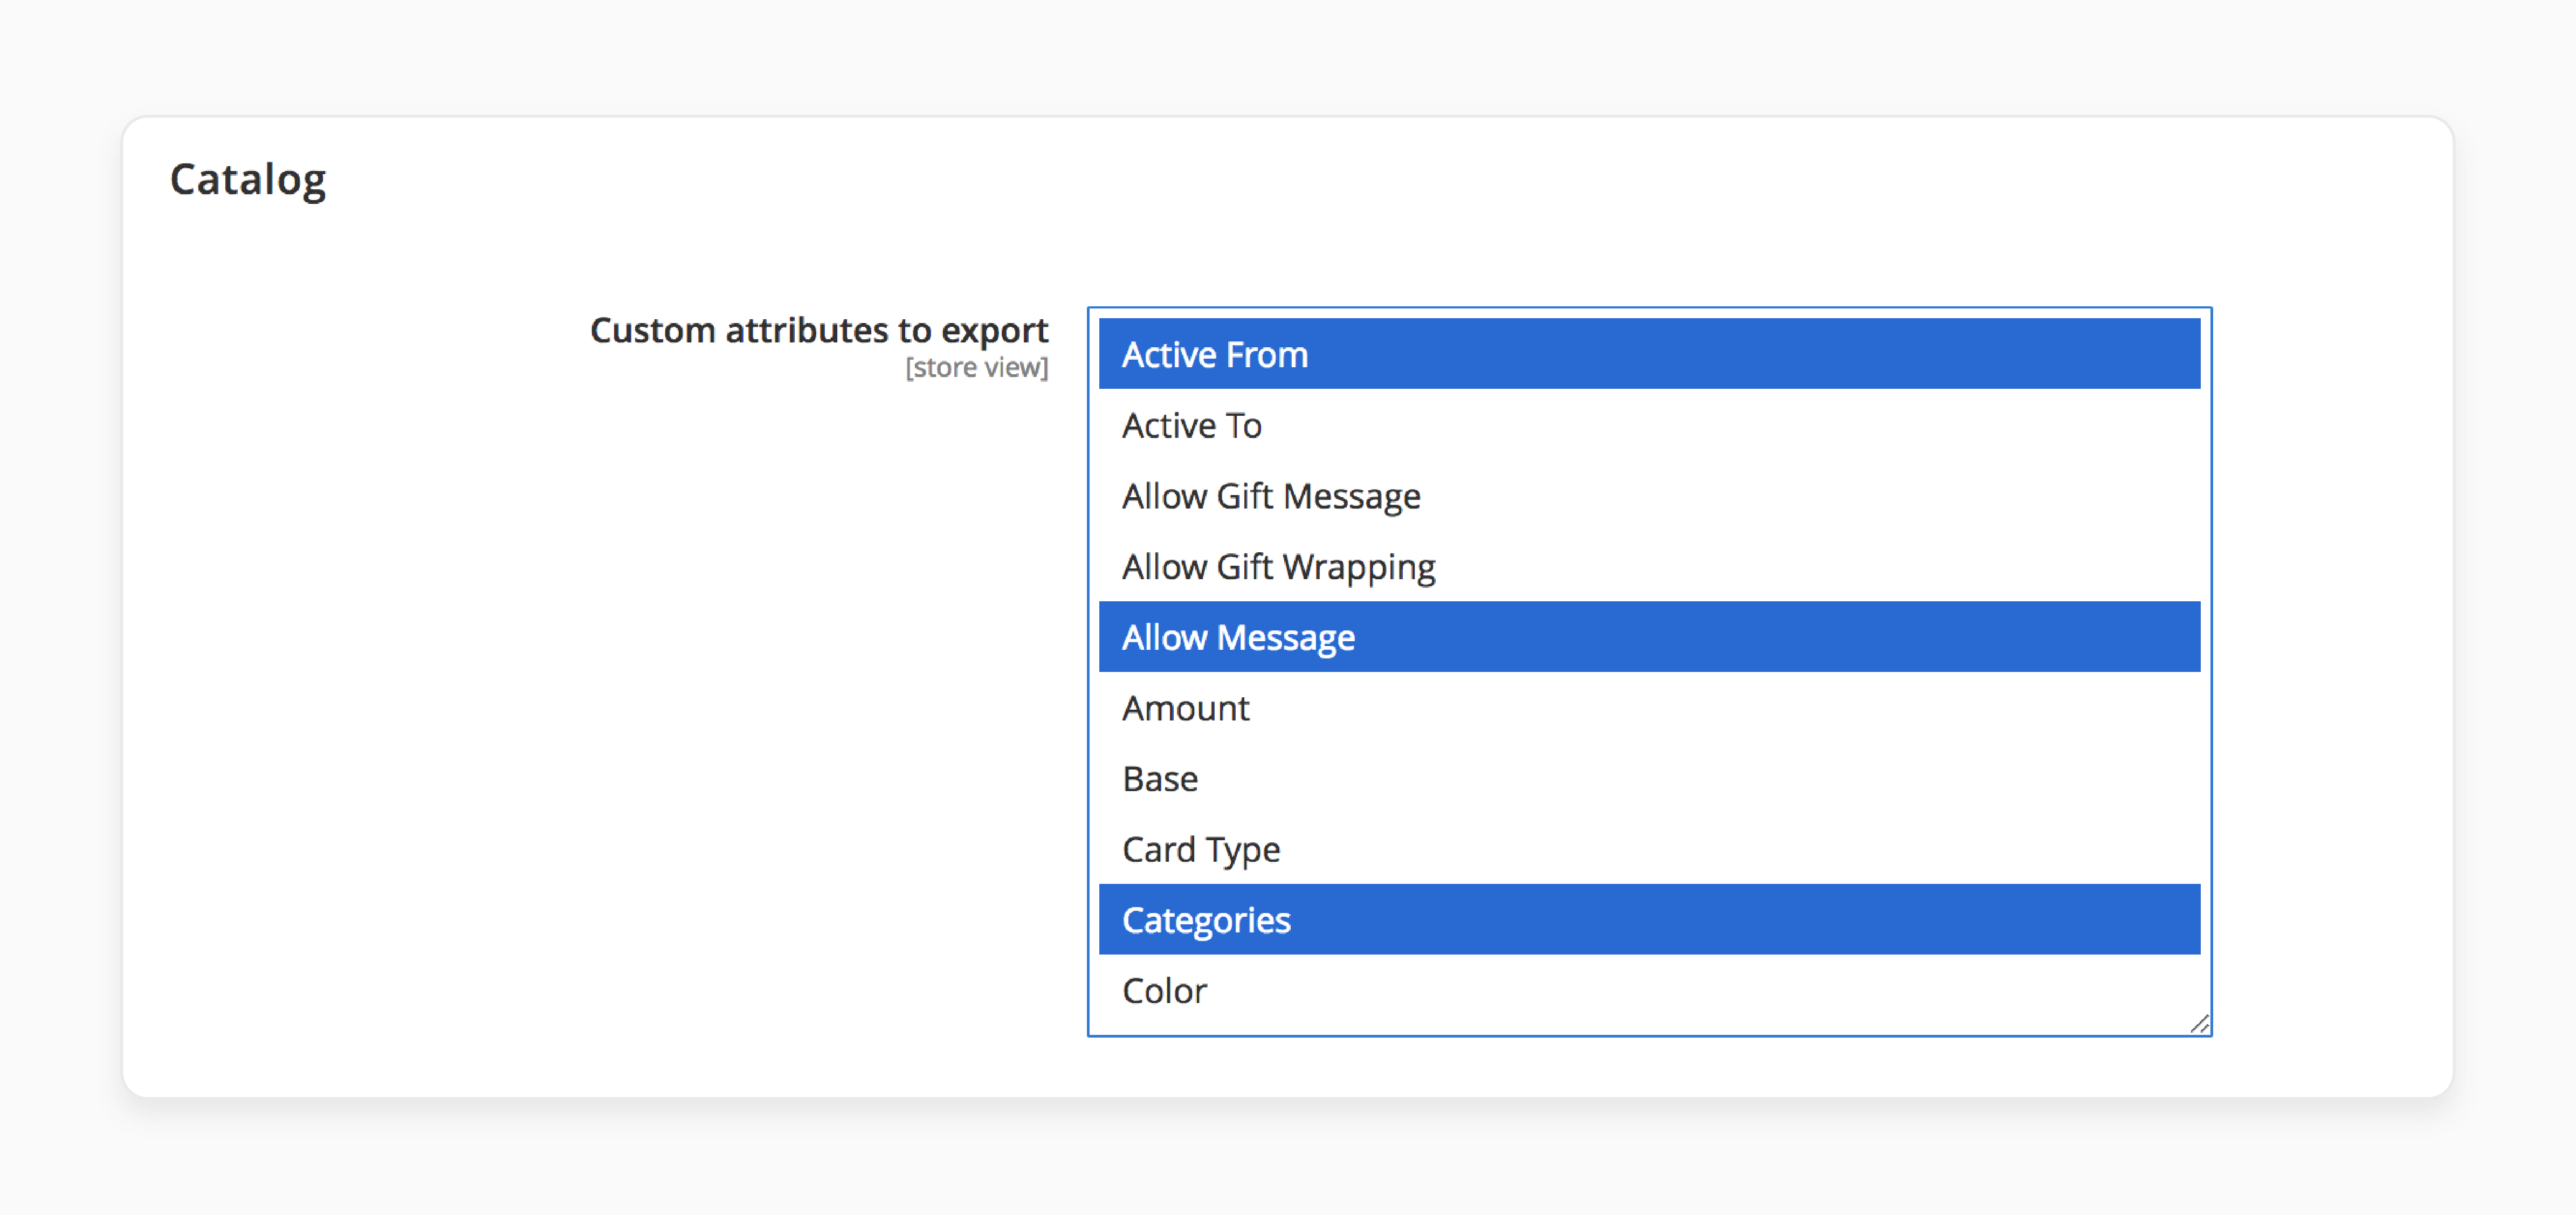
Step 4: Define Custom Attributes for Products

-
Specify the custom attributes for each product that should be exported to the OMS with catalog synchronization.
-
Go to Stores > Configuration > MCOM Connector > Configuration > Catalog.
-
Enter the custom attributes to be exported.
-
Save the configuration.
Step 5: Configure the HTTP Integration
-
Modify the
env.phpfile to allow the OMS Connector to connect to the OMS API. -
Update the following values with the correct information specific to your installation:
'serviceBus' =>
array (

'url' => 'https://api.mcom.magento.com/LUMA',           // OMS Production API URL, change to https://api-stg.mcom.magento.com/clientid for Staging

'oauth_server_url' => 'https://auth.bcn.magento.com/',  // OMS Production URL for the oauth server, change to https://auth-stg.bcn.magento.com for Staging

'oauth_client_id' => 'luma',                            // Client as defined in the OMS auth server

'oauth_client_secret' => '$43A8[3338',                  // Secret as defined in the OMS auth server

'application_id' => 'mdc',                              // Unique integration ID, default to "mdc"

'application_base_url' => 'https://mymcstore.com/',     // URL for receiving requests from OM

'secret' => 'tCn5Y4XppSuKjriGr8n2gr76dgKIZ9Oa',         // Secret provided to OMS API to calculate signature.

'labels' => array(           // Additional labels used for integration registration

'key' => 'value',
 ),
)
- Save the
env.phpfile.
Step 6: Execute Magento Upgrade
-
Open a terminal and navigate to the Magento root directory.
-
Run the following command to ingest the changes:
$ bin/magento setup:upgrade
Troubleshoot Common Configuration Issues
| Issue | Solution |
|---|---|
| Incorrect Sales Channel ID Configuration | - Double-check the sales channel ID entered in the Magento Commerce Admin panel (Stores > Configuration > MCOM CONNECTOR > General > Sales Channel ID). - Ensure that the sales channel ID matches the external ID of the defined sales channel in your OMS. - Save the configuration and test the order export process again. |
| Asynchronous Communication Not Enabled | - Navigate to Stores > Configuration > MCOM Connector > Configuration > Transport in the Magento Commerce Admin panel. - Verify that asynchronous order processing is enabled by ensuring the option is toggled to "No". - Save the configuration and monitor the order processing performance. |
| Incorrect Order Status Configuration for Export | - Go to Stores > Configuration > MCOM Connector > Configuration > Orders in the Magento Commerce Admin panel. - Review the selected order statuses for export and ensure that the desired statuses are included. - Save the configuration and test the order export process with orders in the specified statuses. |
| Missing or Incorrect Custom Attributes for Products | - Navigate to Stores > Configuration > MCOM Connector > Configuration > Catalog in the Magento Commerce Admin panel. - Verify that the custom attributes for products are correctly defined and mapped. - Ensure that the attribute names and values match the expected format in the OMS. - Save the configuration and initiate a catalog synchronization to test the attribute export. |
| Incorrect HTTP Integration Configuration | - Open the env.php file in the Magento root directory.- Review the HTTP integration configuration values and ensure they are correct. - Check the OMS API URL, OAuth server URL, client ID, secret, application ID, and base URL. - Generate a new secret with at least 32 symbols and update it in the configuration. - Save the env.php file and run the Magento upgrade command to apply the changes. |
| Synchronization Queue and Log Monitoring | - Regularly monitor the synchronization queues and logs for any errors or delays. - Check the Magento system logs for any error messages related to the OMS Connector. - Investigate the OMS logs to identify any issues on the OMS side. - If errors are found, refer to the error messages and troubleshoot accordingly. - Ensure that the cron jobs responsible for processing the queues are running correctly. |
| Version Compatibility Issues | - Verify that the installed version of the OMS Connector is compatible with the Magento and OMS versions. - Check the release notes and compatibility matrix provided by the OMS Connector documentation. - If necessary, upgrade the OMS Connector to a compatible version. - Perform thorough testing after the upgrade to ensure that the integration is functioning as expected. |
| Incorrect Mapping of Order and Product Data | - Review the mapping configuration for order and product data in both Magento and the OMS. - Ensure that the field mappings are correctly defined and match the expected format. - Verify that any custom attributes or fields are properly mapped and transmitted. - Test the data synchronization process and compare the data in Magento and the OMS for accuracy. |
| Network Connectivity Issues | - Check the network connectivity between the Magento server and the OMS API endpoint. - Verify that the firewall and security settings allow communication between the systems. - Ensure that the API credentials (client ID, secret, etc.) are correct and have the necessary permissions. - Test the API connectivity using tools like cURL or Postman to isolate any network-related issues. |
| Performance Optimization | - Review the Magento system requirements and ensure that the server resources are adequate. - Optimize the Magento configuration settings, such as caching and indexing, to improve overall performance. - Monitor the synchronization queues and adjust the cron job frequencies if necessary. - Consider implementing queue prioritization or batching to handle high volumes of orders efficiently. - Evaluate the network latency and optimize the connectivity between Magento and the OMS if needed. |
FAQs
1. How can I configure the Magento connector for my e-commerce platform?
To configure the Magento connector, follow the documentation provided by Magento. Ensure that the connector is compatible with your e-commerce platform. Configure the connector based on your specific requirements.
2. What are the advantages of integrating Magento with my e-commerce platform?
Integration with Magento can streamline operations. It can automate processes effectively. It provides real-time information on stock updates. Integration enhances the overall shopping experience for customers.
3. Can I customize the Magento connector to suit my business needs?
Yes, the Magento connector can be customized. It can include custom attributes, entity mappings, and other configurations. These customizations align with your business processes.
4. How does the Magento connector handle stock updates?
The Magento connector can automatically update stock levels. It ensures the accurate availability of information for customers in real time.
5. Is the Magento connector compatible with Adobe Commerce?
Yes, the Magento connector is designed to work seamlessly with Adobe Commerce, formerly known as Magento Commerce.
6. What role does a developer play in configuring the Magento connector?
Developers can assist in customizing the connector. They troubleshoot any issues that arise during integration. They ensure a smooth operation between Magento and your e-commerce platform.
7. How can I import orders from Magento to my e-commerce platform using the connector?
The Magento connector allows you to import orders from Magento. It processes the messages. It seamlessly passes the information to your e-commerce platform.
Summary
Magento Connector offers real-time data synchronization. It ensures accurate stock levels. It improves order processing efficiency. This tutorial has covered,
-
Benefits and setup process of integrating Magento Connector for enhanced e-commerce efficiency.
-
Detailed exploration of key features like data synchronization and order management.
-
Step-by-step configuration guidelines for optimizing Magento Connector.
Explore managed Magento hosting options to enhance performance and scalability with Magento connectors.


