
How to Manage Magento Categories?
Magento categories allow customers to navigate your store and find products effortlessly. When setting up a new Magento 2 store, the first essential step is creating a new category and adding products. In this guide, discover how to create, organize, and configure your Magento categories efficiently.
Key Takeaways
-
Learn the essential steps to create and organize categories in Magento 2.
-
Discover how to configure your categories for optimal user experience.
-
Find out best practices for SEO, naming, and hierarchy to boost site navigation.
-
Understand the role of high-quality images in enhancing categories.
-
Uncover the importance of attributes in adding depth to product categories.
-
Gain insights into FAQs about Magento categories and their role in eCommerce.
9 Steps of Creating Magento Categories
You can follow these steps to create a new category in Magento:
1. Access the admin panel.
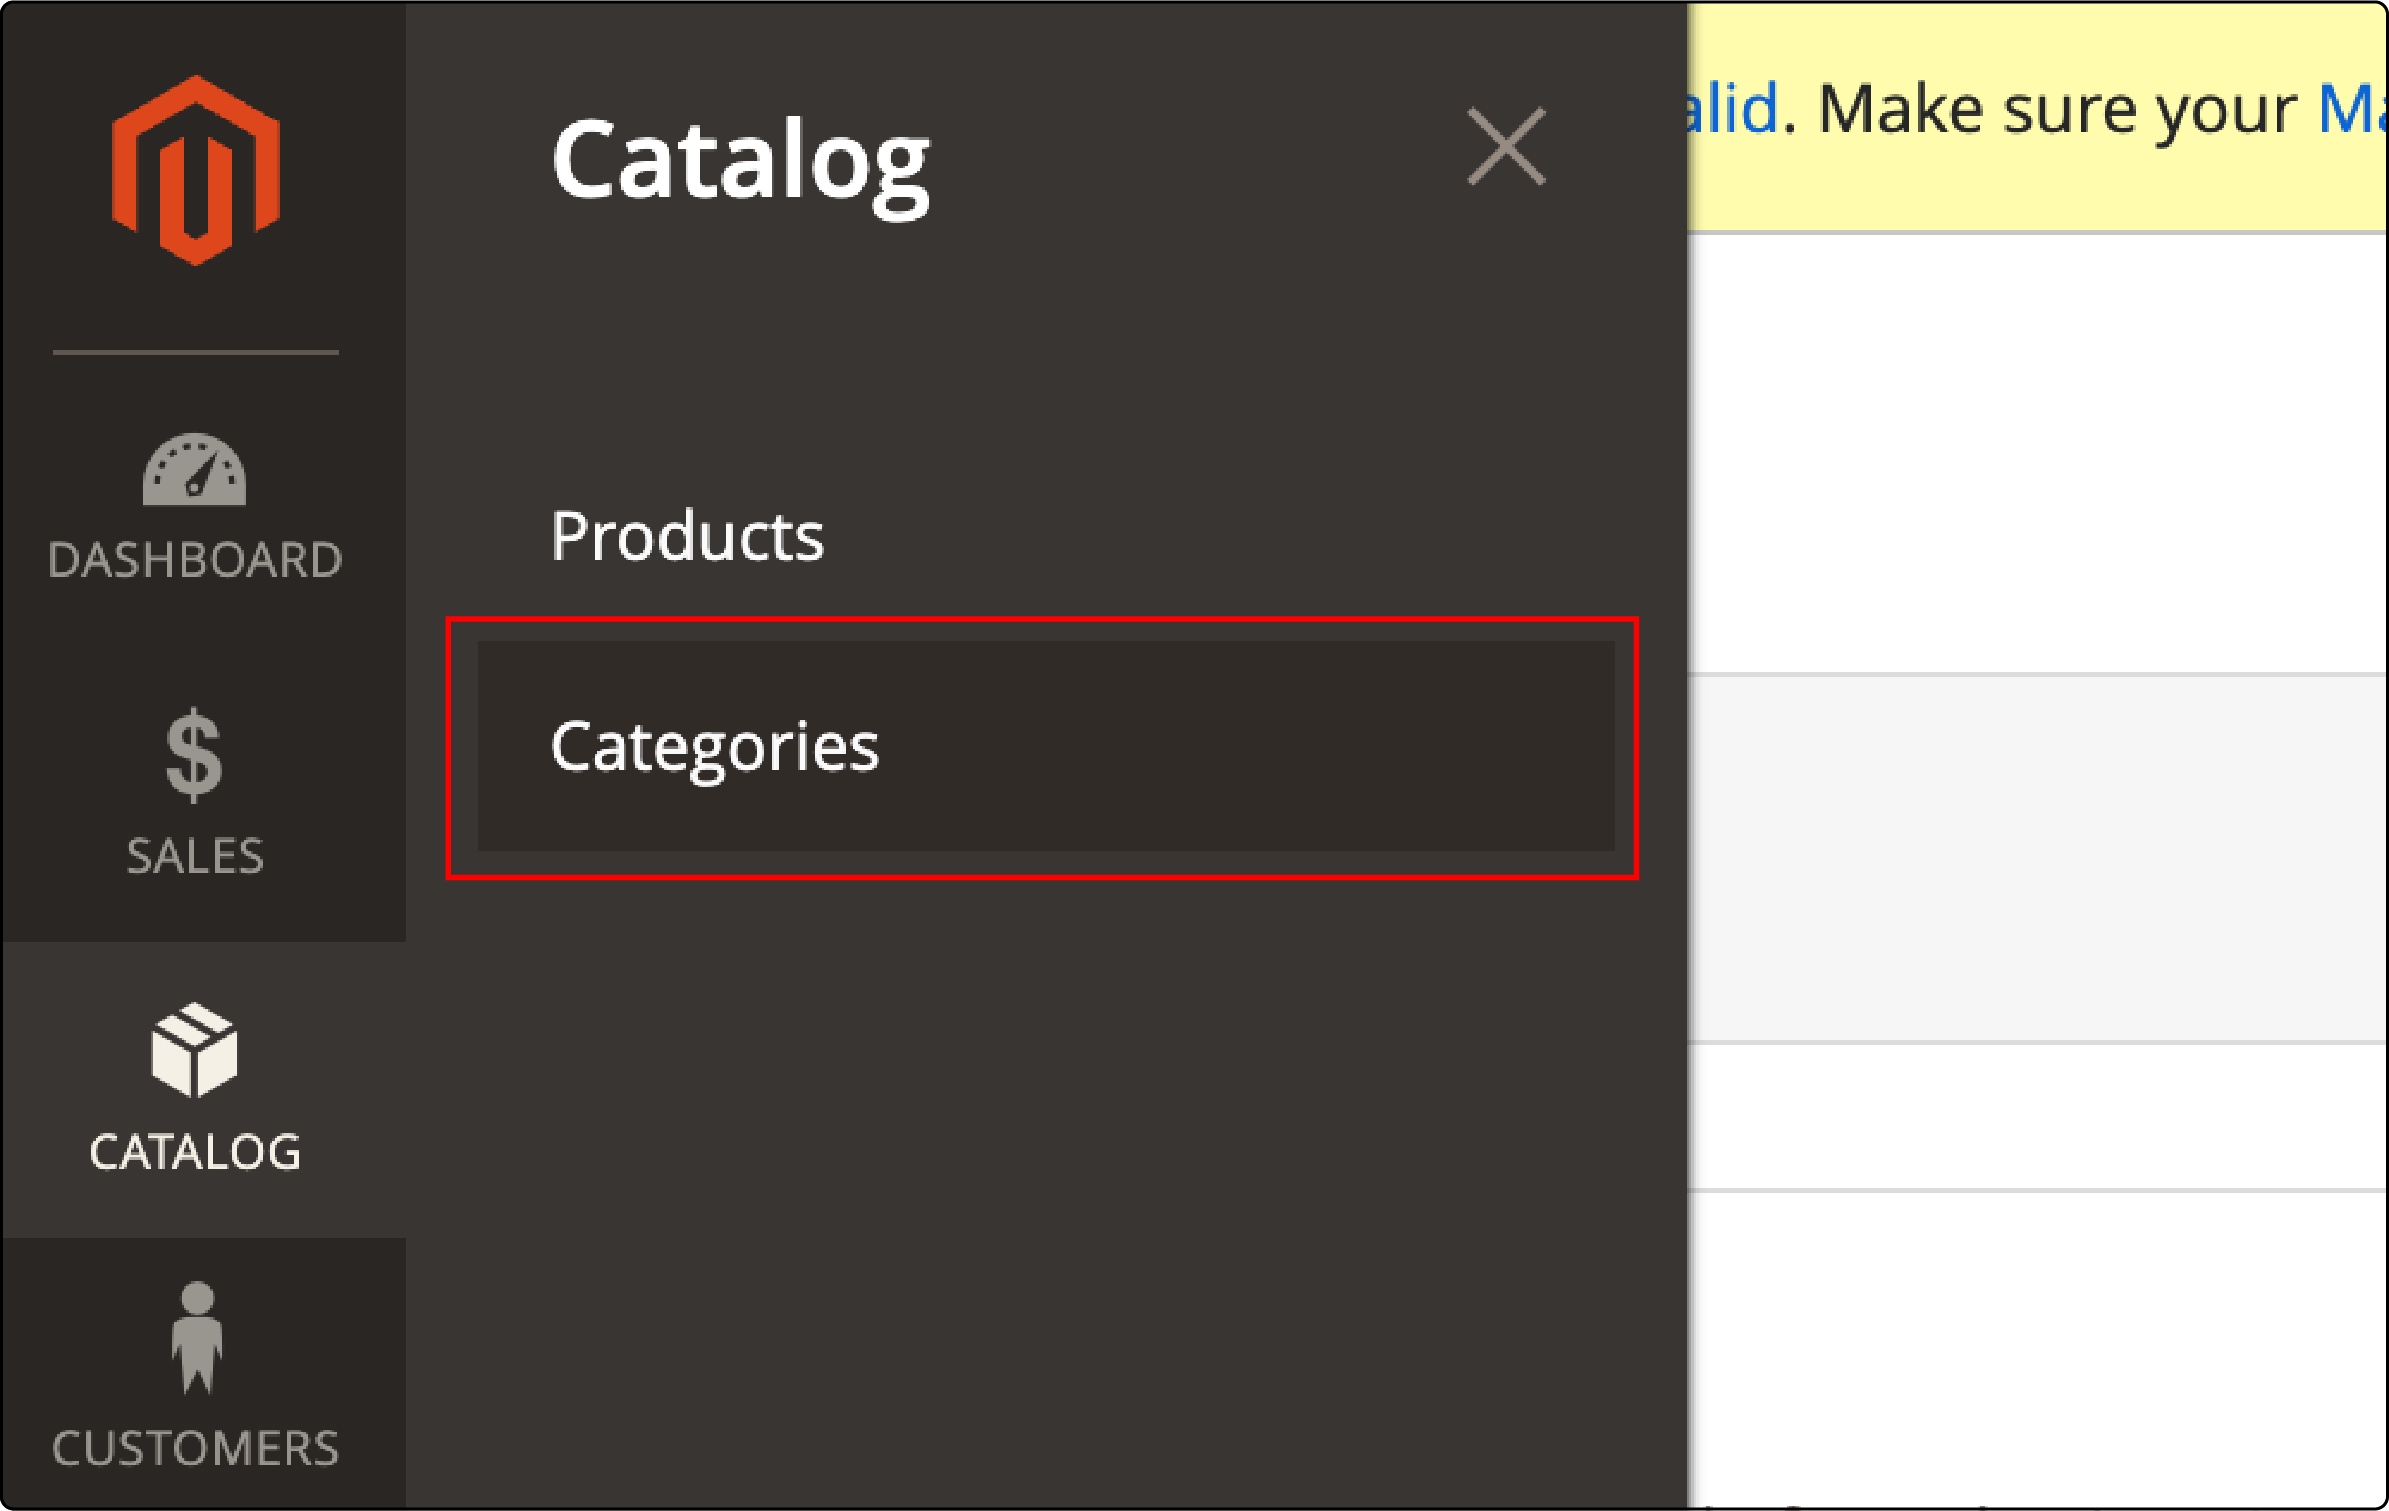
Log in to the admin panel and navigate to the side menu of the Catalog tab. Choose Categories from the list.
You will be directed to the next page. On the left-hand side, you will find the layout displaying your current and upcoming categories and subcategories.
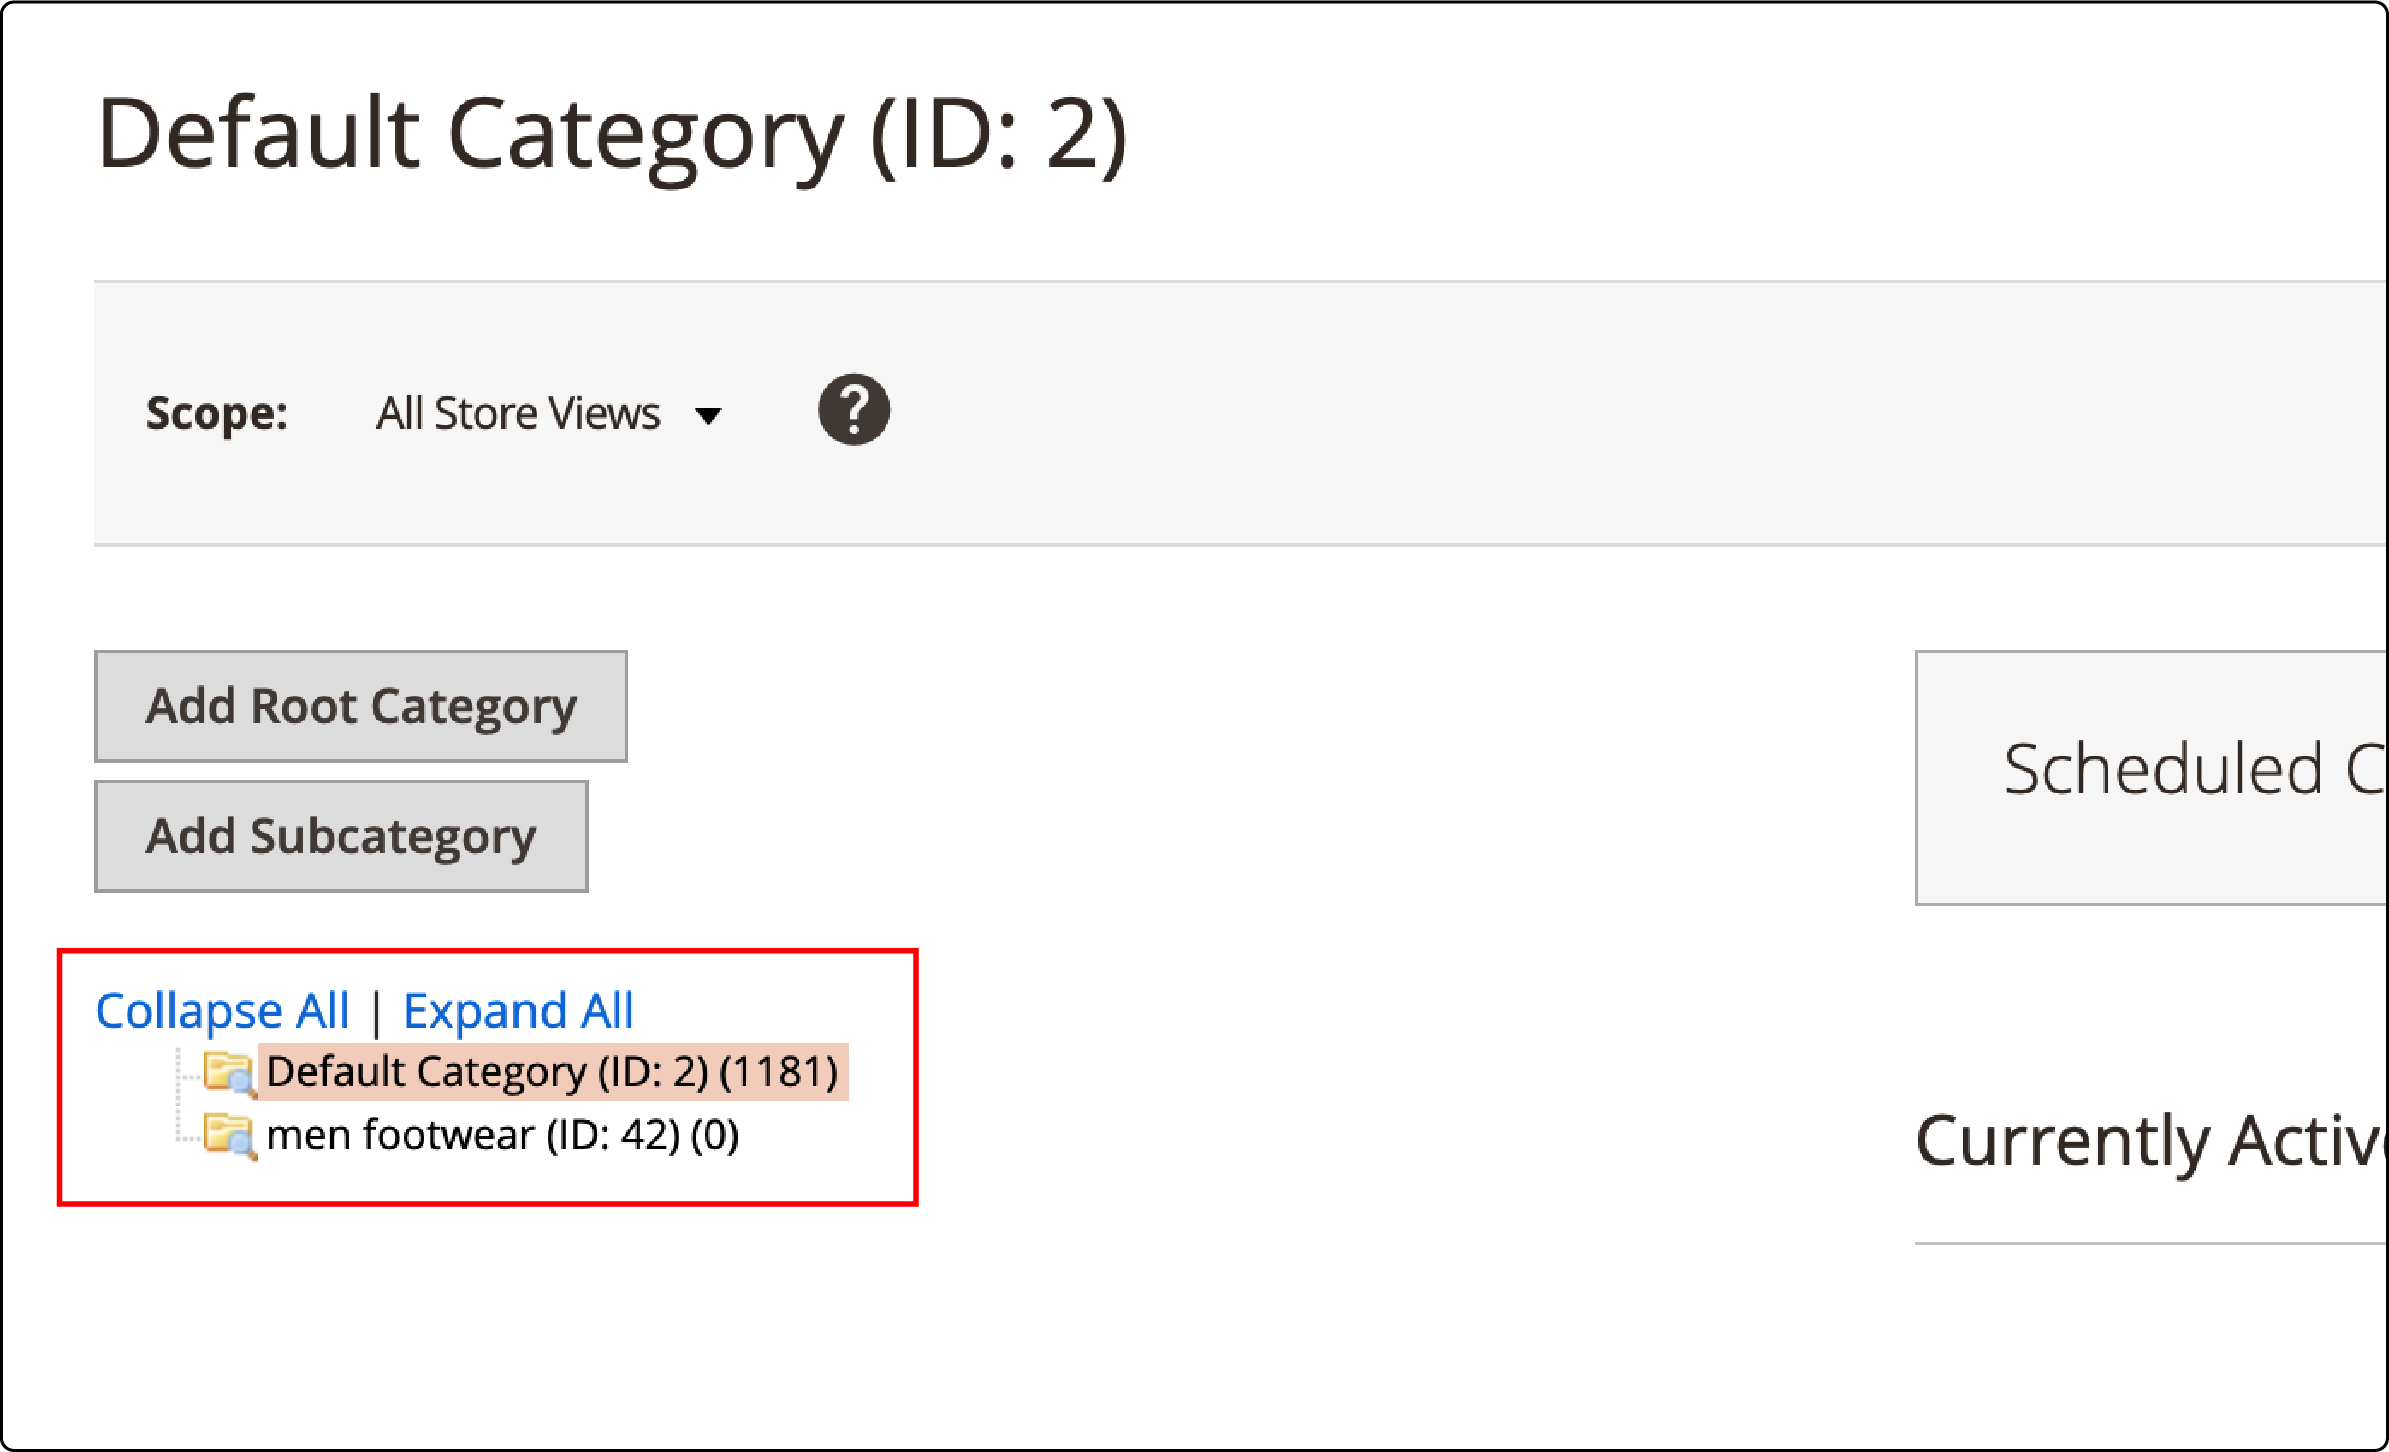
2. Click on the "Add Subcategory" button.
Once you've clicked the "Add Subcategory" button, a form will appear. This form will require you to input specific details for your new category.
3. Provide your basic information.

- Enable Category – To make it active in the store immediately, select "Yes."
- Include in Menu – Set it as "Yes."
- Give a Category Name for store view.
When you click Save in the upper right corner, the category will appear in the categories tree.
4. Go to the "Content" tab.
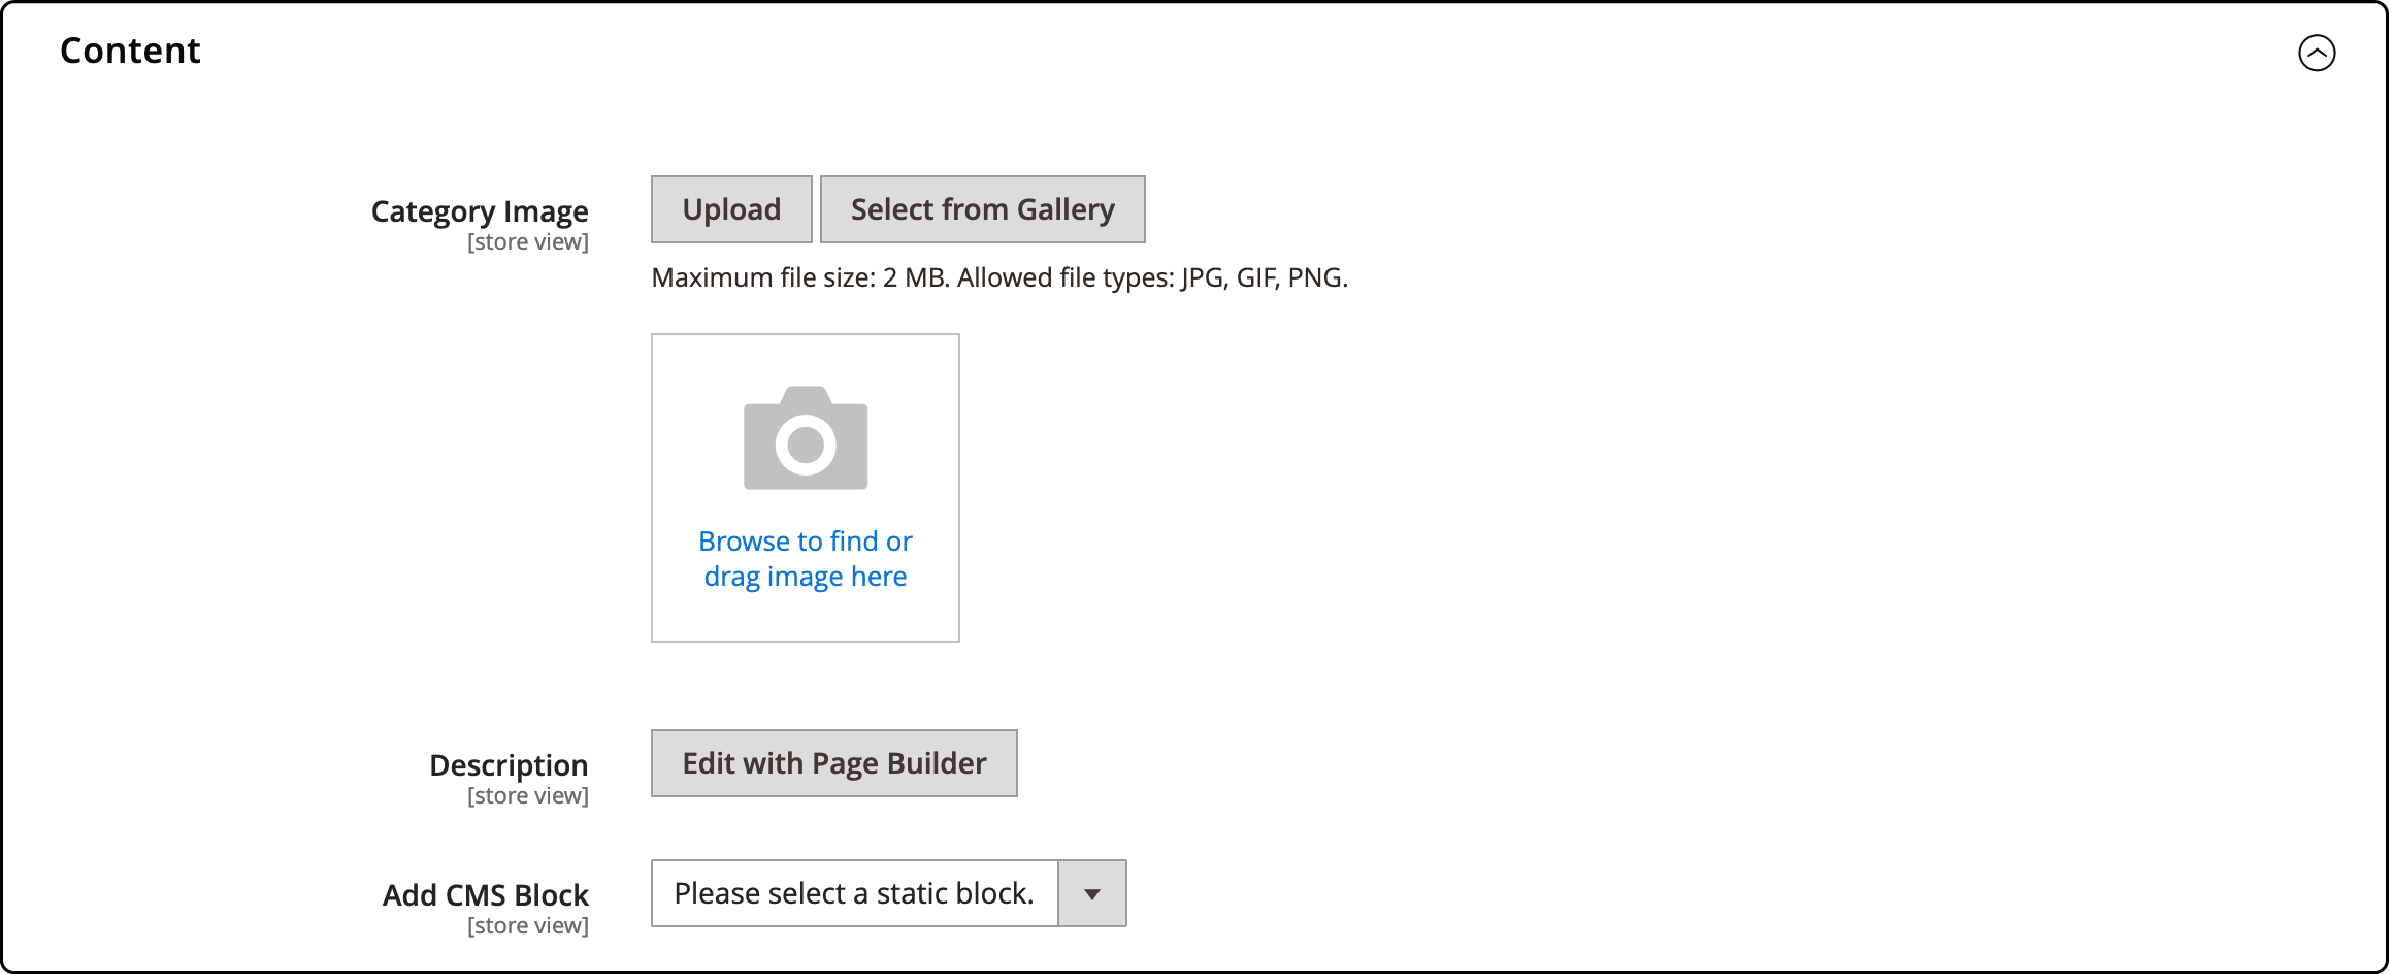
- Upload the image for the category.
- Provide the store view description.
- Choose a CMS Block from the drop-down menu to display a content block on the category landing page.
- Save all the changes.
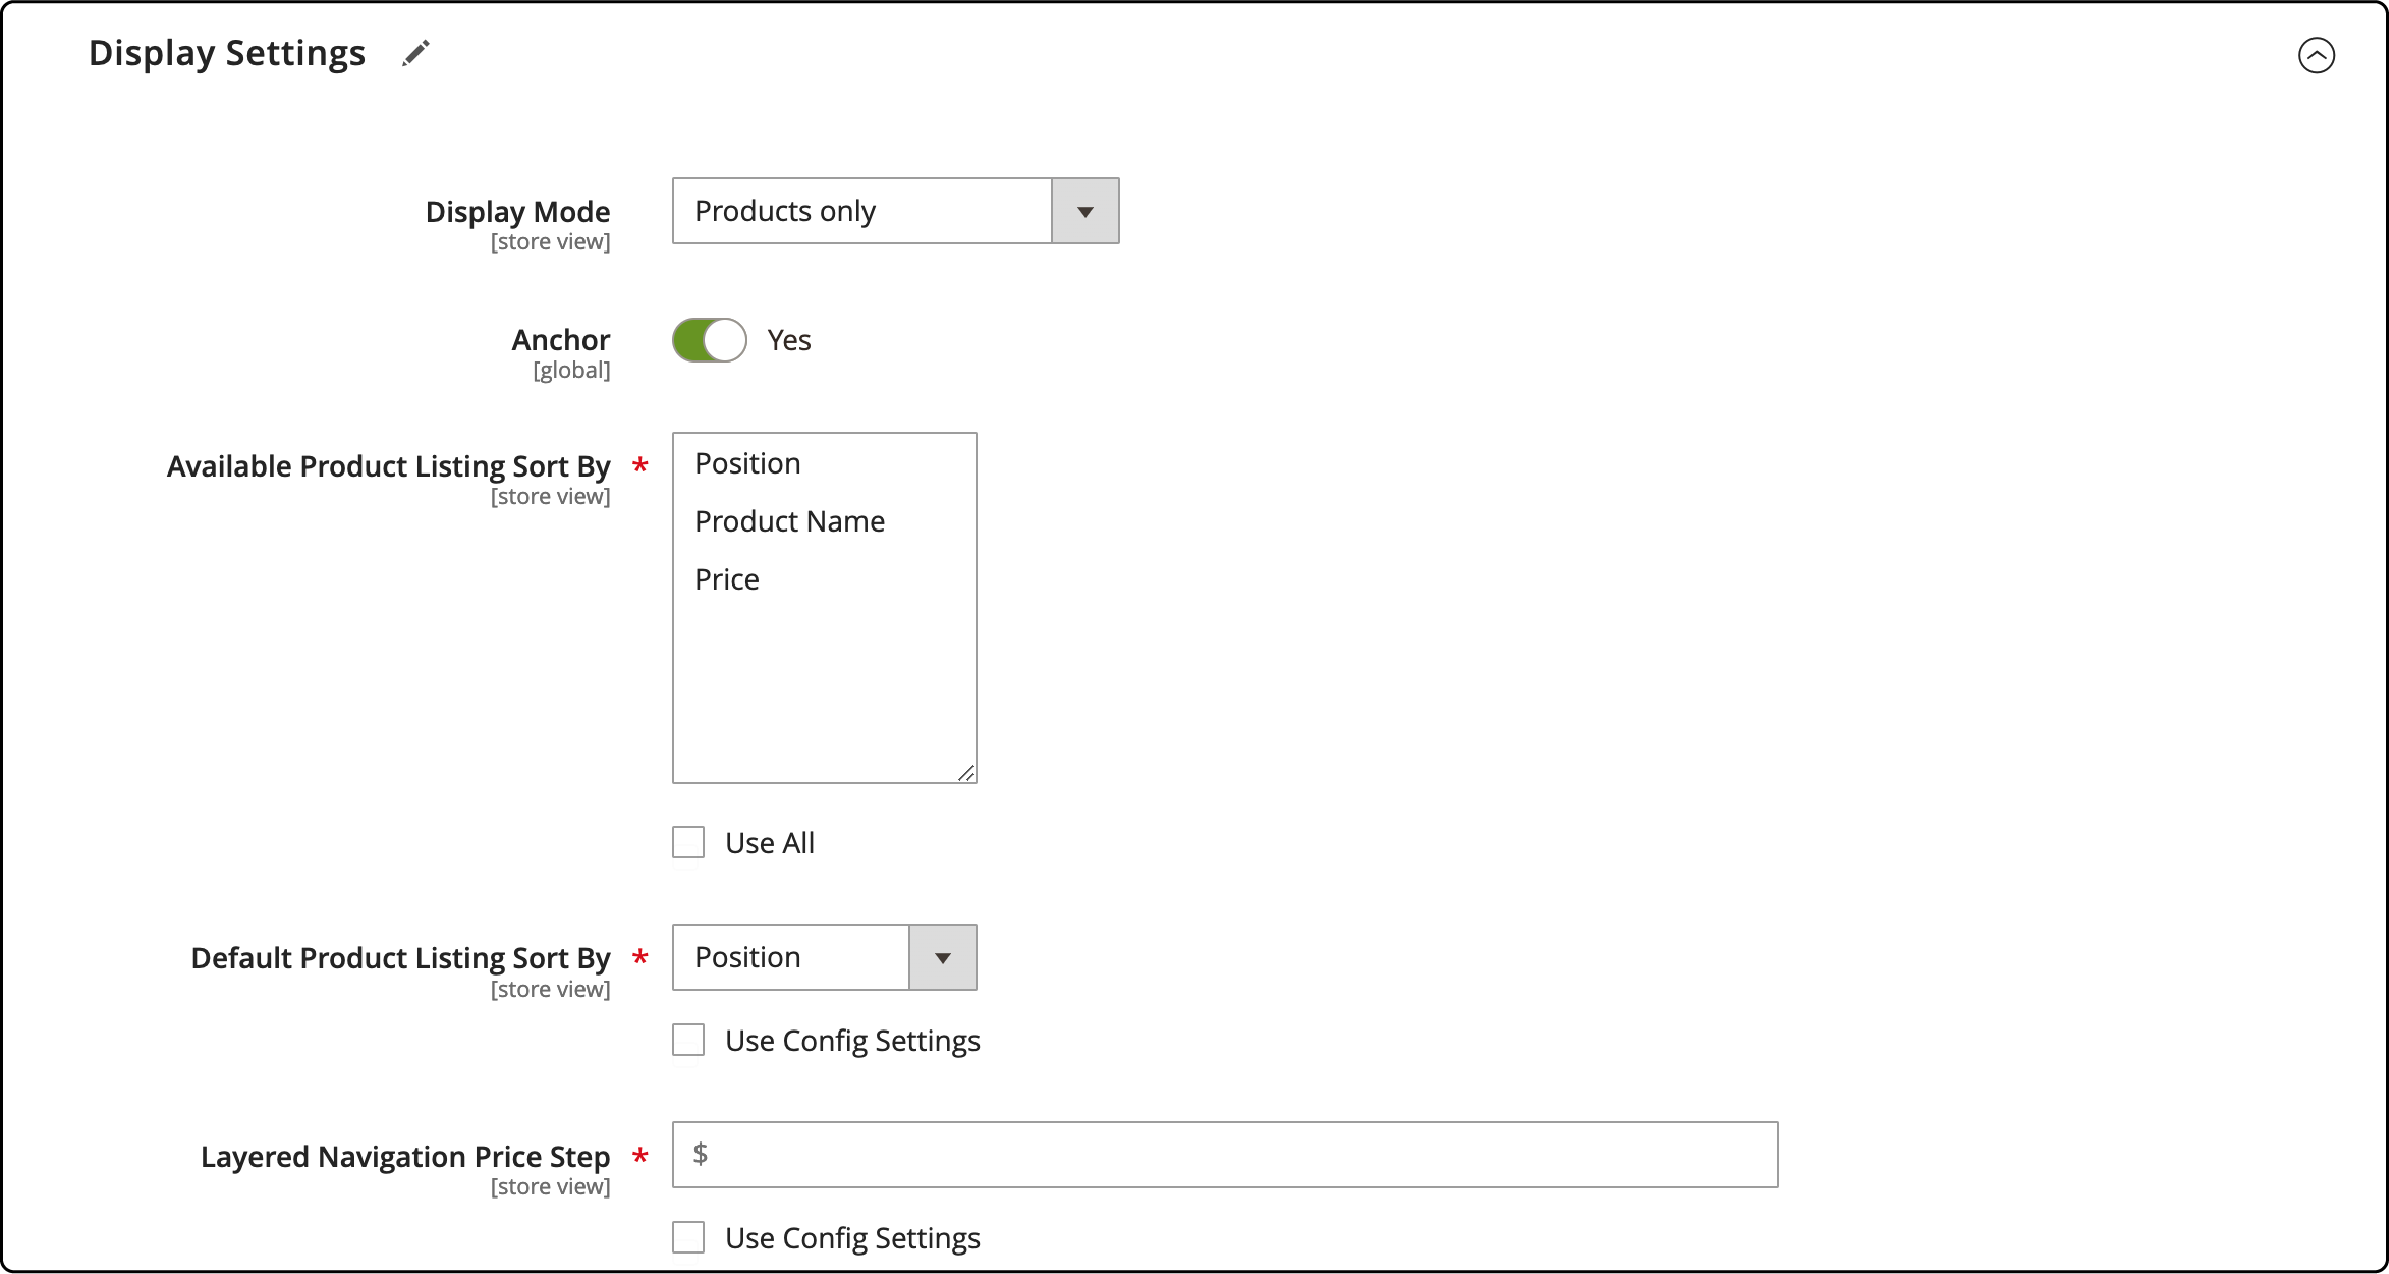
5. Go to the Display Settings.
In this section, you will find the configuration options:
-
Display Mode: Choose between products only, static block only, or both static block and products.
-
Anchor – You can now easily add the "Filter by Attribute" option to the category.
-
Available Product Listing Sort By – It offers two choices: keep the tick at "Use All" or choose one option from the list below.
-
Default Product Listing Sort By – You can keep "Use Config Settings" or select from Position, Product Name, or Price.
-
Layered Navigation Price Step – Select "Use Config Settings" as it is or assign a specific value.
To proceed, simply click on the Save button.
6. Go to the "Search Optimization" tab.
To boost your search rankings, complete the following information:

-
Meta Title – The title sidebar, browser tab, and search results display it. Keep it under 70 characters and make it unique.
-
Meta Keywords – These are the keywords that search engines use to understand what your page is about.
-
Meta Description – Search engines display the description below the page title in search results. Aim for a meta description of 150-160 characters for optimal length.
Click the 'Save' button to implement the new changes.
7. Navigate to the "Products in Category" tab.
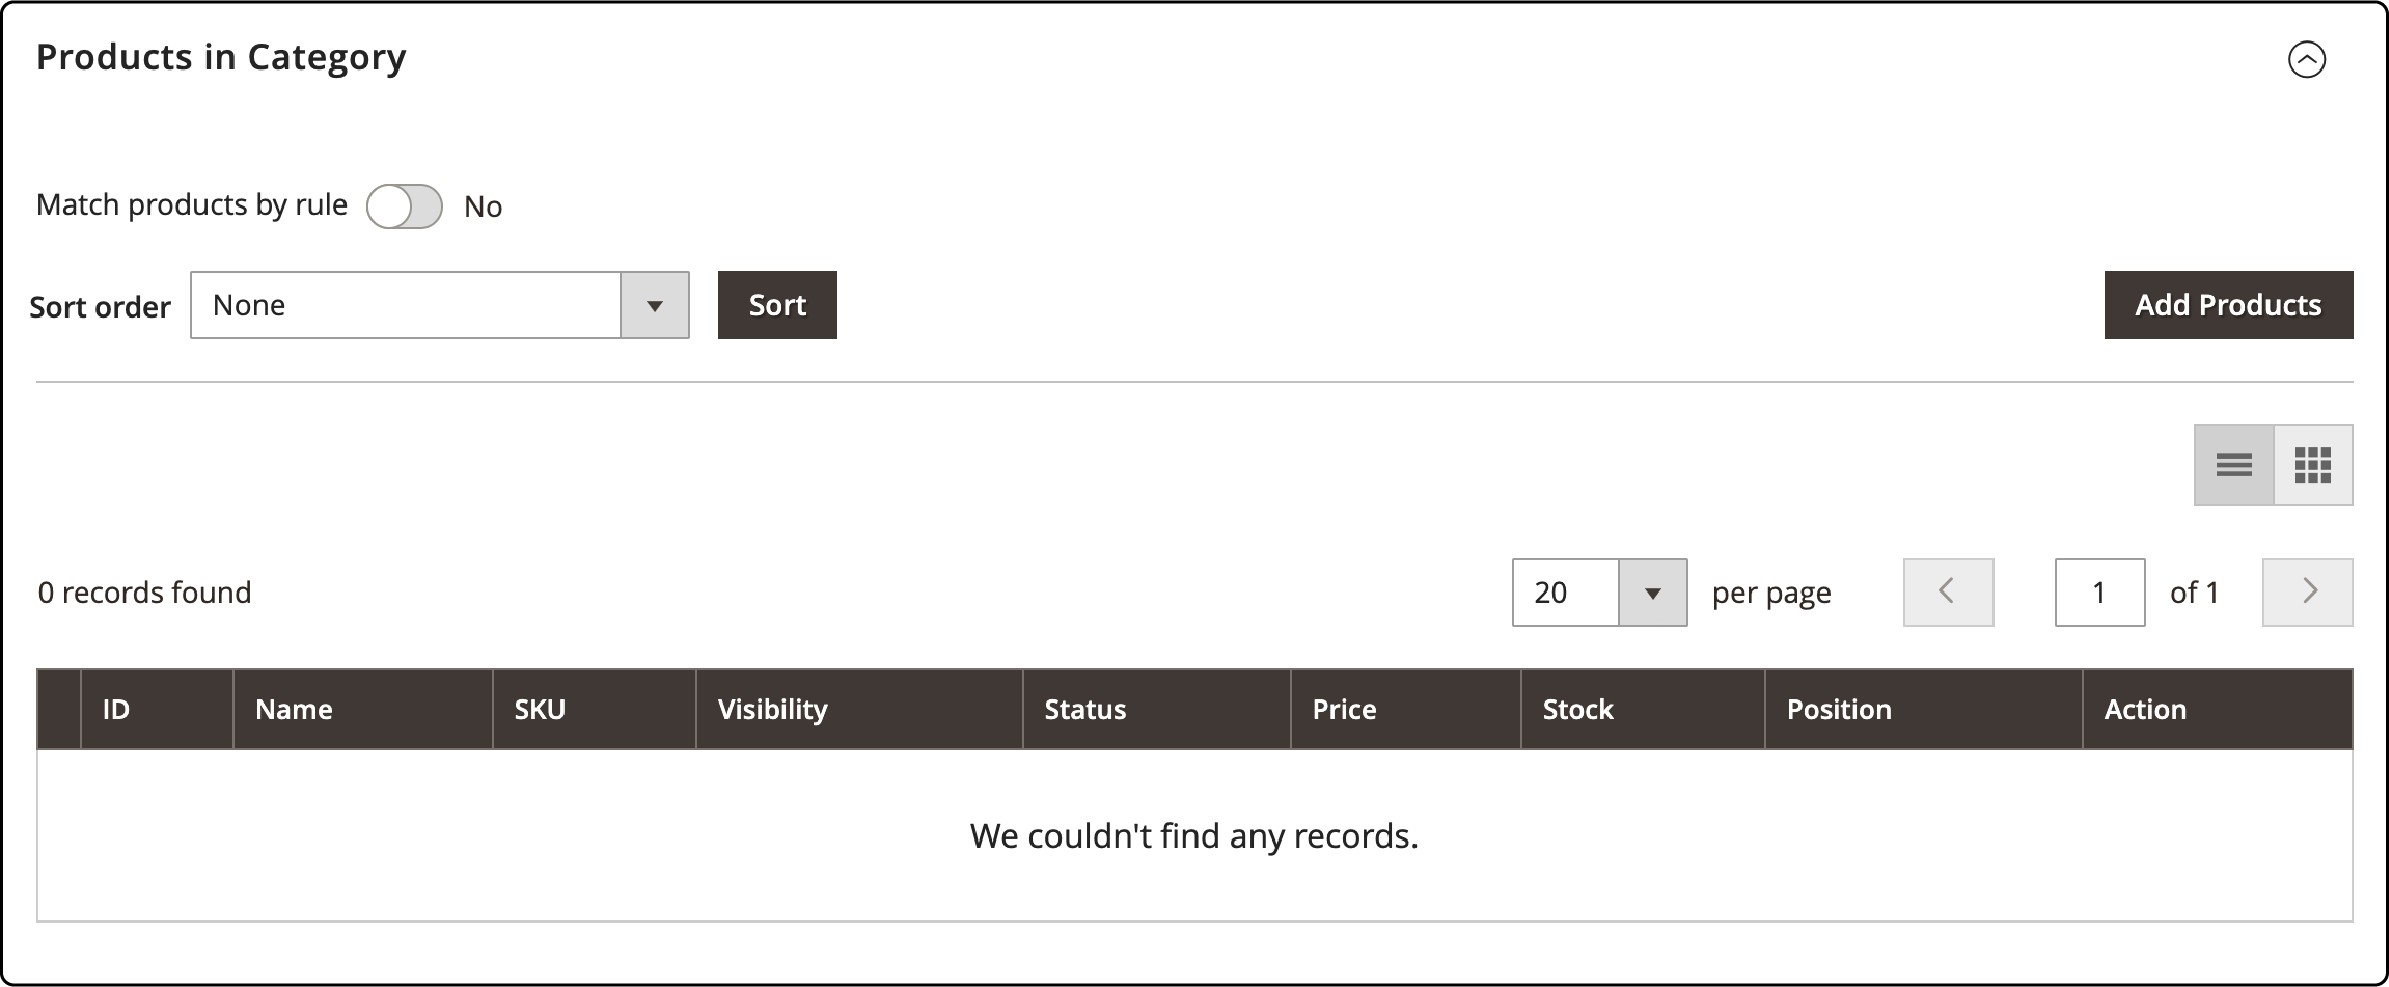
To add products, simply tick the ones you want. You can use the Search Filters at the top of each category if you have many items in the store. To clear all filter fields, just click Reset Filter.
Click on the "Save" button.
8. Navigate to the "Design" tab.
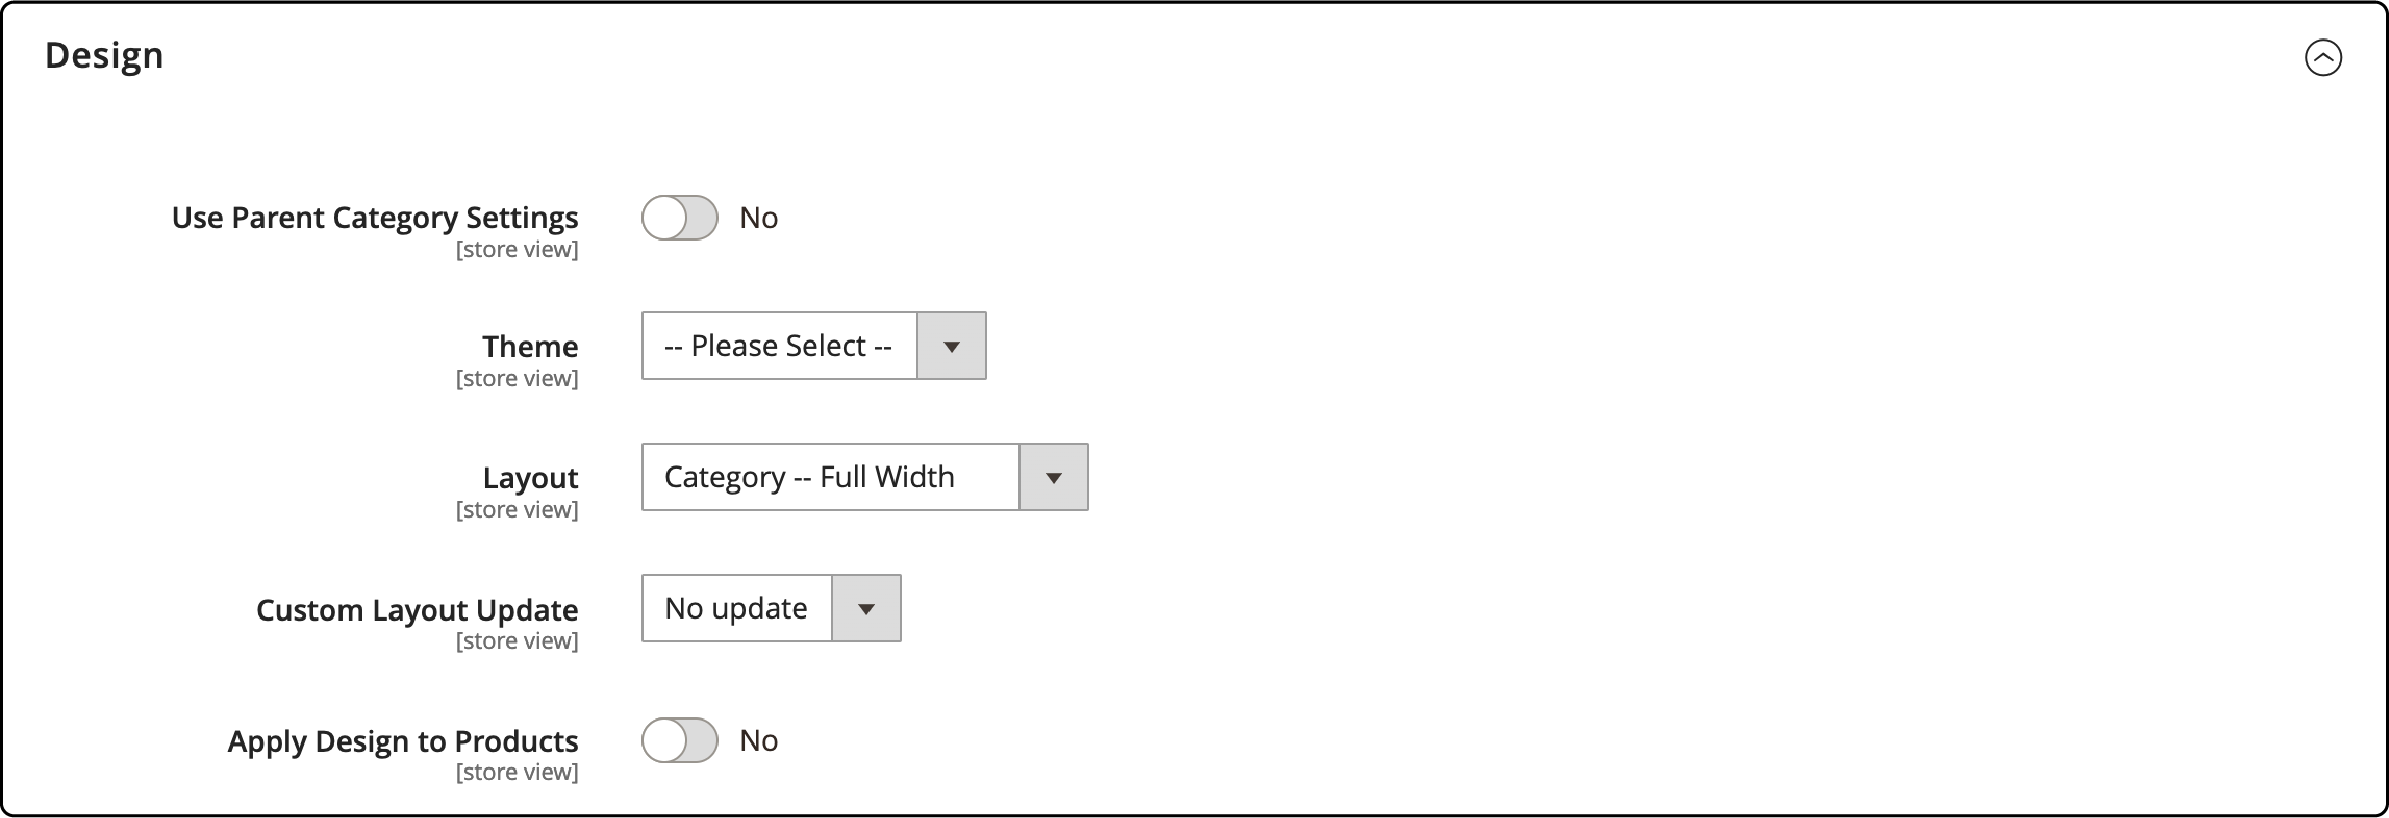
- To apply the settings of the parent category to the current category, enable the "Use Parent Category Settings" option.
- Apply a theme to the category.
- Choose the column layout for the category by selecting Layout.
- If you have a custom Layout Update XML code, fill it in.
- Apply design to products: yes or no.
Please click on the "Save" button.
9. Go to the last tab called "Schedule Design Update.

You can specify the date range for applying your custom design to a specific category. Here are some additional modifications you can make:
- Move the category or subcategory position effortlessly by dragging and dropping them in the categories tree.
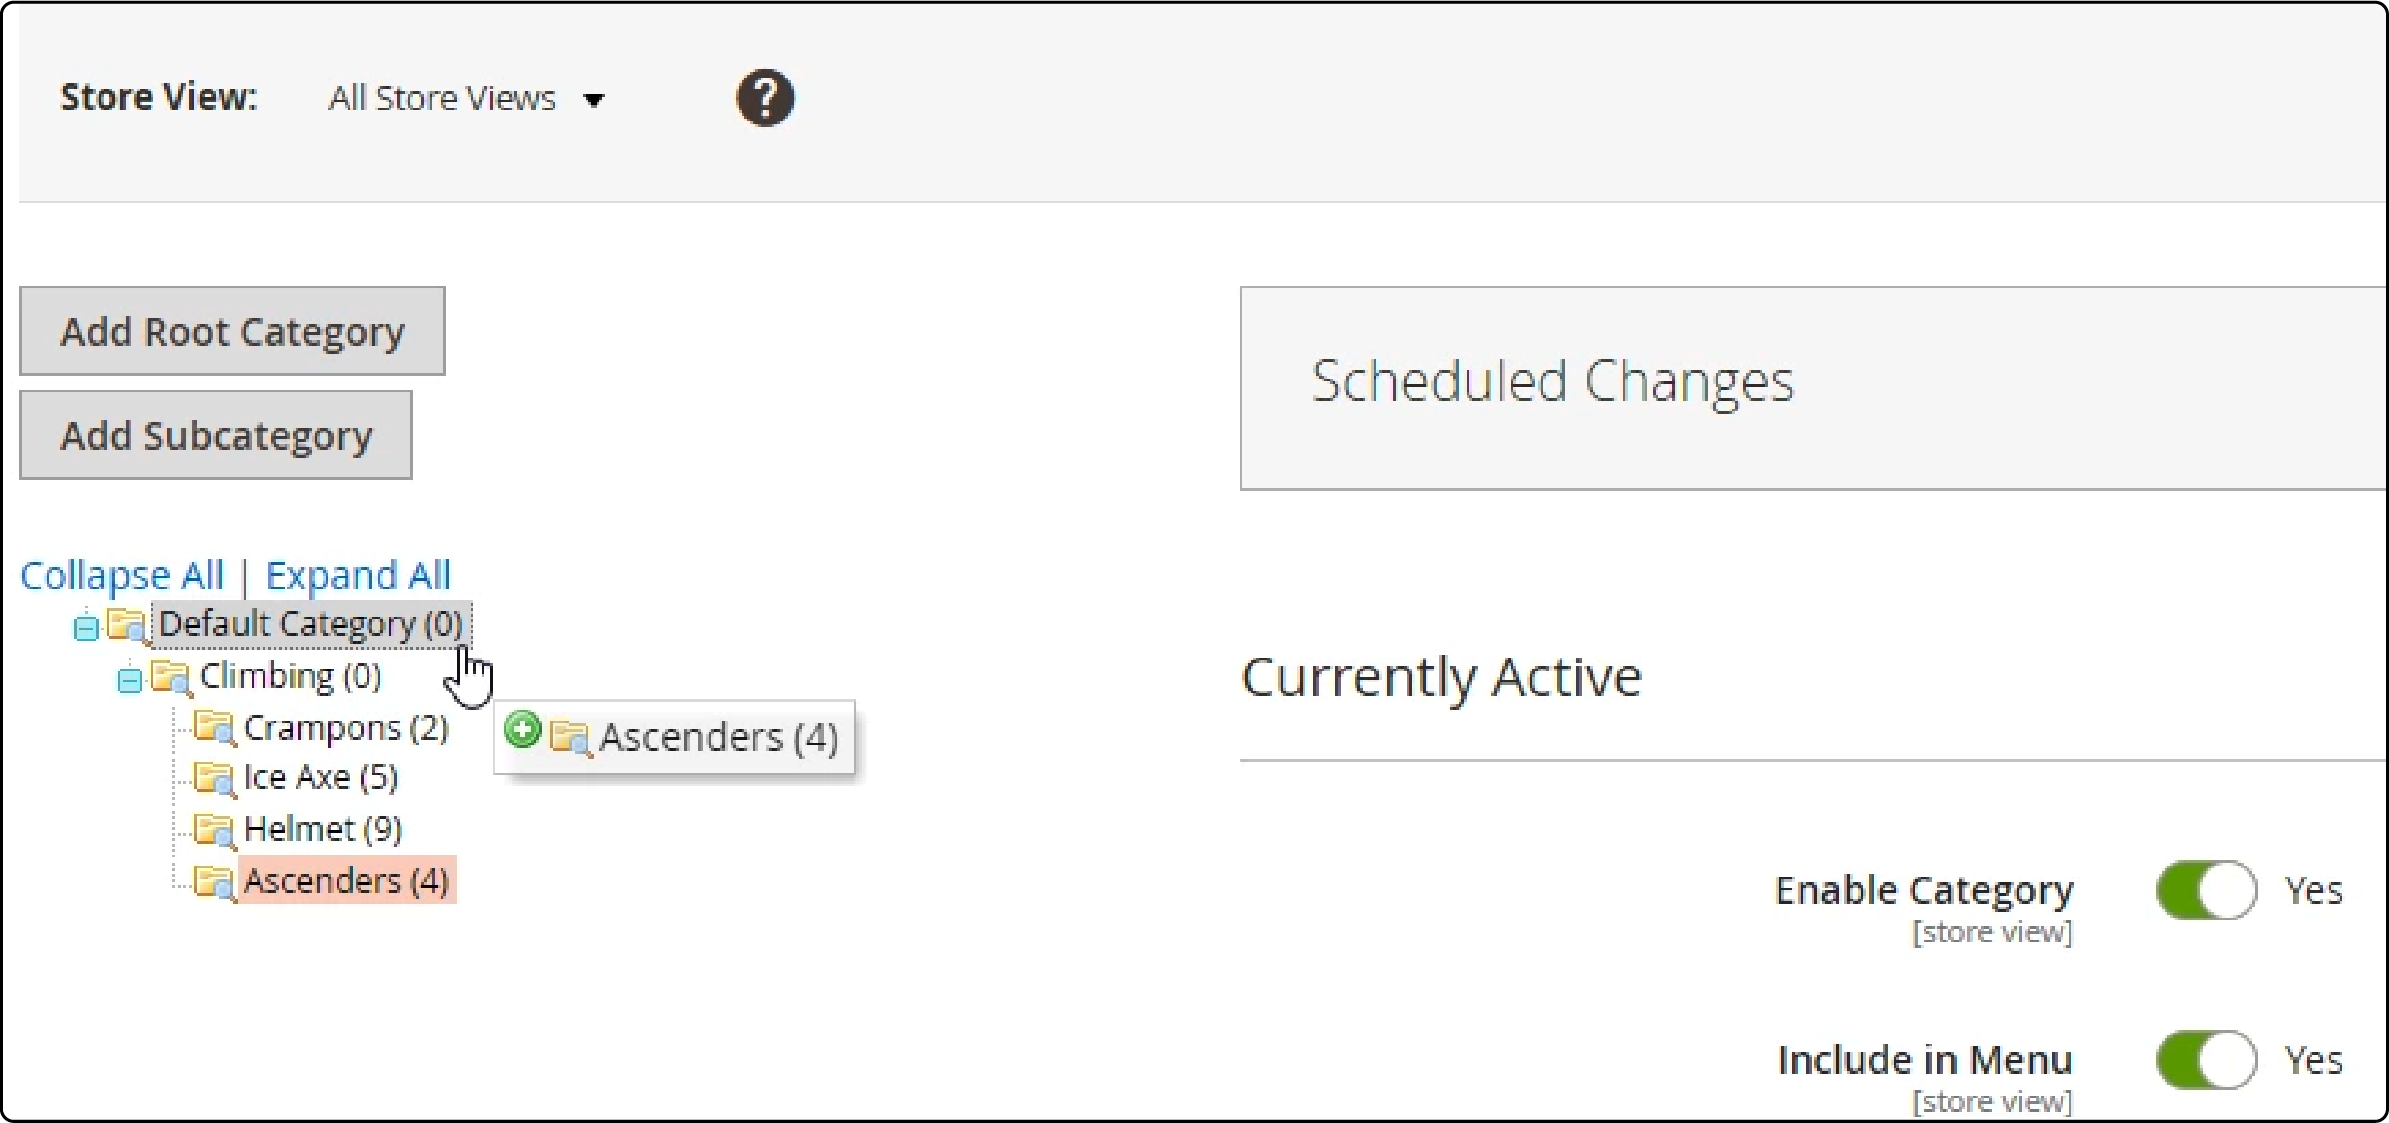
- To delete a category, locate the "Delete" button, usually positioned near the "Save" button in the upper right corner.
- Click on it, and a notification will appear, asking, "Are you sure you want to delete this category?"

Best Practices for Configuring Magento 2 Categories
1. Creating Descriptive Category Names
Crafting descriptive names for your Magento categories is crucial. It helps customers find their desired products with ease and enhances SEO.
Use the following tips for category names:
-
Use precise, concise language for your category names.
-
Avoid jargon that your customers may not be familiar with.
-
Make sure names are unique and non-repetitive.
-
Consider using keywords that are relevant to the products in the category.
-
Keep category names short to ensure they are user-friendly.
2. Utilizing Proper Category Levels
Having a logical category hierarchy improves navigation and user experience. Here are some tips:
-
Stick to a shallow hierarchy with fewer levels for easy navigation.
-
Ensure all levels have a logical flow from one to the next.
-
Avoid creating unnecessary subcategories.
-
Make sure top-level categories are general, with more specific subcategories.
-
Aim for a balanced number of products across all categories.
3. Integrating SEO Practices
Integrating SEO practices into your Magento categories can increase visibility on search engines. Consider using the following SEO practices:
-
Use keywords in your category names and descriptions.
-
Keep URLs clean and readable, integrating keywords where possible.
-
Create unique meta descriptions for each category.
-
Avoid duplicate content across categories.
-
Ensure site navigation is user-friendly and intuitive.
4. Using High-Quality Images
High-quality images enhance your Magento categories. It visually represents the Magento products within the store.
Improve image quality with the following tips:
-
Use clear, high-resolution images.
-
Ensure images are relevant to the category.
-
Opt for professional photography when possible.
-
Avoid using too many images that could slow page loading times.
-
Consider using consistent image styles across all categories.
5. Consistently Updating Categories
Regularly updating your Magento categories keeps the store fresh and can drive customer engagement. Some ideas to remember:
-
Regularly add new categories per emerging trends.
-
Review and update category names and descriptions as needed.
-
Consider seasonal or promotional categories during peak times.
-
Regularly check your categories for broken or outdated links.
-
Revisit and refine your category hierarchy periodically.
6. Using Attributes in Magento 2
Attributes in Magento add depth to your product categories. They provide specific details that help customers find exactly what they need. Here are some points to consider:
-
Prominently feature product attributes like size, color, and brand.
-
Use attributes to filter and sort products within categories.
-
Keep attribute names clear and concise.
-
Regularly update attributes to reflect changes in products.
-
Employ consistent attribute naming across all categories.
FAQs
1. What are Magento categories, and how do they help in eCommerce?
Magento categories are a way to organize products in your online Magento store. They help users easily find and browse products, enhancing the shopping experience.
You can enhance your Magento store by adding third party category modules. These modules allow you to manage and organize your products effectively.
Users can add root categories to the main menu through an extension. This extension also allows for a dropdown menu on the product page, enhancing navigation.
2. What is a parent category in Magento?
A parent category in Magento is the main category under which you add new subcategories. It's essential for your site's main navigation, helping customers to select from a list of options.
3. How do product attributes feature in Magento 2 categories?
Product attributes provide additional detail about the products in Magento 2 categories. They can be used in the product grid and filters, helping customers easily find what they want.
4. What does adding new categories involve in Adobe Commerce?
You can add new categories via the admin dashboard in Adobe Commerce. This includes:
-
Creating a new category.
-
Choosing an image.
-
Setting it as a parent category if needed.
-
Adding it to the categories on the homepage of your online store.
5. What are some best practices for using Magento's category functionality?
Best practices of configuring Magento categories include:
-
Regularly updating categories.
-
Using high-quality category images.
-
Implementing attributes in Magento 2.
-
Ensuring your categories in the layered navigation are user-friendly.
-
Preview your changes on the front end to ensure an engaging customer experience.
6. Why are product types and Magento’s attributes important to my Magento 2 store?
Product types and Magento's attributes allow you to choose how to display your products. They form the basis of your product listing page. They help customers navigate your store, filter options, and sort through available product listings. Choosing the right Magento hosting is also crucial here. It guarantees a smooth and secure online store, offering the best user experience.
Summary
Configuring Magento categories helps boost user experience, driving more traffic and conversions to your store. Magento's flexibility lets you customize and optimize your categories, enhancing your store's usability and appeal.
We've covered key aspects of Magento categories and how to create them. The tutorial looked at the importance of product attributes and best practices to follow. We've also discussed product types and attributes on your Magento 2 store.
Enhance your store's performance with Magento hosting services for a seamless shopping experience.


