Magento 2 Add New Field in Shipping Address: Steps & Benefits
Are you having trouble improving the checkout process in Magento 2? You can use Magento 2 add new field in shipping address option to collect specific customer details during checkout.
This tutorial explains how to add a custom shipping address in Magento programmatically and using extensions. It covers the steps, benefits, and common issues.
Key Takeaway
-
Custom checkout fields enhance your Magento 2 store's checkout process.
-
Using the following code simplifies adding custom shipping fields.
-
Magento extensions offer easy ways to include your custom attributes.
-
A custom checkout field extension benefits businesses by saving time.
-
Adding a field to the layout helps personalize customer interactions.
-
What Are The Benefits of Adding Custom Fields to Shipping Address?
-
Steps To Add New Shipping Address In Magento 2: Programmatically
-
Steps To Add Custom Field to Magento 2 Shipping Address: Using Extension
-
Programmatic vs. Extension-Based Approach For Adding Address Form In Magento 2
What Is A Shipping Address In Magento 2?
In Magento 2, a shipping address is where orders are delivered. It differs from the billing address used for payment. Users fill in the shipping details on the checkout page."
Adding a custom field to the shipping address helps collect specific information. Developers can create a plugin using PHP to enhance the functionality of the checkout form.
Magento also allows developers to customize shipping and billing fields easily. They can use var config to define the changes within the checkout step or billing sections.
What Are The Benefits of Adding Custom Fields to Shipping Address?
1. Personalize the Checkout Process
Custom fields provide relevant data tailored to customer needs, such as delivery preferences and a customer address. This personal touch enhances customer satisfaction, creates a better shopping experience, and sets your store apart.
2. Improve Customer Experience
Adding custom fields in Magento 2 ensures accurate shipping details. It minimizes errors and delays. These fields gather more specific customer information. It helps streamline logistics and speed up the order fulfillment process.
3. Support Business Needs
Custom address fields in the shipping address form of checkout allow businesses to meet specific goals. You can use custom fields in Magento 2 to collect business-relevant data, such as gift messages or custom delivery requests. A Magento plugin or custom module simplifies adding fields. It ensures the checkout process remains flexible.
4. Simplify Integration with Templates
When you use custom fields, shipping address and billing address forms are generated dynamically and can be easily modified. Fields added to the shipping address can integrate with templates, emails, and invoices. You can also add predefined address attributes to default checkout forms. It ensures consistent communication and makes managing customer data seamless across platforms.
Steps To Add New Shipping Address In Magento 2: Programmatically
Step 1: Add a New Field to the Layout
To add a field in the address form in Magento 2, create a Magento 2 layout XML file in your custom module. Place it in app/code/Vendor/Module/view/frontend/layout/checkout_index_index.xml. Use <item> tags to define the custom field for checkout shipping.
\<item name="custom\_field" xsi:type="string"\>Your Custom Field Label\</item\>
This step enhances shipping and billing address forms.
Step 2: Add a JS Mixin to Modify Data Submission
Create a mixin in app/code/Vendor/Module/view/frontend/web/js/view/mixin.js. This mixin modifies the checkout shipping form to include a custom field for the shipping address. Add your custom logic for submitting the custom field to the server.
 define(function () {
    'use strict';
    return function (target) {
        target.saveAdditionalData \= function () {
            console.log("Custom field saved.");
        };
        return target;
    };
});
Step 3: Load the Mixin in the RequireJS Config
Define the mixin in the RequireJS config. Add this in app/code/Vendor/Module/view/frontend/requirejs-config.js to include the mixin for the checkout shipping step.
 var config \= {
    config: {
        mixins: {
            'Magento\_Checkout/js/view/shipping': {
                'Vendor\_Module/js/view/mixin': true
            }
        }
    }
};
It integrates your custom field with the Magento 2 add custom field feature.
Step 4: Add the Field to the Address Model
Modify the address model to save the custom field. In app/code/Vendor/Module/Model/Address/CustomField.php, extend the address form in Magento 2 to add the field.
namespace Vendor\\Module\\Model\\Address;

class CustomField extends \\Magento\\Framework\\Model\\AbstractModel {
    protected function \_construct() {
        $this\-\>\_init(\\Vendor\\Module\\Model\\ResourceModel\\CustomField::class);
    }
}
This step links the custom field to the billing address if needed.
Step 5: Access the Custom Field's Value on the Server Side
Use a plugin to access your field value. Create app/code/Vendor/Module/Plugin/CustomFieldPlugin.php to retrieve and process the custom field value during order save.
 public function beforeSaveAddressInformation(
    \\Magento\\Checkout\\Api\\ShippingInformationManagementInterface $subject,
    $cartId,
    $addressInformation
) {
    $customField \= $addressInformation-\>getExtensionAttributes()-\>getCustomField();
    // Save custom field logic
}
It ensures the custom field is stored for customers during checkout.
Step 6: Run CLI Commands
Run the following commands to apply changes:
bin/magento setup:upgrade
bin/magento setup:di:compile
bin/magento cache:flush
It ensures your Magento store reflects the updates to the shipping and billing address forms. Dedicated Magento hosting improves performance for such changes.
Steps To Add Custom Field to Magento 2 Shipping Address: Using Extension
Step 1: Install the Extension
-
Choose a Magento 2 extension to add a custom field.
-
Download and install it via the Magento dashboard or Magento Command Line Interface.
-
Use the
bin/magento module:enable Vendor_ExtensionNameto activate it.
It simplifies adding custom fields to the shipping address form.
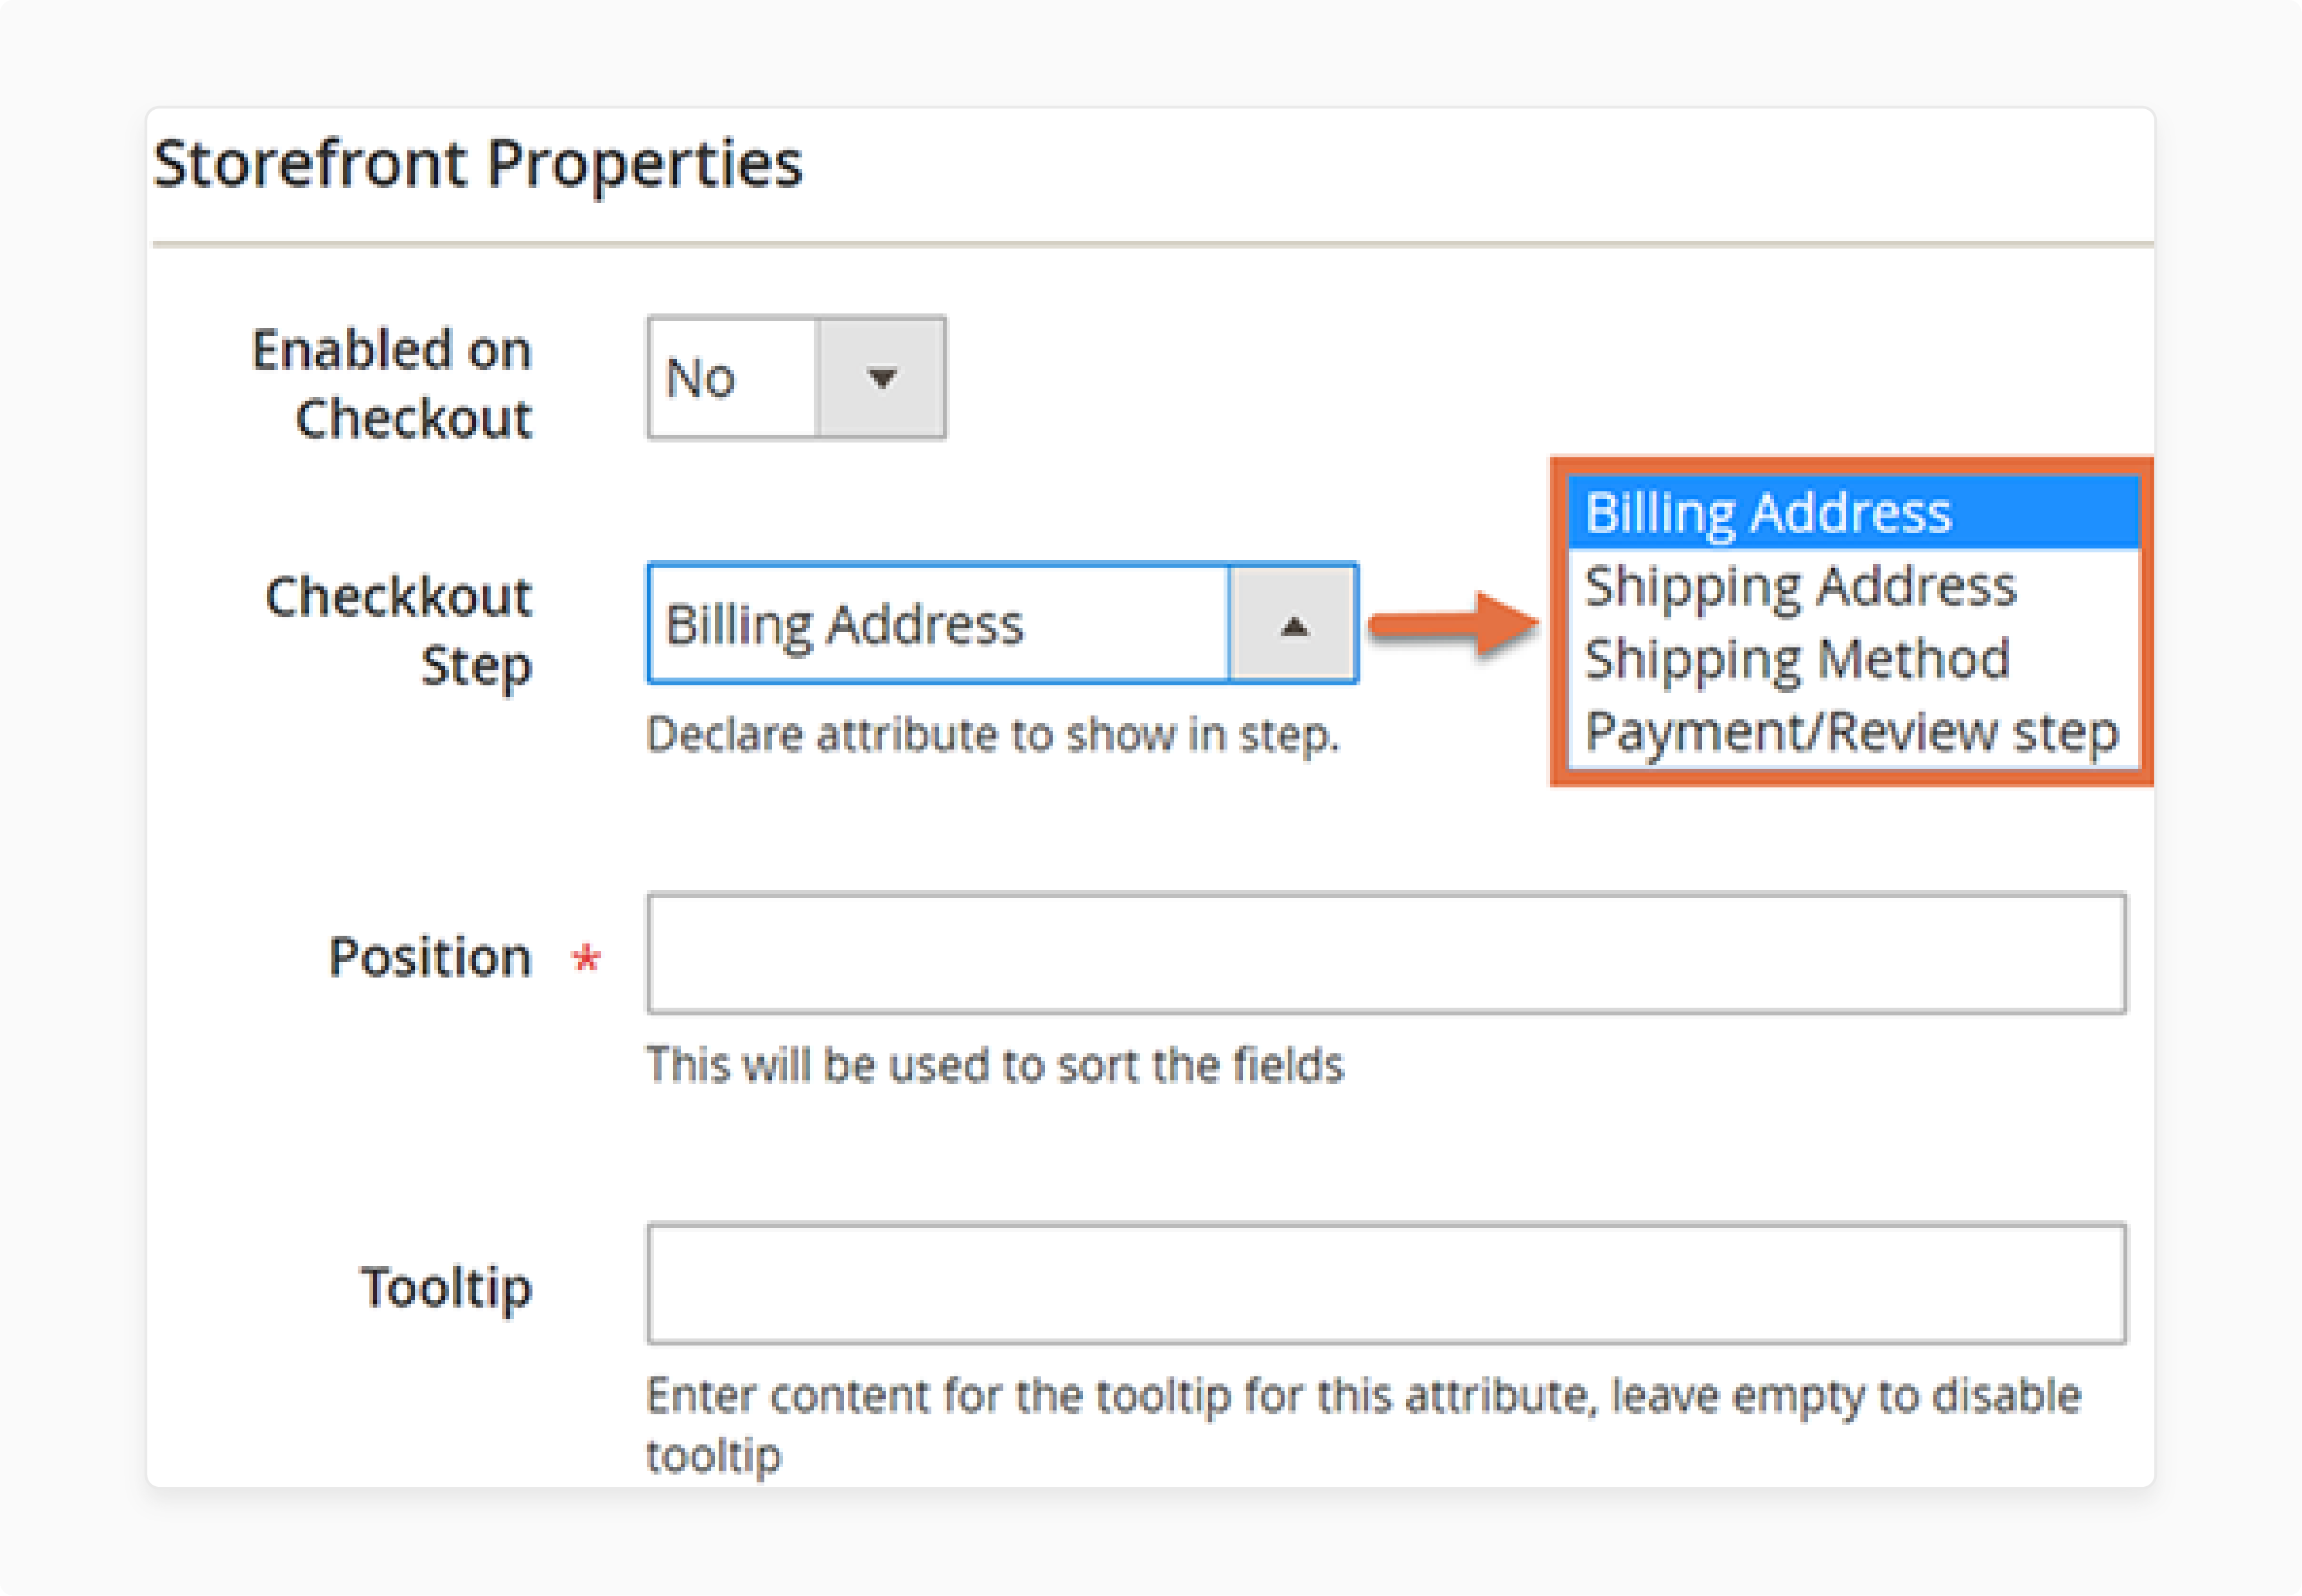
Step 2: Configure the Extension Settings

-
Navigate to Dashboard > Stores > Configuration > Extension Settings.
-
Enable the extension and define custom field labels.
-
Save the configuration to make changes effective.
These settings ensure the field integrates with shipping and billing address forms.
Step 3: Customize the Checkout Shipping Form
-
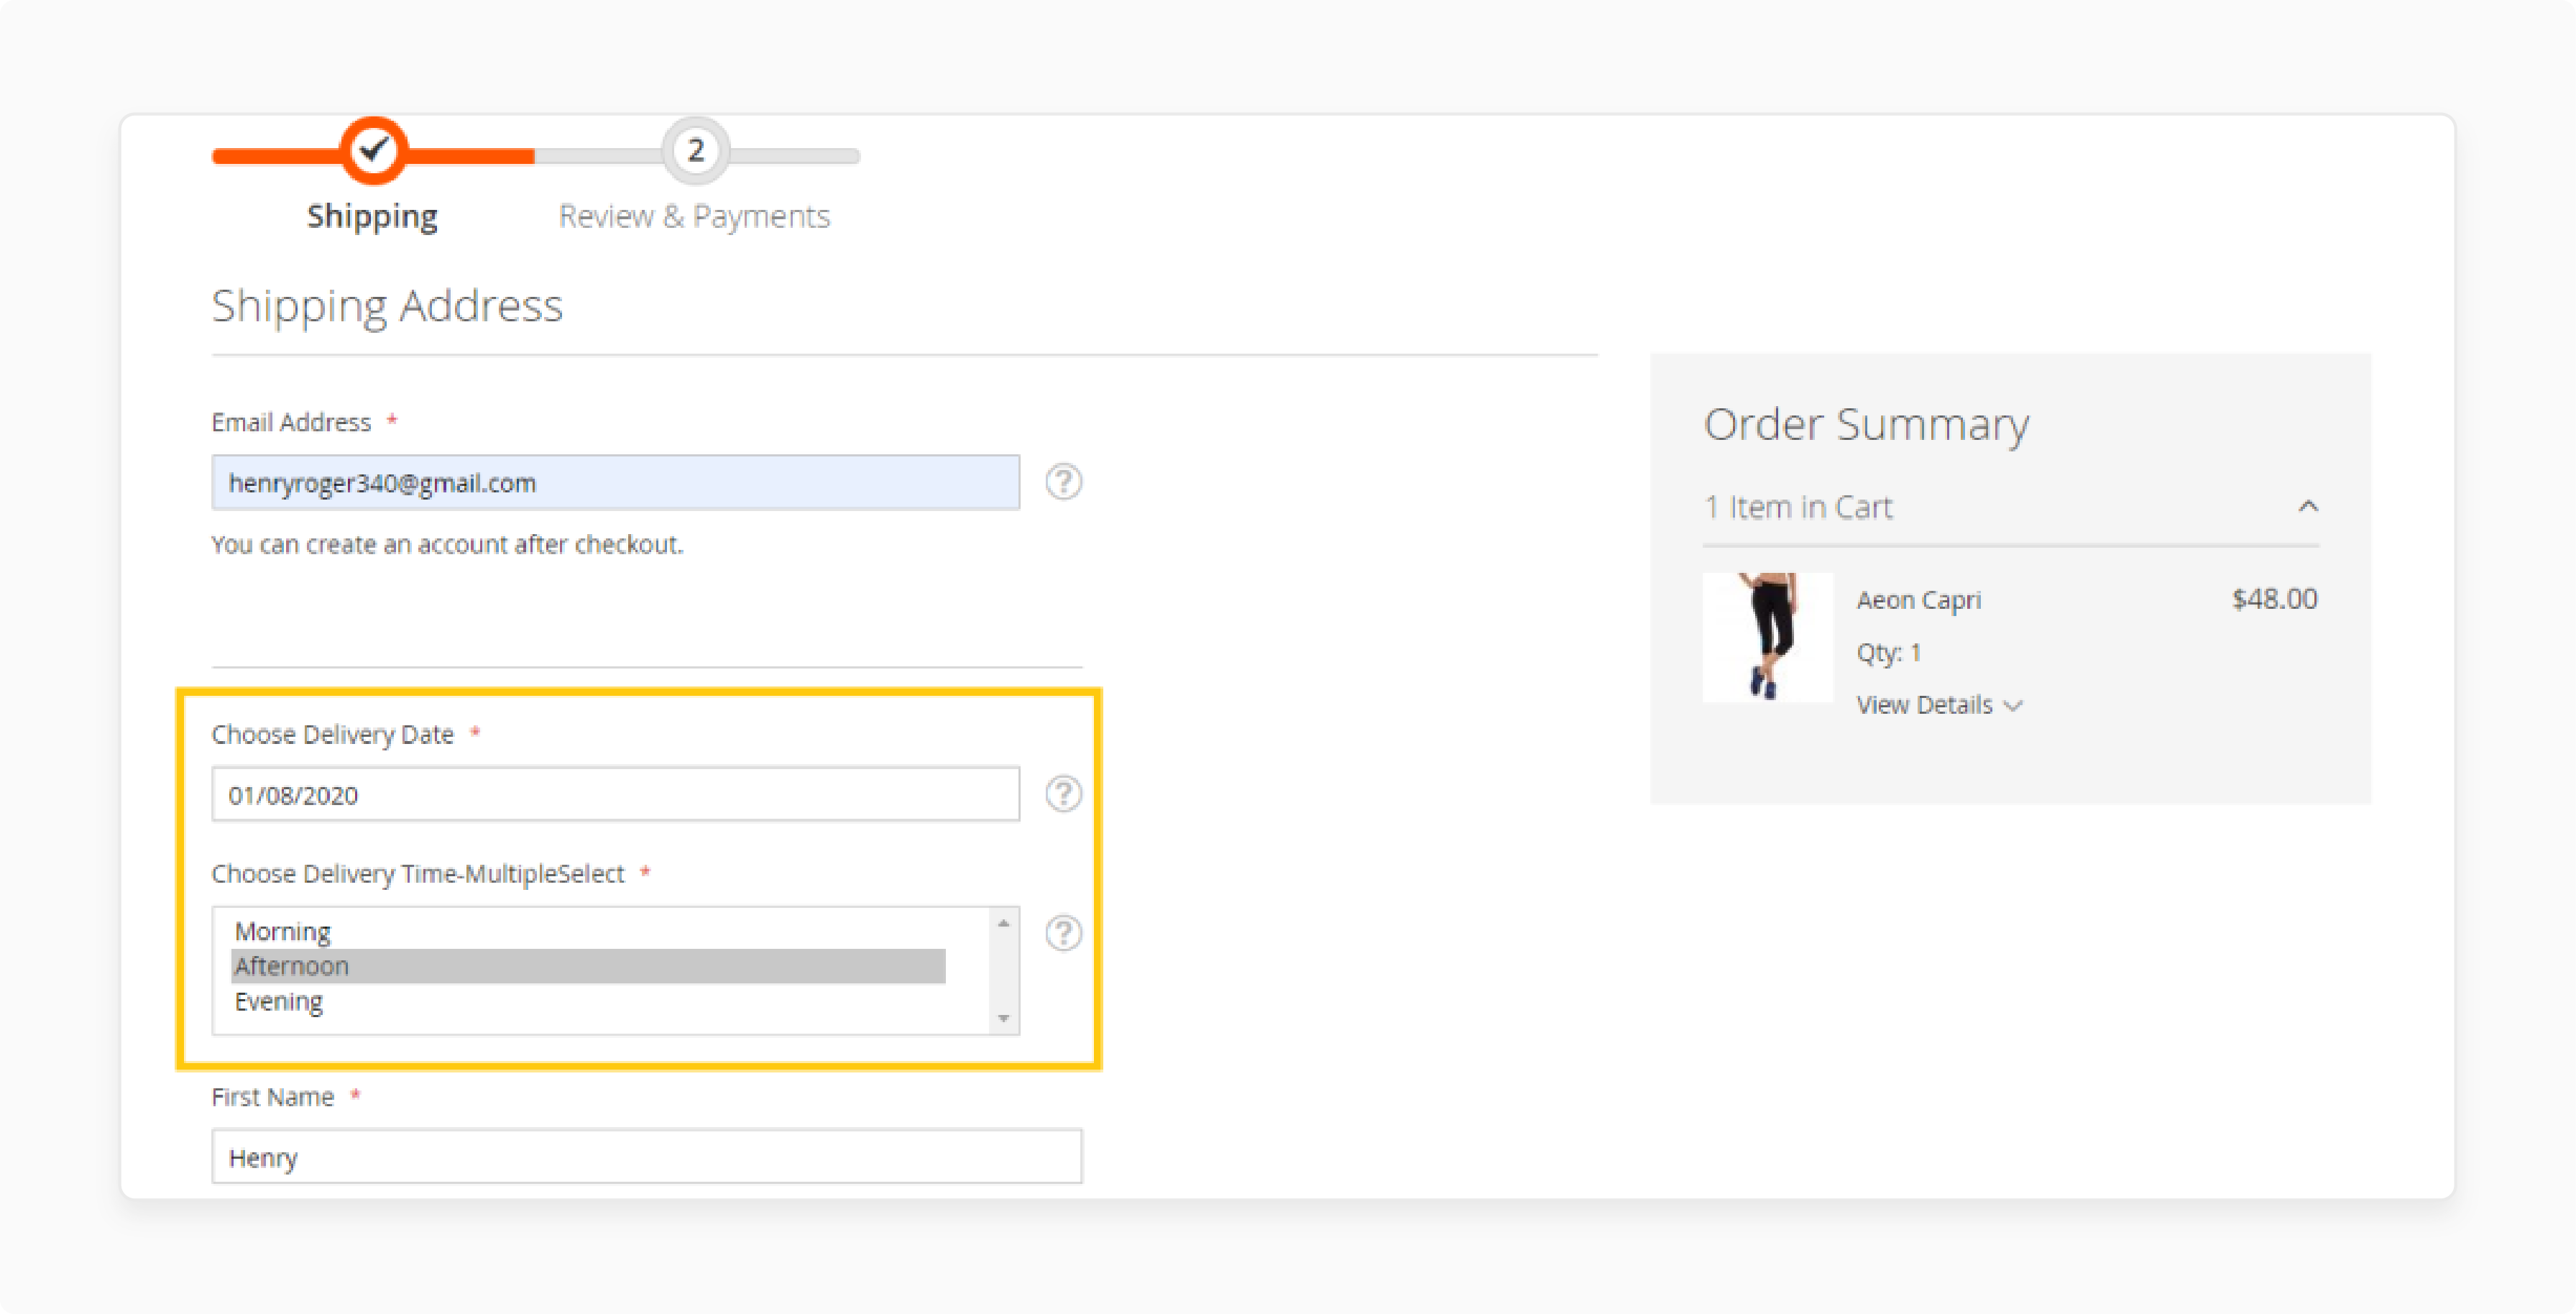
Extensions allow fields to be added directly to the checkout shipping form.
-
Use the Magento admin panel to specify field placement and validation.
-
Test the changes to ensure the custom field at checkout appears correctly.
This process enhances the Magento 2 checkout experience.
Step 4: Map the Custom Field to Data Models
-
Extensions often provide options to map fields in the address form.
-
Map the custom field to the address data models to save information.
-
Validate that the field data syncs with the shipping and billing models.
It ensures proper storage of the custom field data.
Step 5: Display Custom Field Data in Orders
-
Configure the extension to display the custom field in orders.
-
Use options to show the field in emails, invoices, or admin grids.
-
Verify that the data appears accurately in the Magento store.
It helps store owners manage customer information effectively.
Step 6: Test the Extension Setup

-
Test the checkout process with the custom field enabled.
-
Confirm the field works as expected and appears in order.
-
Use dedicated Magento hosting for faster and smoother testing.
This step ensures a seamless experience for customers during checkout.
Common Issues When Adding a Custom Field In Magento
1. Custom Field Not Visible on Checkout
The custom field does not appear in the checkout process. It can occur due to improper configuration or missing layout updates. Ensure the field is correctly added to the checkout shipping layout and loaded through the RequireJS config.
2. Custom Field Value Not Saved in Database
The custom field's value might not be saved in the database. It happens if the field is not mapped to the shipping and billing address forms. Use the appropriate Magento 2 models and ensure data mapping is correctly set in the custom field to shipping address logic.
3. Custom Validation Not Working
Custom validation rules for the field might fail during checkout. It usually happens if the JS mixin or validation script is not implemented correctly. Double-check the JavaScript and PHP code to ensure the validation logic is linked to the address form in Magento 2.
4. Compatibility Issues with Other Extensions
Issues can arise when multiple extensions modify the checkout form. Extensions might overwrite each other's functionality. Use Magento plugins or merge configurations to resolve issues and ensure compatibility.
5. Cache Issues Preventing Changes from Applying
Custom fields might not appear due to cache issues. Always run the bin/magento cache:flush after making changes. This step ensures the field in the address form reflects correctly on the Magento store.
Programmatic vs. Extension-Based Approach For Adding Address Form In Magento 2
| Aspect | Programmatic Approach | Extension-Based Approach |
|---|---|---|
| Flexibility | Offers high flexibility for custom fields to gather specific data. Requires coding. | Pre-built solutions but limited customization. Suitable for non-developers. |
| Implementation Time | Takes more time as Magento developers need to write and test code. | Quick to implement with ready-to-use features. |
| Cost | Development costs only. Avoids recurring extension fees. | Upfront costs with possible subscription fees. Cost-effective for beginners. |
| Maintenance | Requires regular updates to ensure compatibility with Magento Open Source updates. | Extension developers manage updates. Minimal effort is needed. |
| Scalability | Highly scalable. Developers can modify solutions for future needs. | Scalability depends on extension features and may need additional purchases. |
| Technical Skills Needed | High. It requires knowledge of Magento open source and development. | Low. Suitable for store owners without technical expertise. |
FAQs
1. How do I ensure custom fields appear on the checkout page?
To ensure visibility, add the field to the layout XML. Then, update your layout in app/code/Vendor/Module/view/frontend/layout/checkout_index_index.xml. Finally, test your changes and flush the cache to apply the updates.
2. What are the benefits of adding a custom field programmatically?
Programmatic customization offers flexibility and scalability. Tweaking the checkout process fields helps you gather specific data, meet business needs, and improve the Magento checkout experience.
3. Can custom fields be restricted to specific customer groups?
Yes, use Magento's configuration to set field visibility. You can add conditions in your code or extension settings to show fields for specific customer groups during the checkout process.
4. How do I validate custom field input on the front end?
Add JavaScript validation in your custom mixin. Use Magento's default validation methods or write custom logic to ensure the input meets requirements before submission.
5. Can I display custom field data in admin order details?
Yes, map the custom field to order attributes. Update the Magento admin panel templates to include the field value. It will ensure that it's visible in the order grid and has a detailed view for easy management.
6. How do I add a new field to the layout in Magento 2?
To add a field to the layout, create an XML layout file in your custom module and define it using the correct tags. It will ensure that you can effectively address customer needs during checkout.
7. Where can I learn how to add custom fields programmatically?
Explore Magento 2 documentation or tutorials to learn how to add custom fields. These guides will help you integrate custom fields into the checkout process.
Summary
Magento 2 add new field in shipping address allows businesses to personalize the checkout process and improve order management. This tutorial covers both programmatic and extension-based approaches to simplify customization.
-
Custom fields enhance personalization and customer experience.
-
Programmatic methods offer flexibility but require coding expertise.
-
Extensions simplify adding fields with pre-built tools.
-
Integration ensures data visibility in orders and admin grids.
-
Testing and cache updates prevent common issues during customization.
Optimize your eCommerce store with managed Magento hosting for faster and more reliable performance.


