
How to Install Theme in Magento 2? 3 Best Methods
Curious about the best method of how to install theme in Magento 2? The right installation method ensures that your store is performance and SEO-driven. This tutorial covers 3 methods to install Magento themes in ecommerce stores.
Key Takeaways
-
Magento theme installation starts with backing up your store and ensuring compatibility.
-
You can install themes in a manual manner, through Composer, or by following Hyvä steps.
-
Configure your logo, layout, colors, and SEO settings after installation.
-
Test the theme across different browsers and mobile devices for performance.
-
Consider using Hyvä or Porto themes for better speed.
Preparation Steps Before Installing a New Magento Theme
-
Create a Backup: Backup your Magento 2 store files and database. It prevents data loss during theme installation.
-
Check Compatibility: Confirm that the theme supports your Magento 2 version. Make sure it also works with your extensions and plugins.
-
Enable Maintenance Mode: Set your store to maintenance mode from the Magento admin. It keeps visitors away during installation.
-
Access Root Directory: Access the Magento root folder using FTP, SFTP, or SSH. Follow the theme vendor’s installation guide.
3 Methods of How to Install Theme in Magento 2
Method 1: Manual Installation
1. Preparation
-
Backup your Magento 2 store files and database.
-
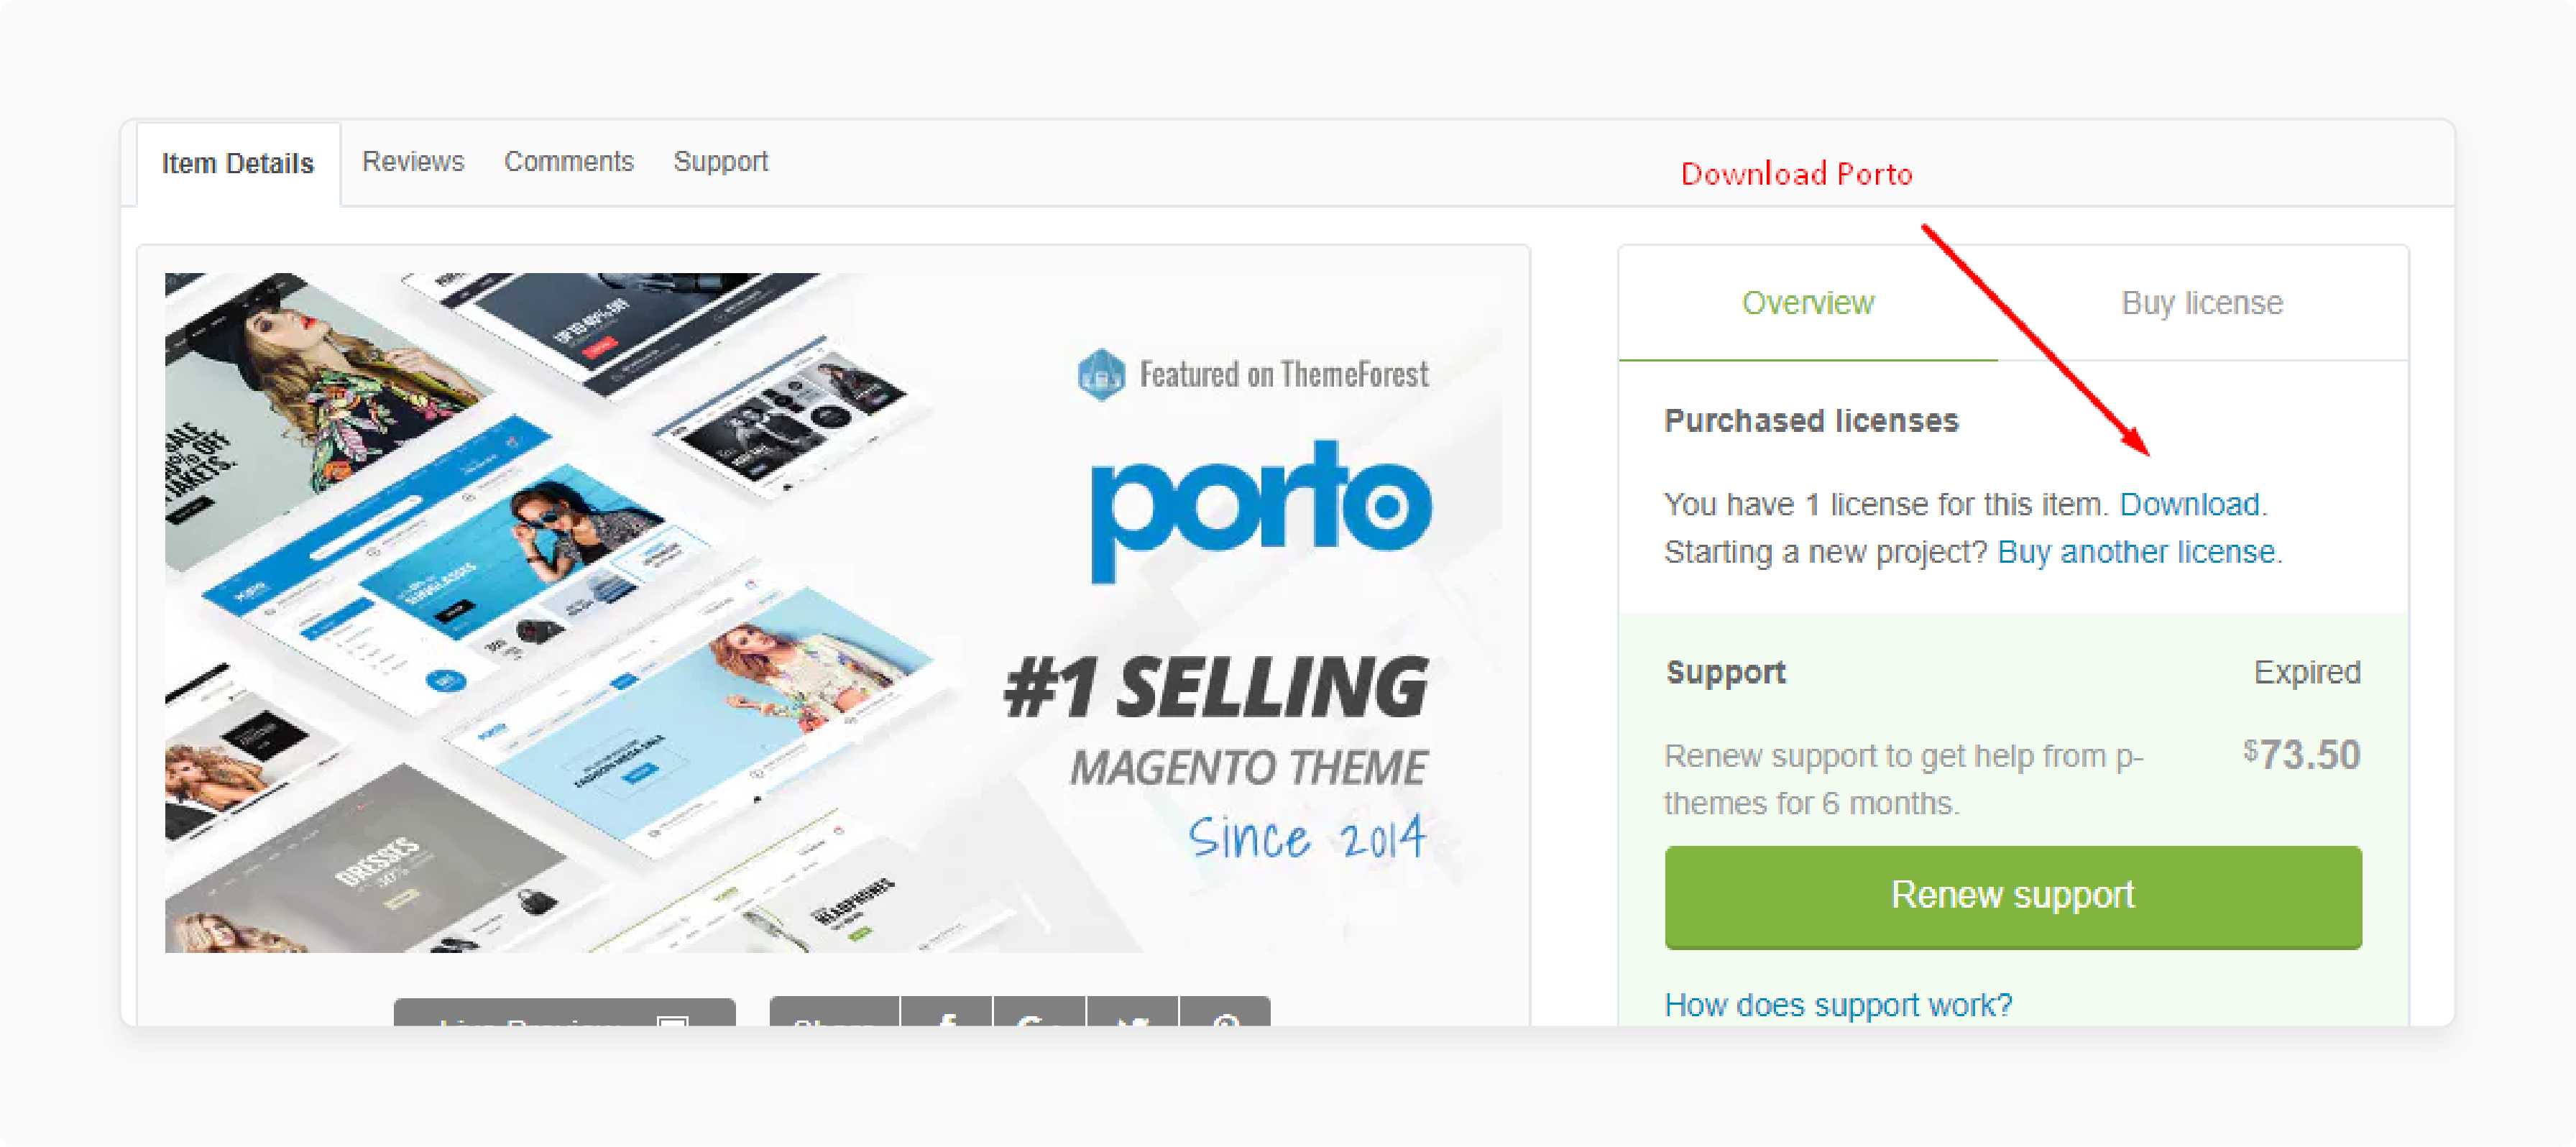
Download the theme archive file from the provider or marketplace.
-
Extract the archive to access the theme files.
2. Uploading Files
-
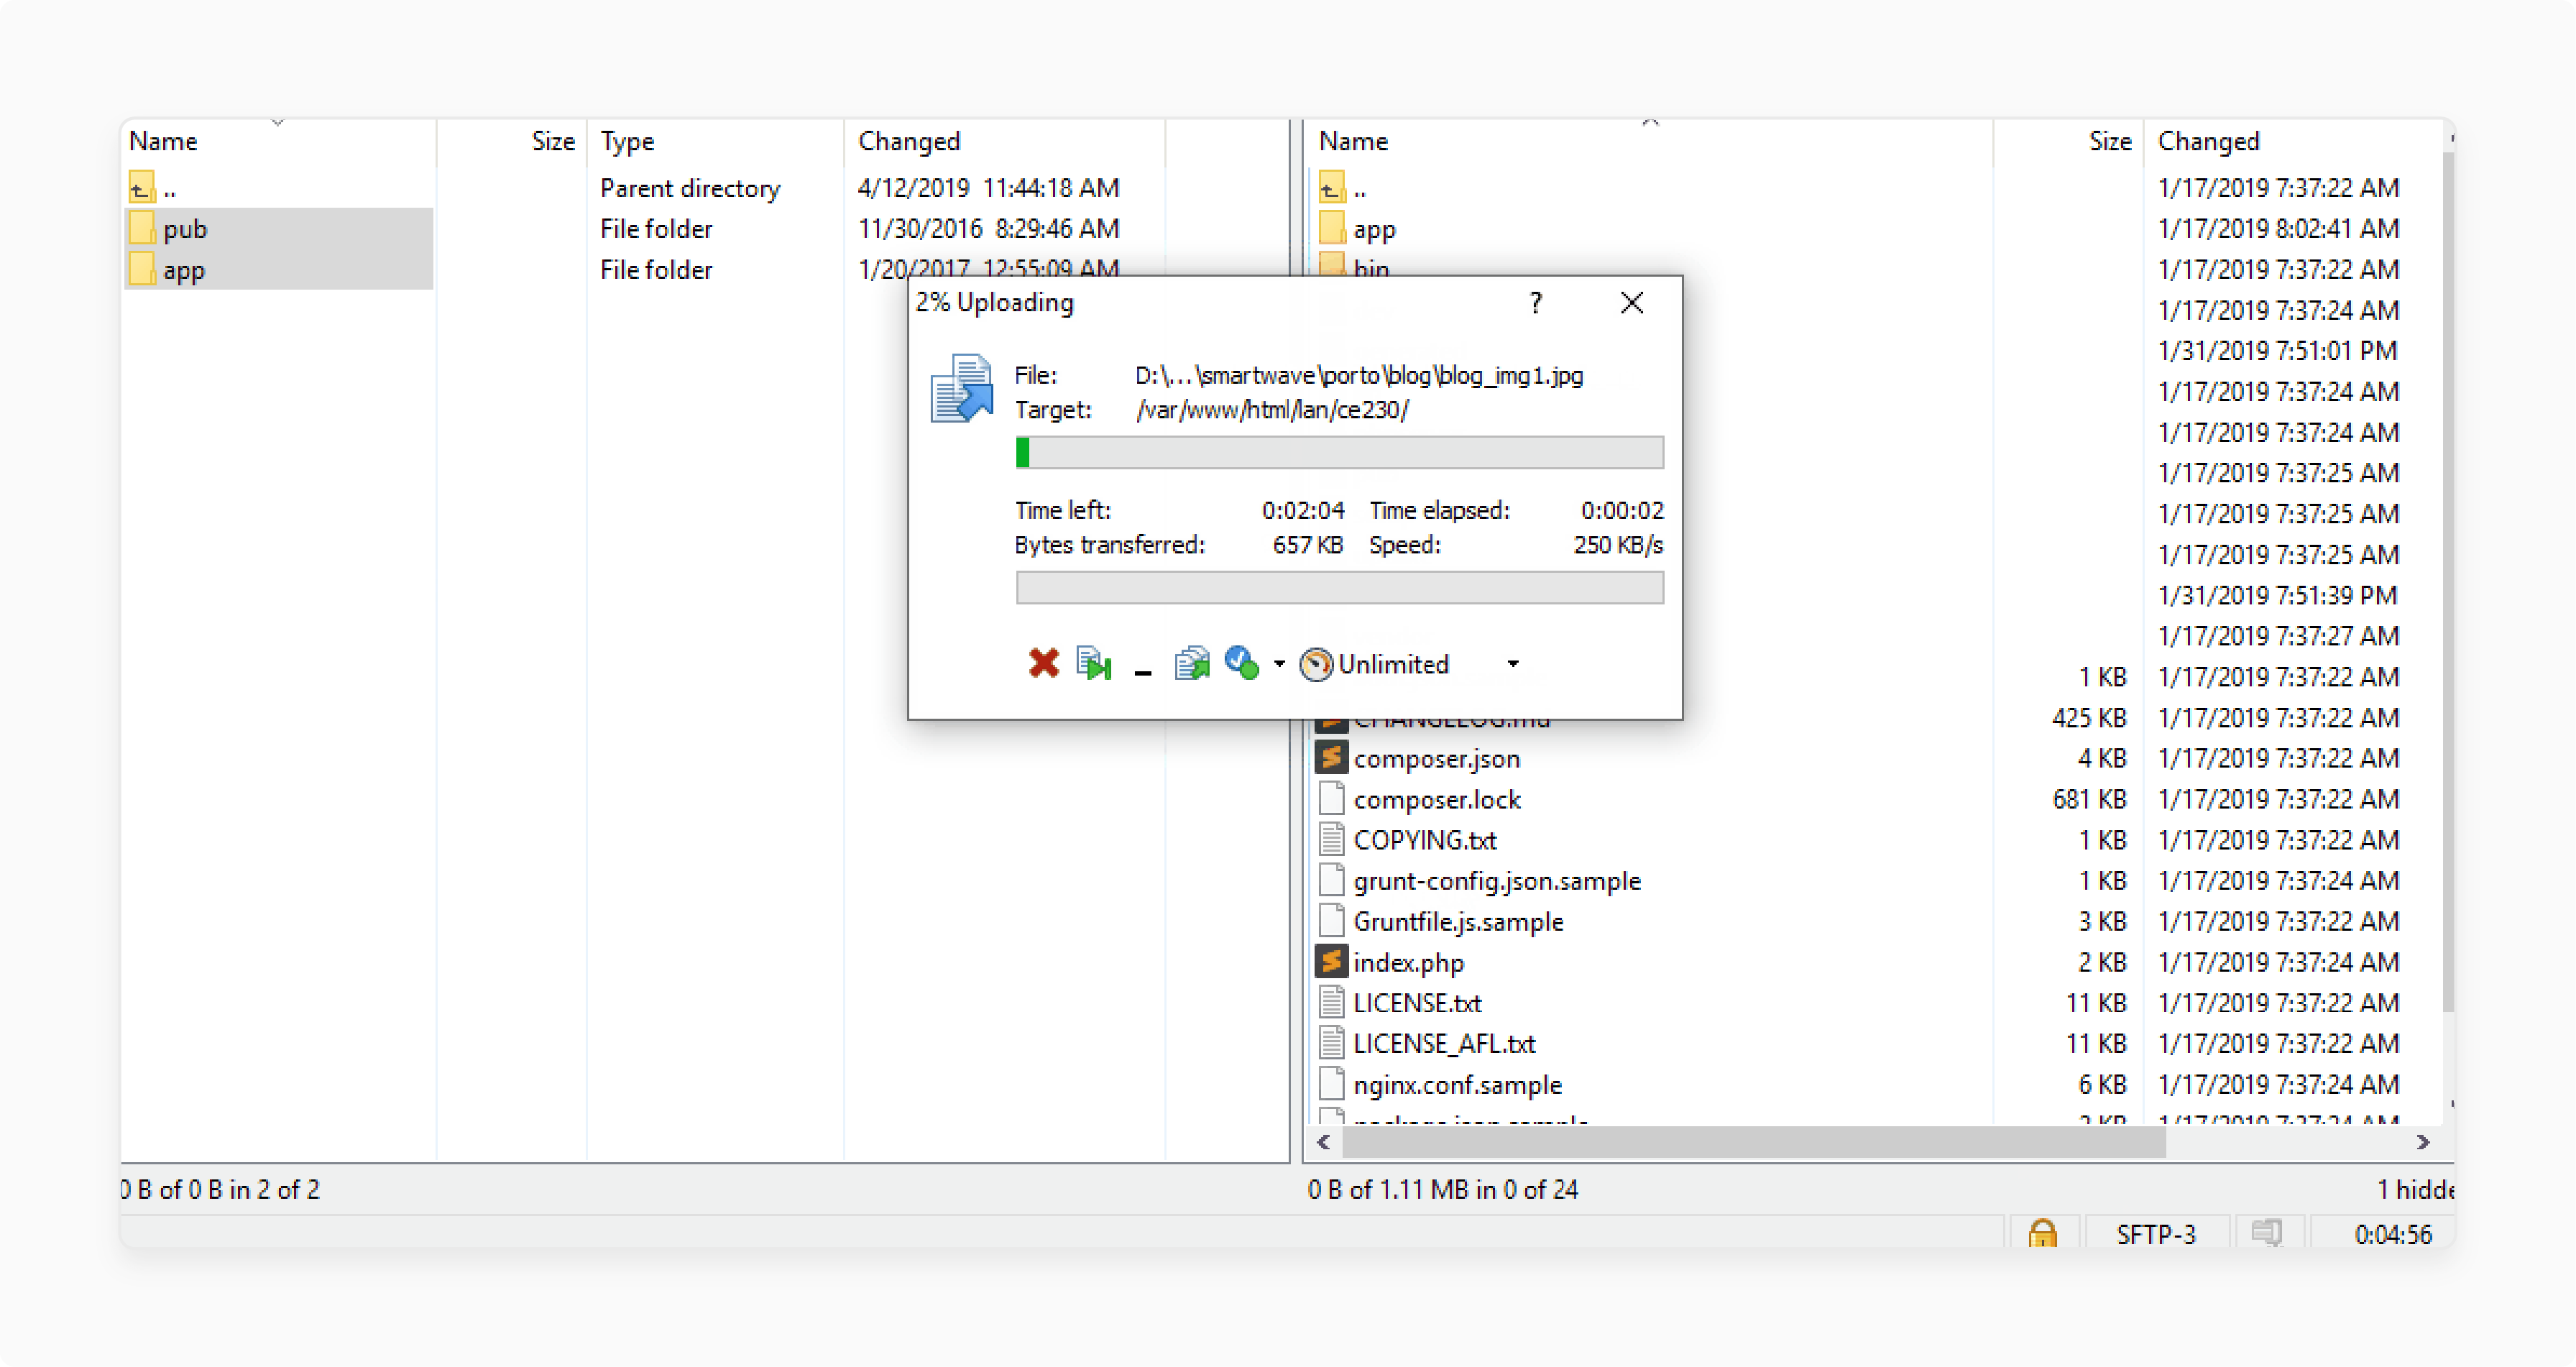
Locate the
appandpubdirectories in the extracted files. -
Use SFTP tools like to connect to your server.
-
Go to Magento root directory.
-
Upload the theme's
appandpubfolders to the root. Overwrite files if prompted.
3. Server Configuration
-
Connect to your server using SSH.
-
Log in with the Magento filesystem owner’s credentials.
-
Navigate to the Magento root using the
cdcommand.
Switch to developer mode:
php bin/magento deploy:mode:set developer
-
Delete contents of
generated/codeandgenerated/metadata.
4. Installing and Activating
Run setup upgrade:
php bin/magento setup:upgrade
Deploy static content:
php bin/magento setup:static-content:deploy -f
Disable maintenance mode:
php bin/magento maintenance:disable
-
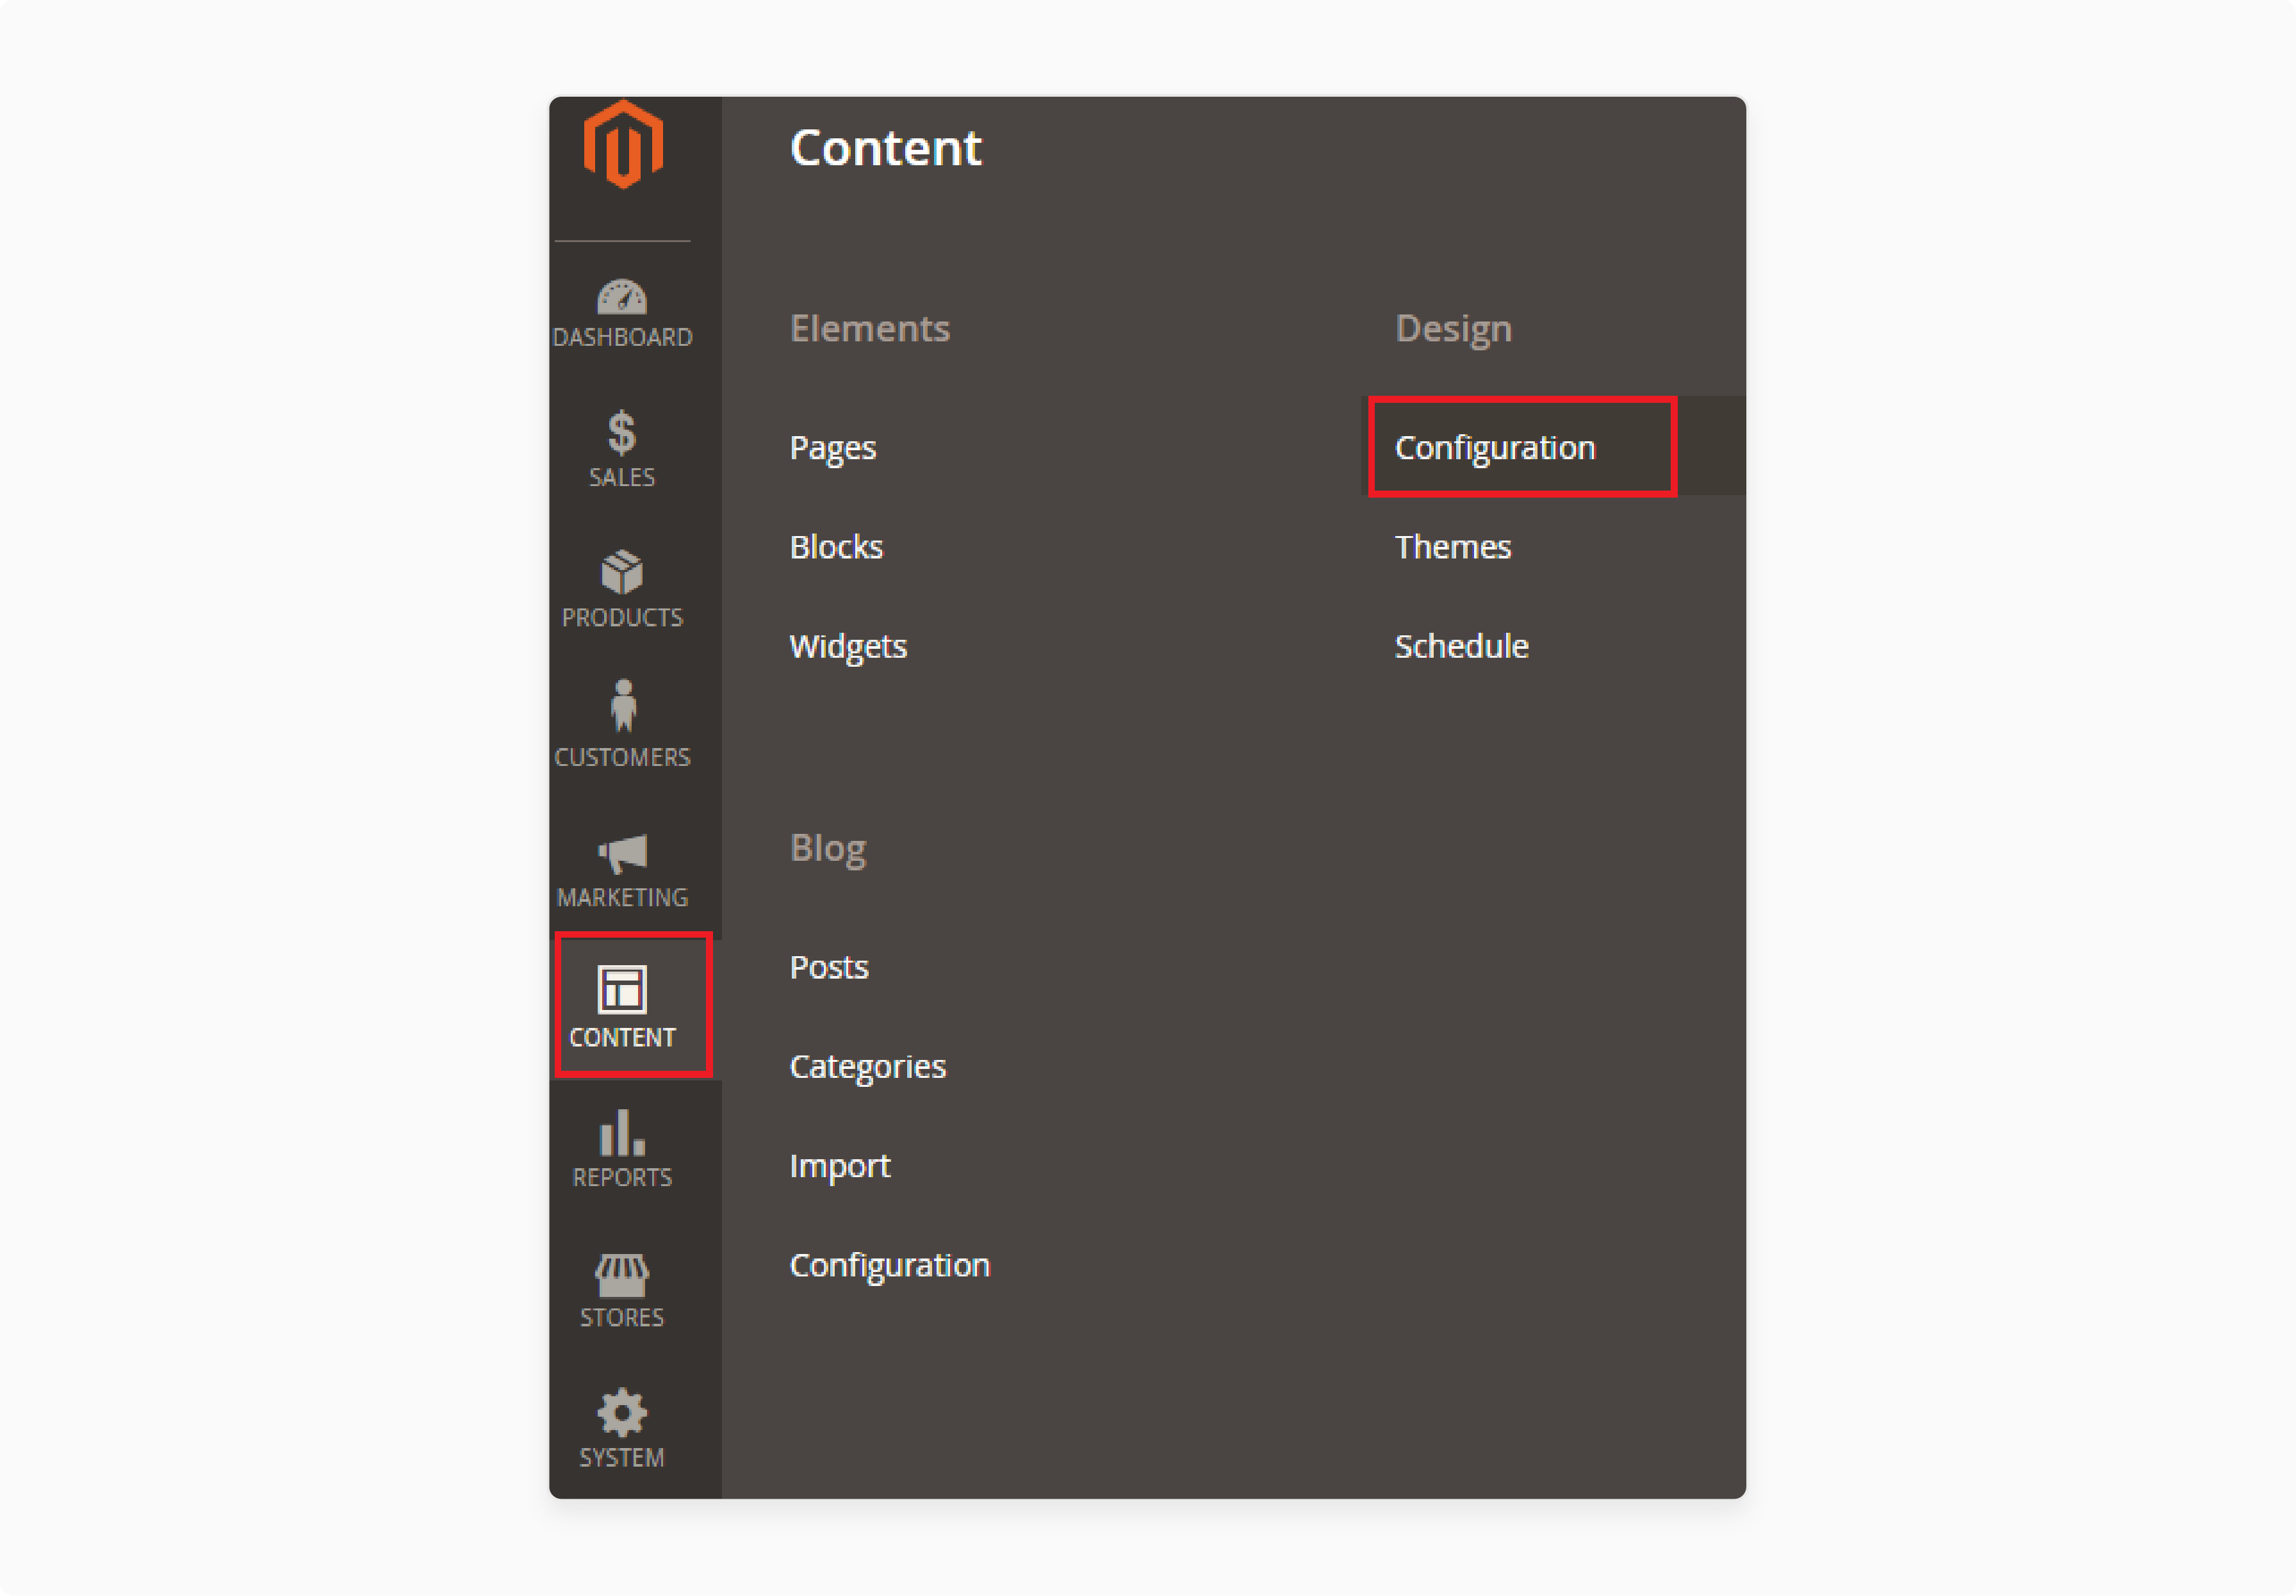
Log in to admin. Go to Content > Design > Configuration.
-
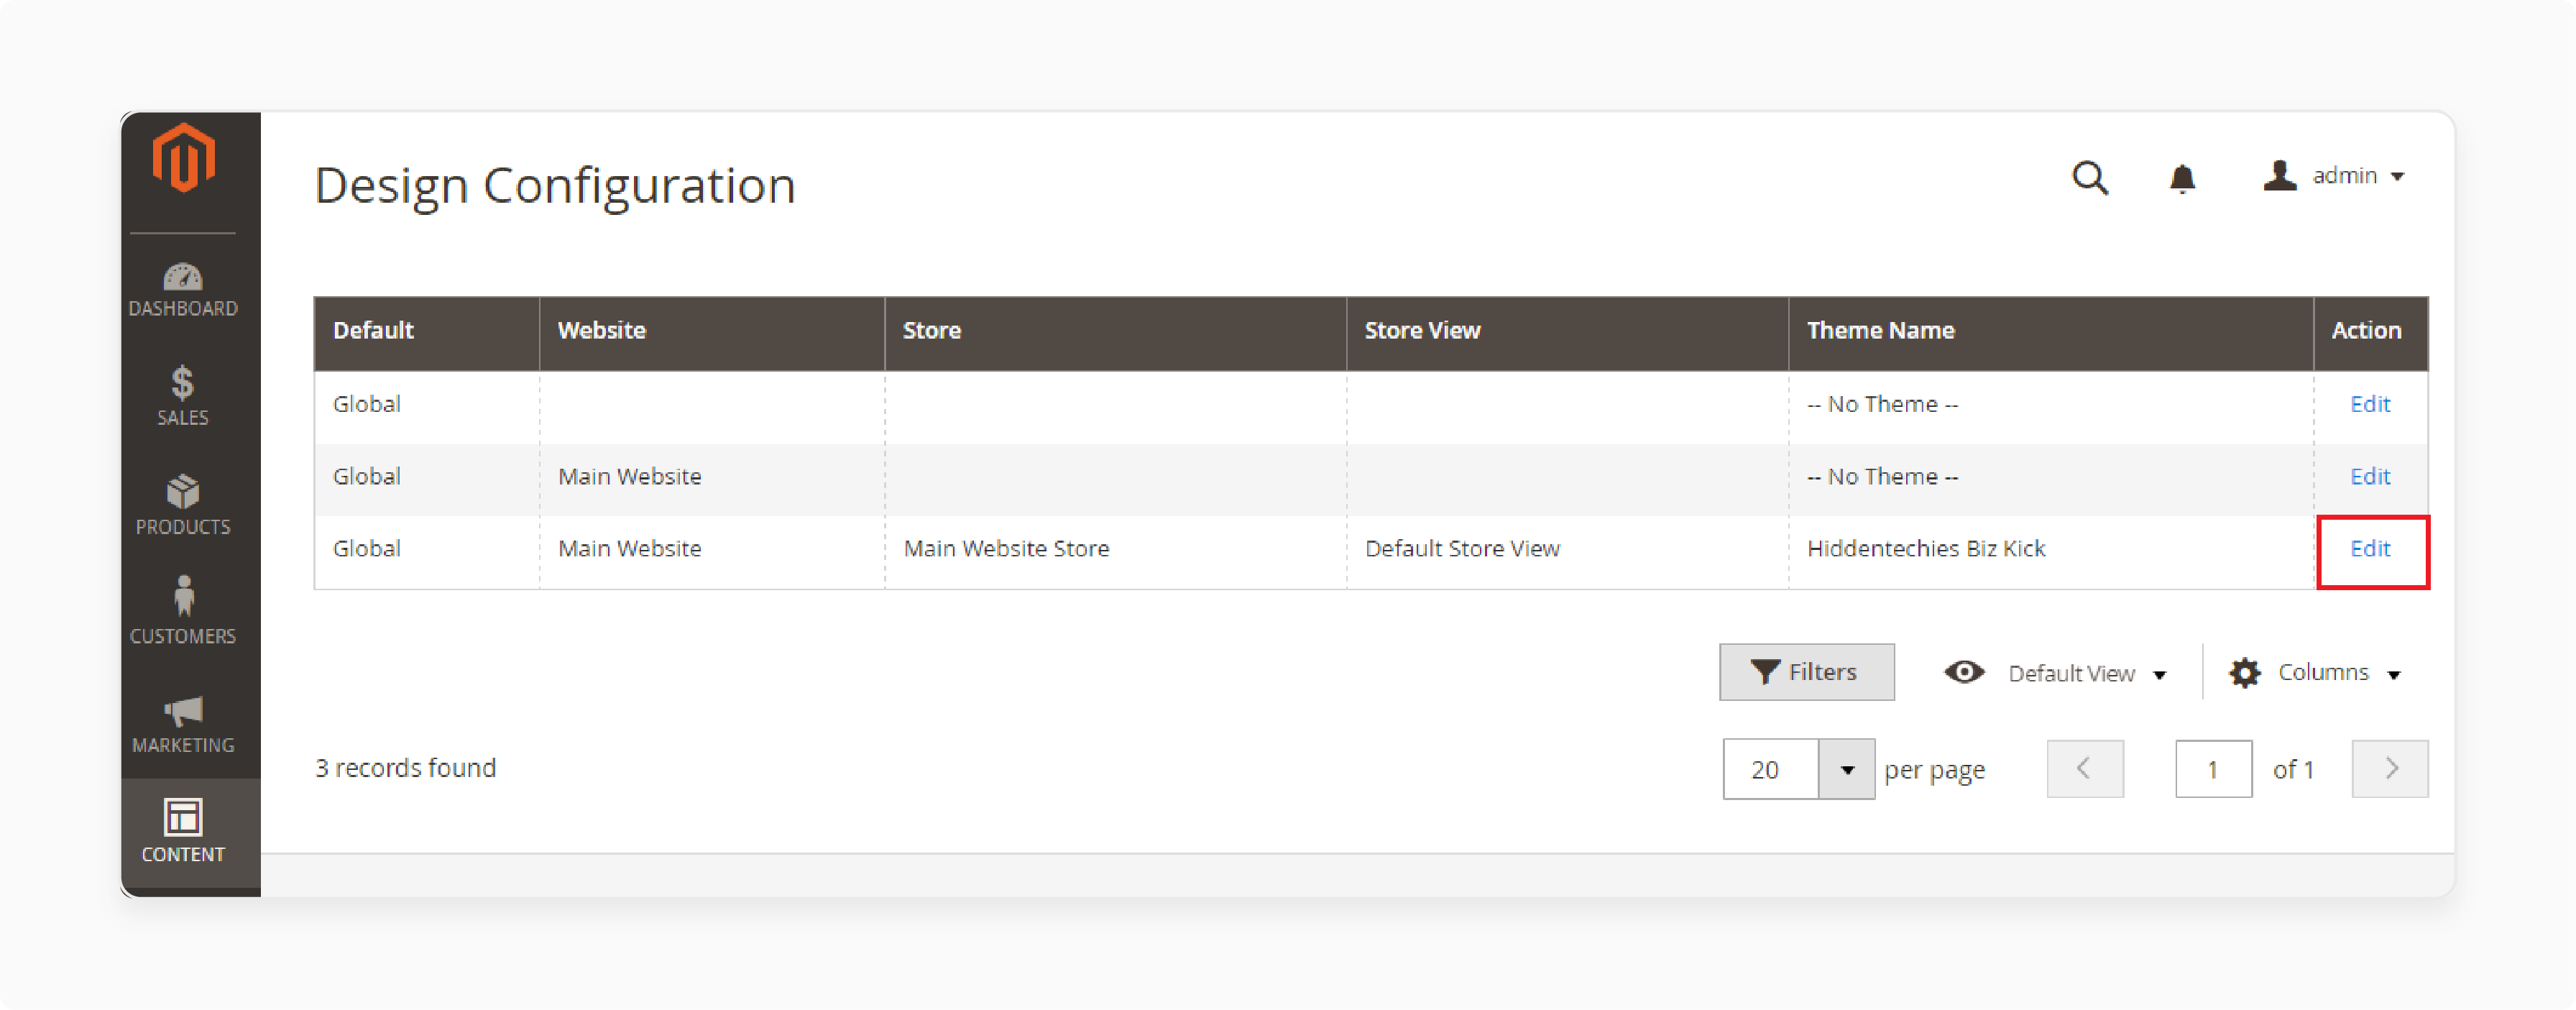
Select your store view and edit configuration.
-
Choose the new theme from the Applied Theme dropdown.
-
Save the configuration.
Method 2: Composer Installation
1. Prerequisites
-
Set Magento 2 in developer mode.
-
Get the theme's composer name and version from the provider.
2. Installation
- Open a terminal. Go to the Magento root directory.
Run composer require:
composer require <vendor>/<name>:<version>
- Wait for Composer to install the theme.
Run setup upgrade:
php bin/magento setup:upgrade
Deploy static content:
php bin/magento setup:static-content:deploy -f
- Check theme registration in Content > Design > Themes in the admin.
Method 3: Installing Hyvä Themes
1. Prerequisites
-
Use Magento 2.4.6 or higher with PHP 8.2.
-
Ensure your server supports Node.js 14+ and npm 6+.
2. Installation via Composer
-
Connect to the server as the Magento filesystem owner.
-
Go to the Magento root directory.
Run:
composer require hyva-themes/magento2-theme-module
composer require hyva-themes/magento2-default-theme
- Wait for Composer to install the theme and dependencies.
3. Configure and Activate
Run commands in this order:
php bin/magento setup:upgrade
php bin/magento setup:di:compile
php bin/magento setup:static-content:deploy -f
-
Go to Content > Design > Configuration in Magento admin.
-
Select your store view and click Edit.
-
Apply the Hyvä theme from the dropdown.
-
Save the configuration.
Clear the cache:
php bin/magento cache:clean
How to Configure Your New Magento Theme?
1. Customizing the Logo
- Go to Content > Design > Configuration in the admin panel.
- Click Edit for your store view.
-
Expand the Header section.
-
Upload your Magento logo image.
-
Set the logo width, height, and alt text.
-
Click Save to apply the logo changes.
2. Adjusting Theme Colors
-
Find your theme’s CSS files in
app/design/frontend/YourVendor/YourTheme/web/css. -
Open the CSS files.
-
Change the color values to match your brand palette.
-
For Hyvä themes, edit the
tailwind.config.jsfile. -
Update the color palette in that file.
-
Save the changes.
-
Clear the cache to see the updates.
3. Modifying Layout and Templates
-
Go to
app/design/frontend/YourVendor/YourTheme/Magento_Theme/layout. -
Open and edit the XML files.
-
Adjust the page layout and structure as needed.
4. Configuring Theme Settings
-
Some themes provide extra settings in the admin panel.
-
Go to Content > Design > Configuration.
-
Look for theme-specific options.
-
Adjust elements like fonts, sliders, or homepage sections.
-
Save the configuration.
-
Clear the cache to apply the updates.
5. Making Your Theme Better for SEO
- Enable URL rewrites at
Stores > Configuration > General > Web > Search Engine Optimization.

-
Add schema markup in your theme’s XML files.
-
Use it to improve rich snippets for products and content.
-
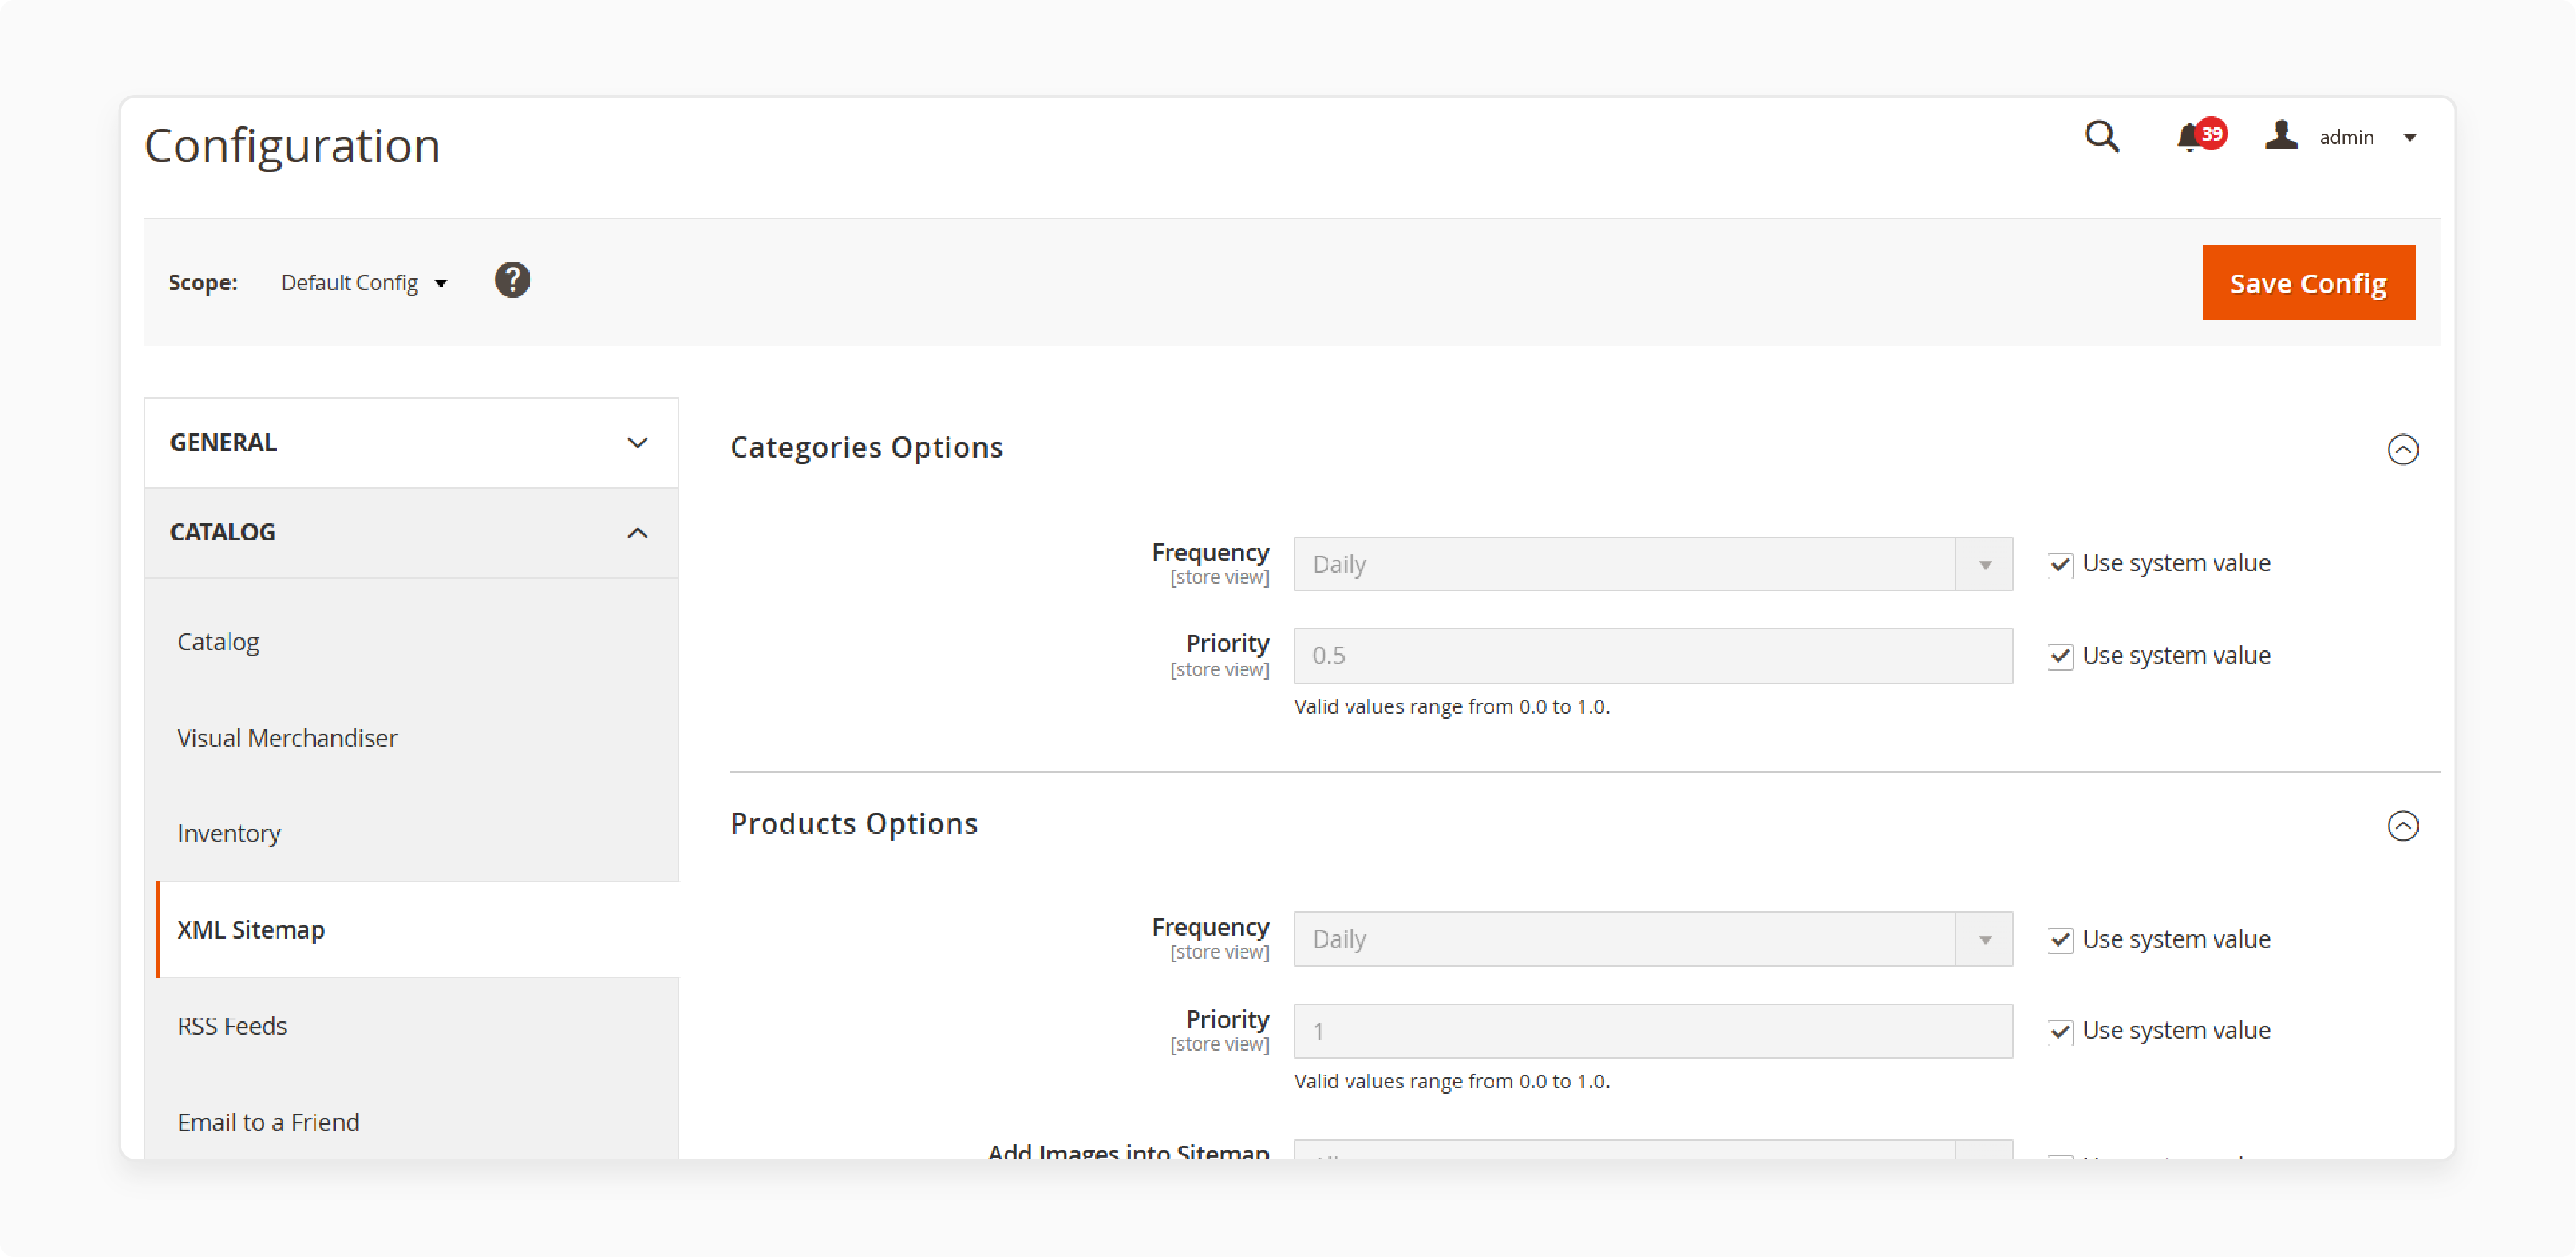
Set up XML sitemaps at
Stores > Configuration > Catalog > XML Sitemap.
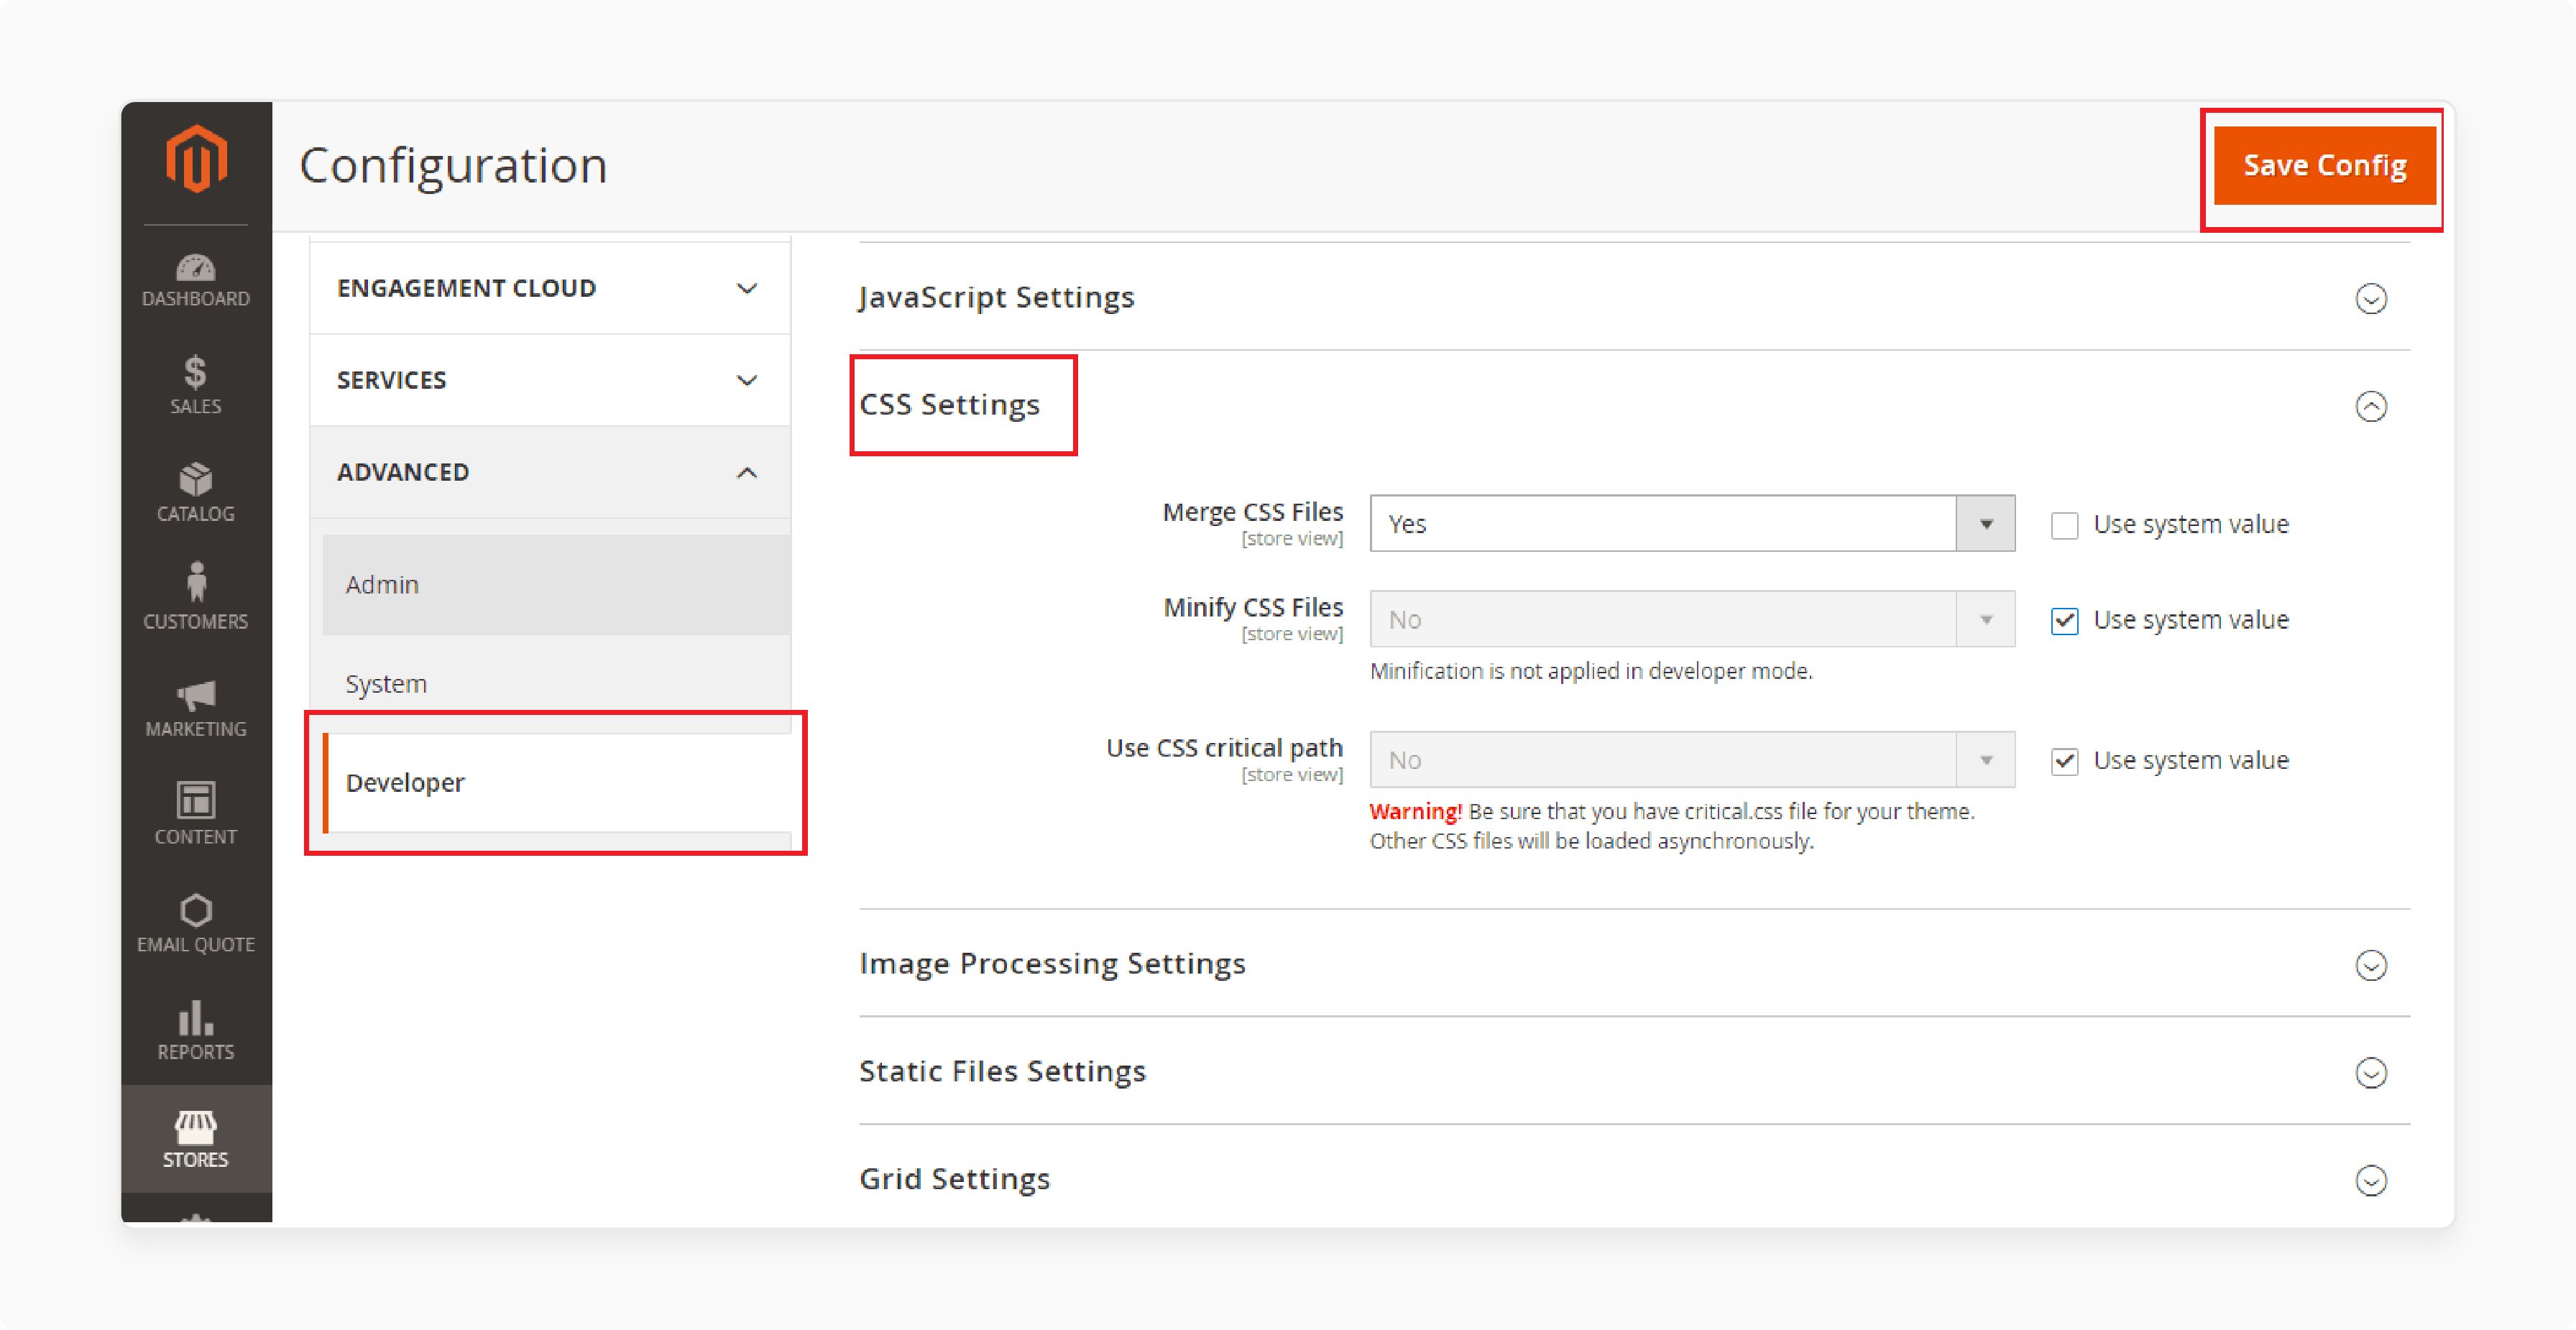
- Minify CSS and JavaScript files under
Stores > Configuration > Advanced > Developer > CSS/JavaScript Settings.
- Use Hyvä’s light frontend to boost Core Web Vitals scores.
Tips to Choose the Right Theme for Your Magento 2 Store
| Tip | Description |
|---|---|
| 1. Compatibility | Check if the theme supports your Magento version. Confirm support for PHP 8.2. Read the documentation. Ask the vendor if needed. |
| 2. Responsiveness | Choose a responsive theme. Make sure it fits desktops, tablets, and phones. Mobile-first themes help with Google's indexing. |
| 3. Performance | Pick a fast-loading theme. Look for clean code and fewer HTTP requests. Use themes with built-in caching. Try Hyvä for better speed. |
| 4. PWA Support | Use a theme with Progressive Web App (PWA) features. Pick options like ScandiPWA or Hyvä. PWA allows faster loading and offline browsing. |
| 5. Customization | Choose a theme with strong customization options. Align it with your brand and products. Some themes include AI layout tools. |
| 6. Support and Ratings | Select a theme with good reviews. Check the vendor’s support. Look for a complete setup and user guides. |
How to Test Theme Functionality After Installation?
| Testing Category | Testing Actions | Details |
|---|---|---|
| Cross-Browser Testing | Test your Magento 2 store on all major browsers. Use browser developer tools. | Check the theme on Chrome, Firefox, Safari, and Edge. Ensure the layout and features work on each browser. Fix any issues. |
| Mobile Responsiveness | Test the theme on different mobile devices and screen sizes. Simulate viewports in dev tools. | Make sure the theme fits smartphones and tablets. Check navigation and mobile display. Confirm it gives a smooth user experience. |
| Functionality Testing | Check all core features of your Magento 2 store. | Test product pages, cart, checkout, and customer accounts. Verify that third-party extensions work. Ensure the theme does not break core functions. |
| Performance Testing | Measure speed using tools like Google PageSpeed Insights or GTmetrix. | Check Core Web Vitals like LCP, FID, and CLS. Compare performance before and after the theme. Identify slow areas and fix them. |
FAQs
1. Why Pick Hyvä Themes for Magento 2?
Hyvä themes make Magento sites faster. They load up to 50% quicker than Luma themes. They use less JavaScript. They work with Tailwind CSS for styling. They follow a mobile-first design. A 2024 case study showed a fashion store increased sales by 20% after switching to Hyvä. Faster page loads caused the growth. Hyvä themes also support Magento 2.4.7 and PHP 8.2.
2. What Should I Check After Applying a New Theme to My Magento Store?
Check the theme's functionality on all pages. Ensure it works on mobile devices. Confirm that your Magento SEO settings are in place. Test how the theme interacts with your Magento extensions and plugins. If you use Hyvä, check that Tailwind CSS does not conflict with other styles.
3. How Does Installing a Professional Theme Like Porto Theme Impact My Magento Store?
A theme like Porto can slow your site if not optimized. Heavy files or complex layouts can raise the bounce rate. But when you configure it well, Porto improves the user experience. It also enhances your site's visual appeal. A well-installed Porto theme can help grow sales and improve customer engagement.
4. Can I Install a Magento Theme on a Shopify Store or Use Adobe Plugins with It?
Magento themes are for Magento only. You cannot install them on Shopify. You cannot use them with Adobe software. Magento, Shopify, and Adobe use different technologies. But you can find similar themes and plugins in their own marketplaces.
5. What Are the Best Practices for Ensuring a Smooth Theme Installation on Magento?
Keep your Magento installation up to date. Always back up your data before you start. Use a tool like FileZilla to move files to the Magento directory. Follow the user guide to complete the installation. Make sure the theme supports your version of Magento.
Summary
Being aware of how to install theme in Magento 2 improves e-store’s design and performance. Follow these steps to set up your theme the right way:
-
Smart Preparation: Back up your store and check theme compatibility.
-
Theme Selection Tips: Choose a fast, mobile-ready theme with PWA support.
-
Easy Installation Options: Use Composer, FTP, or Hyvä steps to install.
-
Quick Configuration: Change logo, colors, layout, and improve SEO.
-
Testing Essentials: Test on browsers, mobile, and check loading speed.
Use managed Magento hosting to make theme installation faster and easier on estores..


