
The Ultimate FishPig WordPress Magento 2 Integration Guide
Looking to integrate your WordPress blog with Magento seamlessly? FishPig WordPress Magento 2 allows you to connect your WordPress & Magento stores effortlessly.
This tutorial will cover how to install and configure the settings of FishPig's extension for WordPress and Magento integration.
Key Takeaways
- Customization and troubleshooting tips to allow seamless WordPress and Magento integration.
- Manage content with WordPress while providing a unified shopping experience in Magento.
- Improve SEO and enhance user experience by streamlining operations.
- Steps to ensure a smooth setup that maximizes the benefits of both platforms.
- Flexible setup options, including separate server installation.
- Provide support for WordPress SEO, shortcodes, and widgets.
-
Tools And Extensions For Optimizing Magento WordPress Integration Using FishPig
-
Customization Of Magento 2 WordPress Using The FishPig Theme
-
Security Considerations For Magento And WordPress Integration With FishPig
Key Features Of FishPig Module For Magento Site
1. Single sign-on
Customers can use the same login credentials for both Magento and WordPress. It simplifies their experience by reducing cart abandonment and increasing engagement. It allows customers to:
- Access both platforms without repeatedly logging in.
- Maintain consistent user roles and permissions across platforms.
- View personalized content based on their Magento customer group.
- Seamlessly transition between shopping and blog content.
2. Unified theme integration
Connect your Magento theme with your WordPress website. It maintains a consistent design across both platforms.
The integration ensures that both platforms maintain a consistent visual design. It allows you to use the same fonts, colors, and layout on Magento and WordPress. It gives your customers a seamless experience as they navigate between your store and your blog.
A unified theme enhances user experience and strengthens brand identity. It ensures every part of your online presence looks and feels cohesive. It helps build trust with your audience when they move between your eCommerce site and blog content.
3. Automatic URL synchronization
Ensure compatibility of URLs between Magento and WordPress. It eliminates potential discrepancies by automatically handling URL structure synchronization by:
- Maintaining consistent URL patterns across both platforms.
- Preserving SEO value through proper "301 redirects" when URLs change.
- Preventing duplicate content issues that could harm search rankings.
- Allowing WordPress posts to inherit your Magento store's URL structure.
4. Easy installation
A straightforward process of integration allows FishPig to be smoothly integrated into your existing Magento store.
The setup involves downloading and installing the FishPig extension. You need to configure basic settings and run a few commands in Magento's command line interface. The well-documented installation steps help reduce potential errors. It allows even those with minimal technical experience to complete the integration efficiently.
It ensures that you can quickly start using the integration without extensive troubleshooting. This ease of use saves valuable time and resources. It enables you to focus on optimizing your store rather than spending excessive time on setup.
5. Support for WordPress shortcodes and page builders
Use popular WordPress tools like shortcodes and page builders. Implement them directly within your Magento environment.
Shortcodes enable you to add dynamic content to your pages quickly. For example, forms, image galleries, or product showcases. Page builders like Elementor or WPBakery make it easy to create custom layouts using a simple drag-and-drop interface. It gives you complete control over the design of your content. You can create rich, engaging content that seamlessly integrates with your Magento store.
6. Third-party plugin compatibility
Support popular plugins like Advanced Custom Fields (ACF) and WooCommerce. It provides additional customization options for your integrated site.
Supported Plugin Categories
| Plugin Type | Examples | Integration Features |
|---|---|---|
| SEO Tools | Yoast SEO, Rank Math | Metadata sync, XML sitemaps, Schema markup |
| Page Builders | Elementor, WPBakery | Visual editing, Custom layouts, Dynamic content |
| Custom Fields | ACF Pro, Pods | Custom data types, Flexible content, Meta boxes |
| Media Management | EWWW, Smush | Image optimization, Gallery integration |
| Forms | Gravity Forms,WPForms | Form building, Data collection |
7. Efficient content management
Manage blog posts, products, categories, and pages efficiently within a unified platform.
Content Organization Structure
| Content Type | Management Features | Integration Benefits |
|---|---|---|
| Blog Posts | Centralized editing, Scheduling, Categories | Seamless product linking |
| Products | Cross-platform visibility, Dynamic pricing | Blog content integration |
| Categories | Unified taxonomy, Hierarchical structure | Consistent navigation |
| Pages | Template consistency, URL management | Unified user experience |
8 Steps To Integrate WordPress And Magento 2 Using FishPig
Step 1: Prerequisites for FishPig WordPress Integration
- You'll need to have Magento 2.x installation, WordPress 5.x installation, and FishPig WordPress Integration module.
- A basic Magento 2 experience with WordPress fundamentals is required. You'll also need to have a basic understanding of the Magento theme system.
- Ensure Magento 2 is running properly.
- Verify that the WordPress installation is working.
- Check both platforms can operate independently.
- Confirm your Magento store version is supported.
- Verify that the WordPress version meets specific requirements.
- Ensure your server meets technical specifications.
Step 2: Download the Latest Version of WordPress
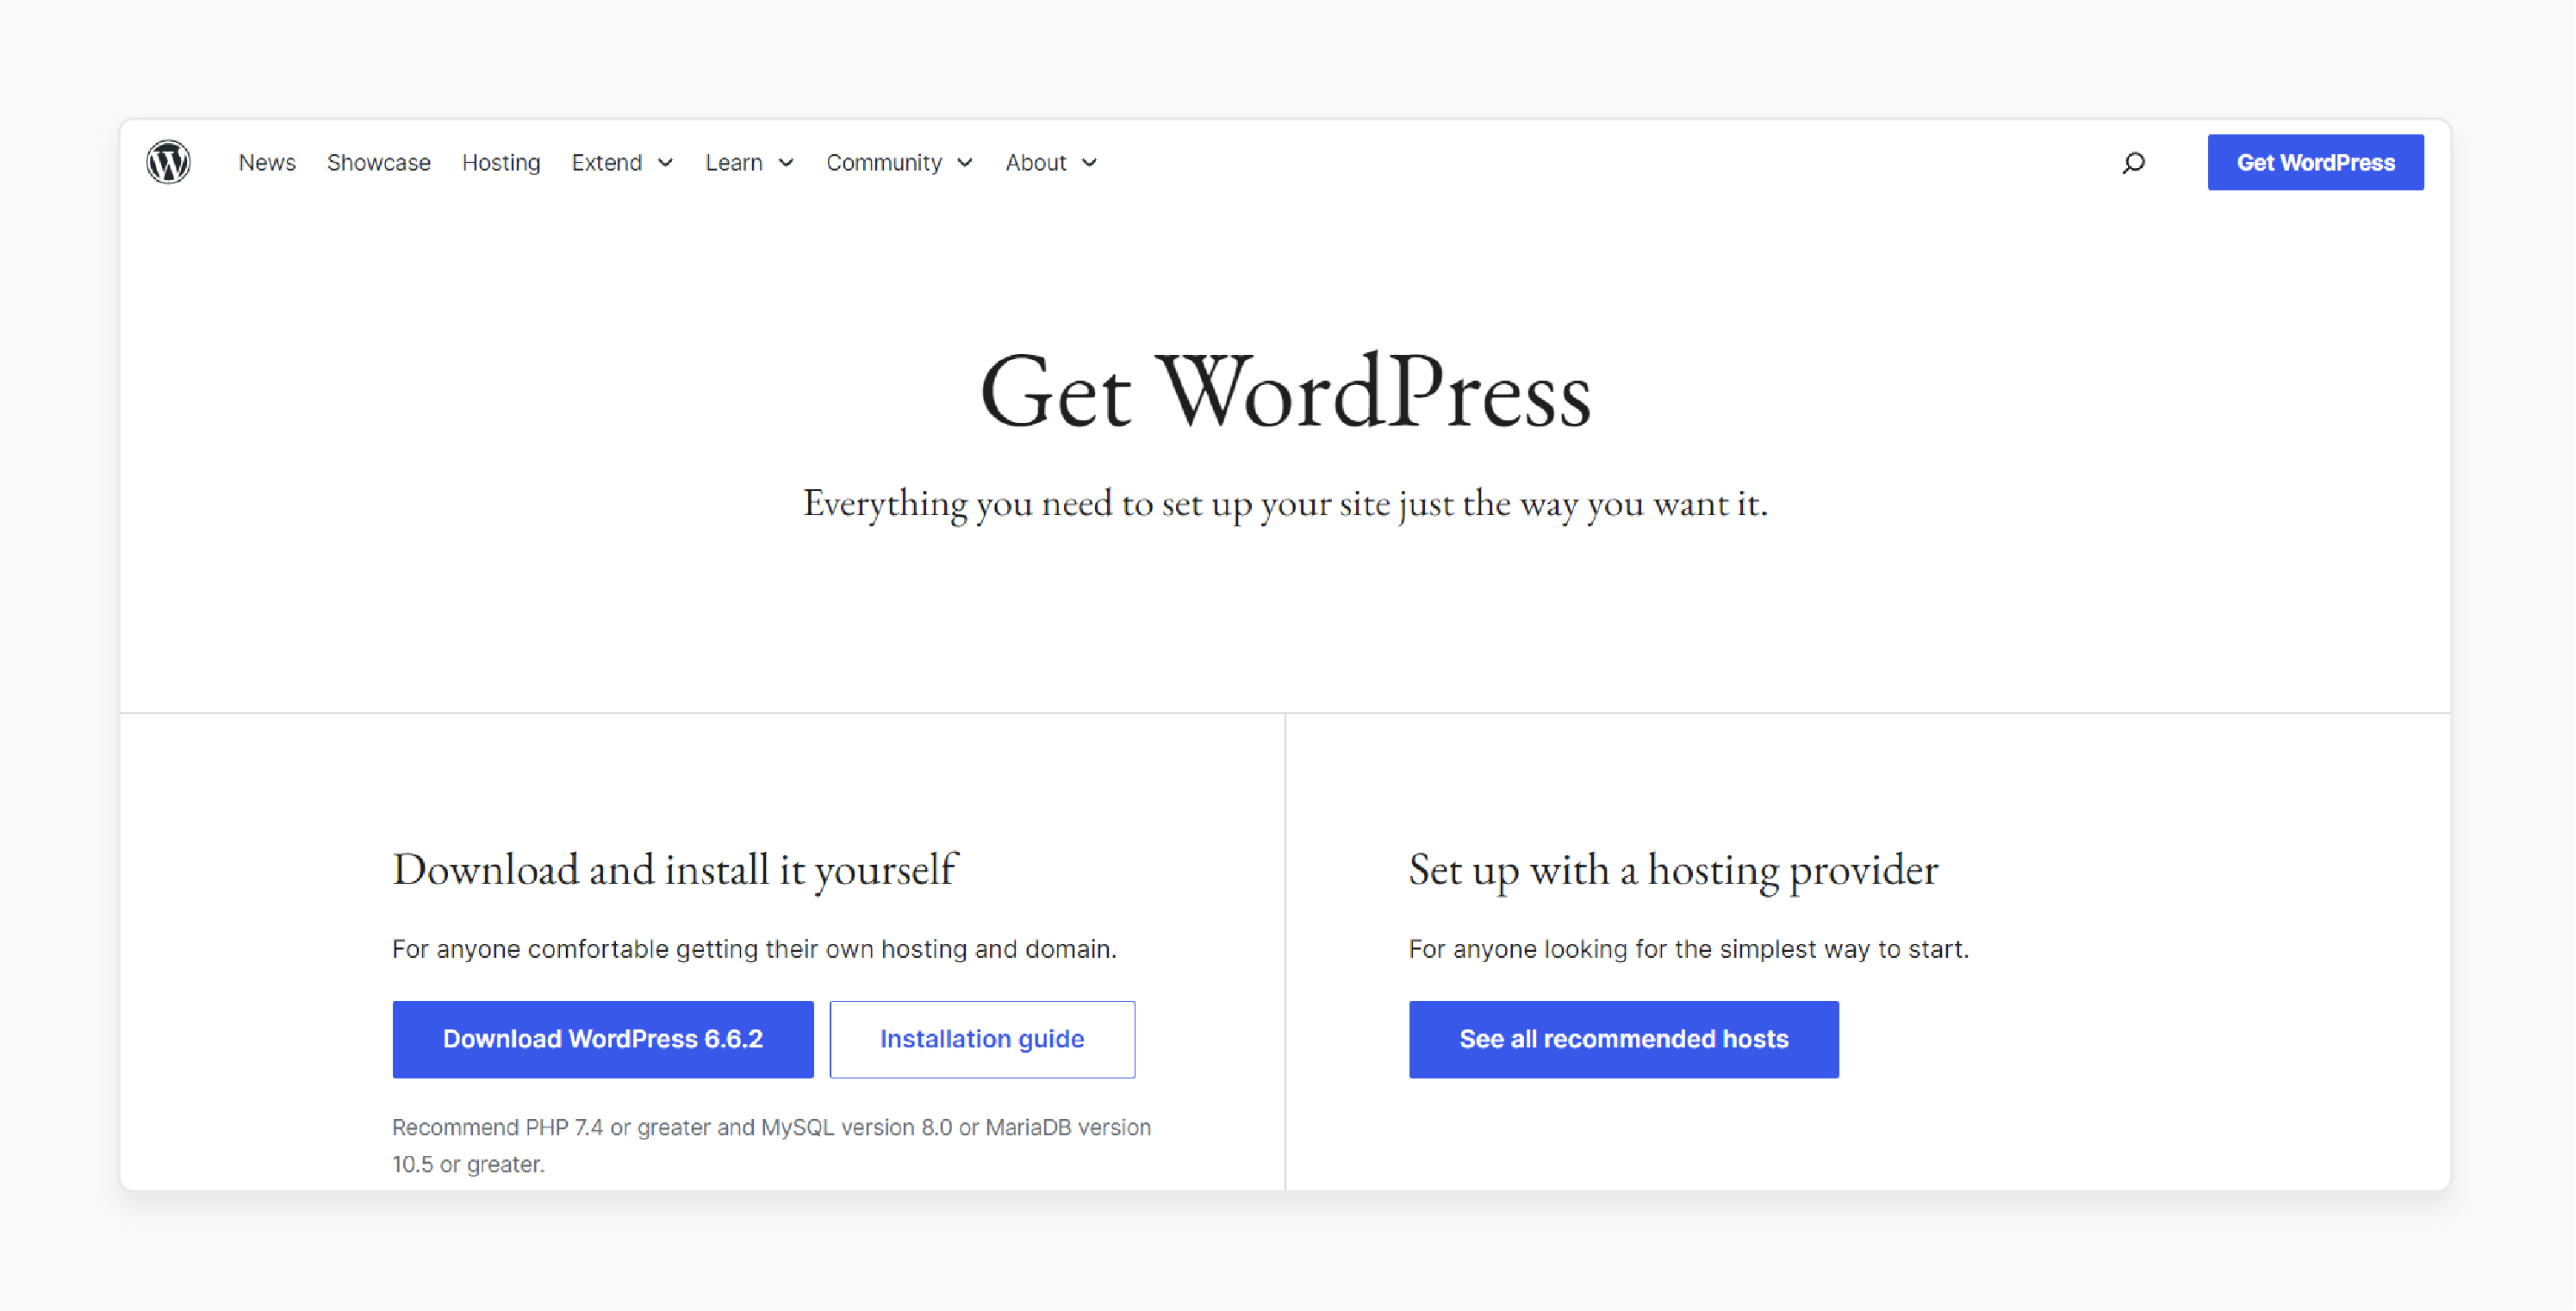
- Go to WordPress.org and download the latest version of WordPress.
- Choose a location (like "wordpress" or "blog") in your root directory.
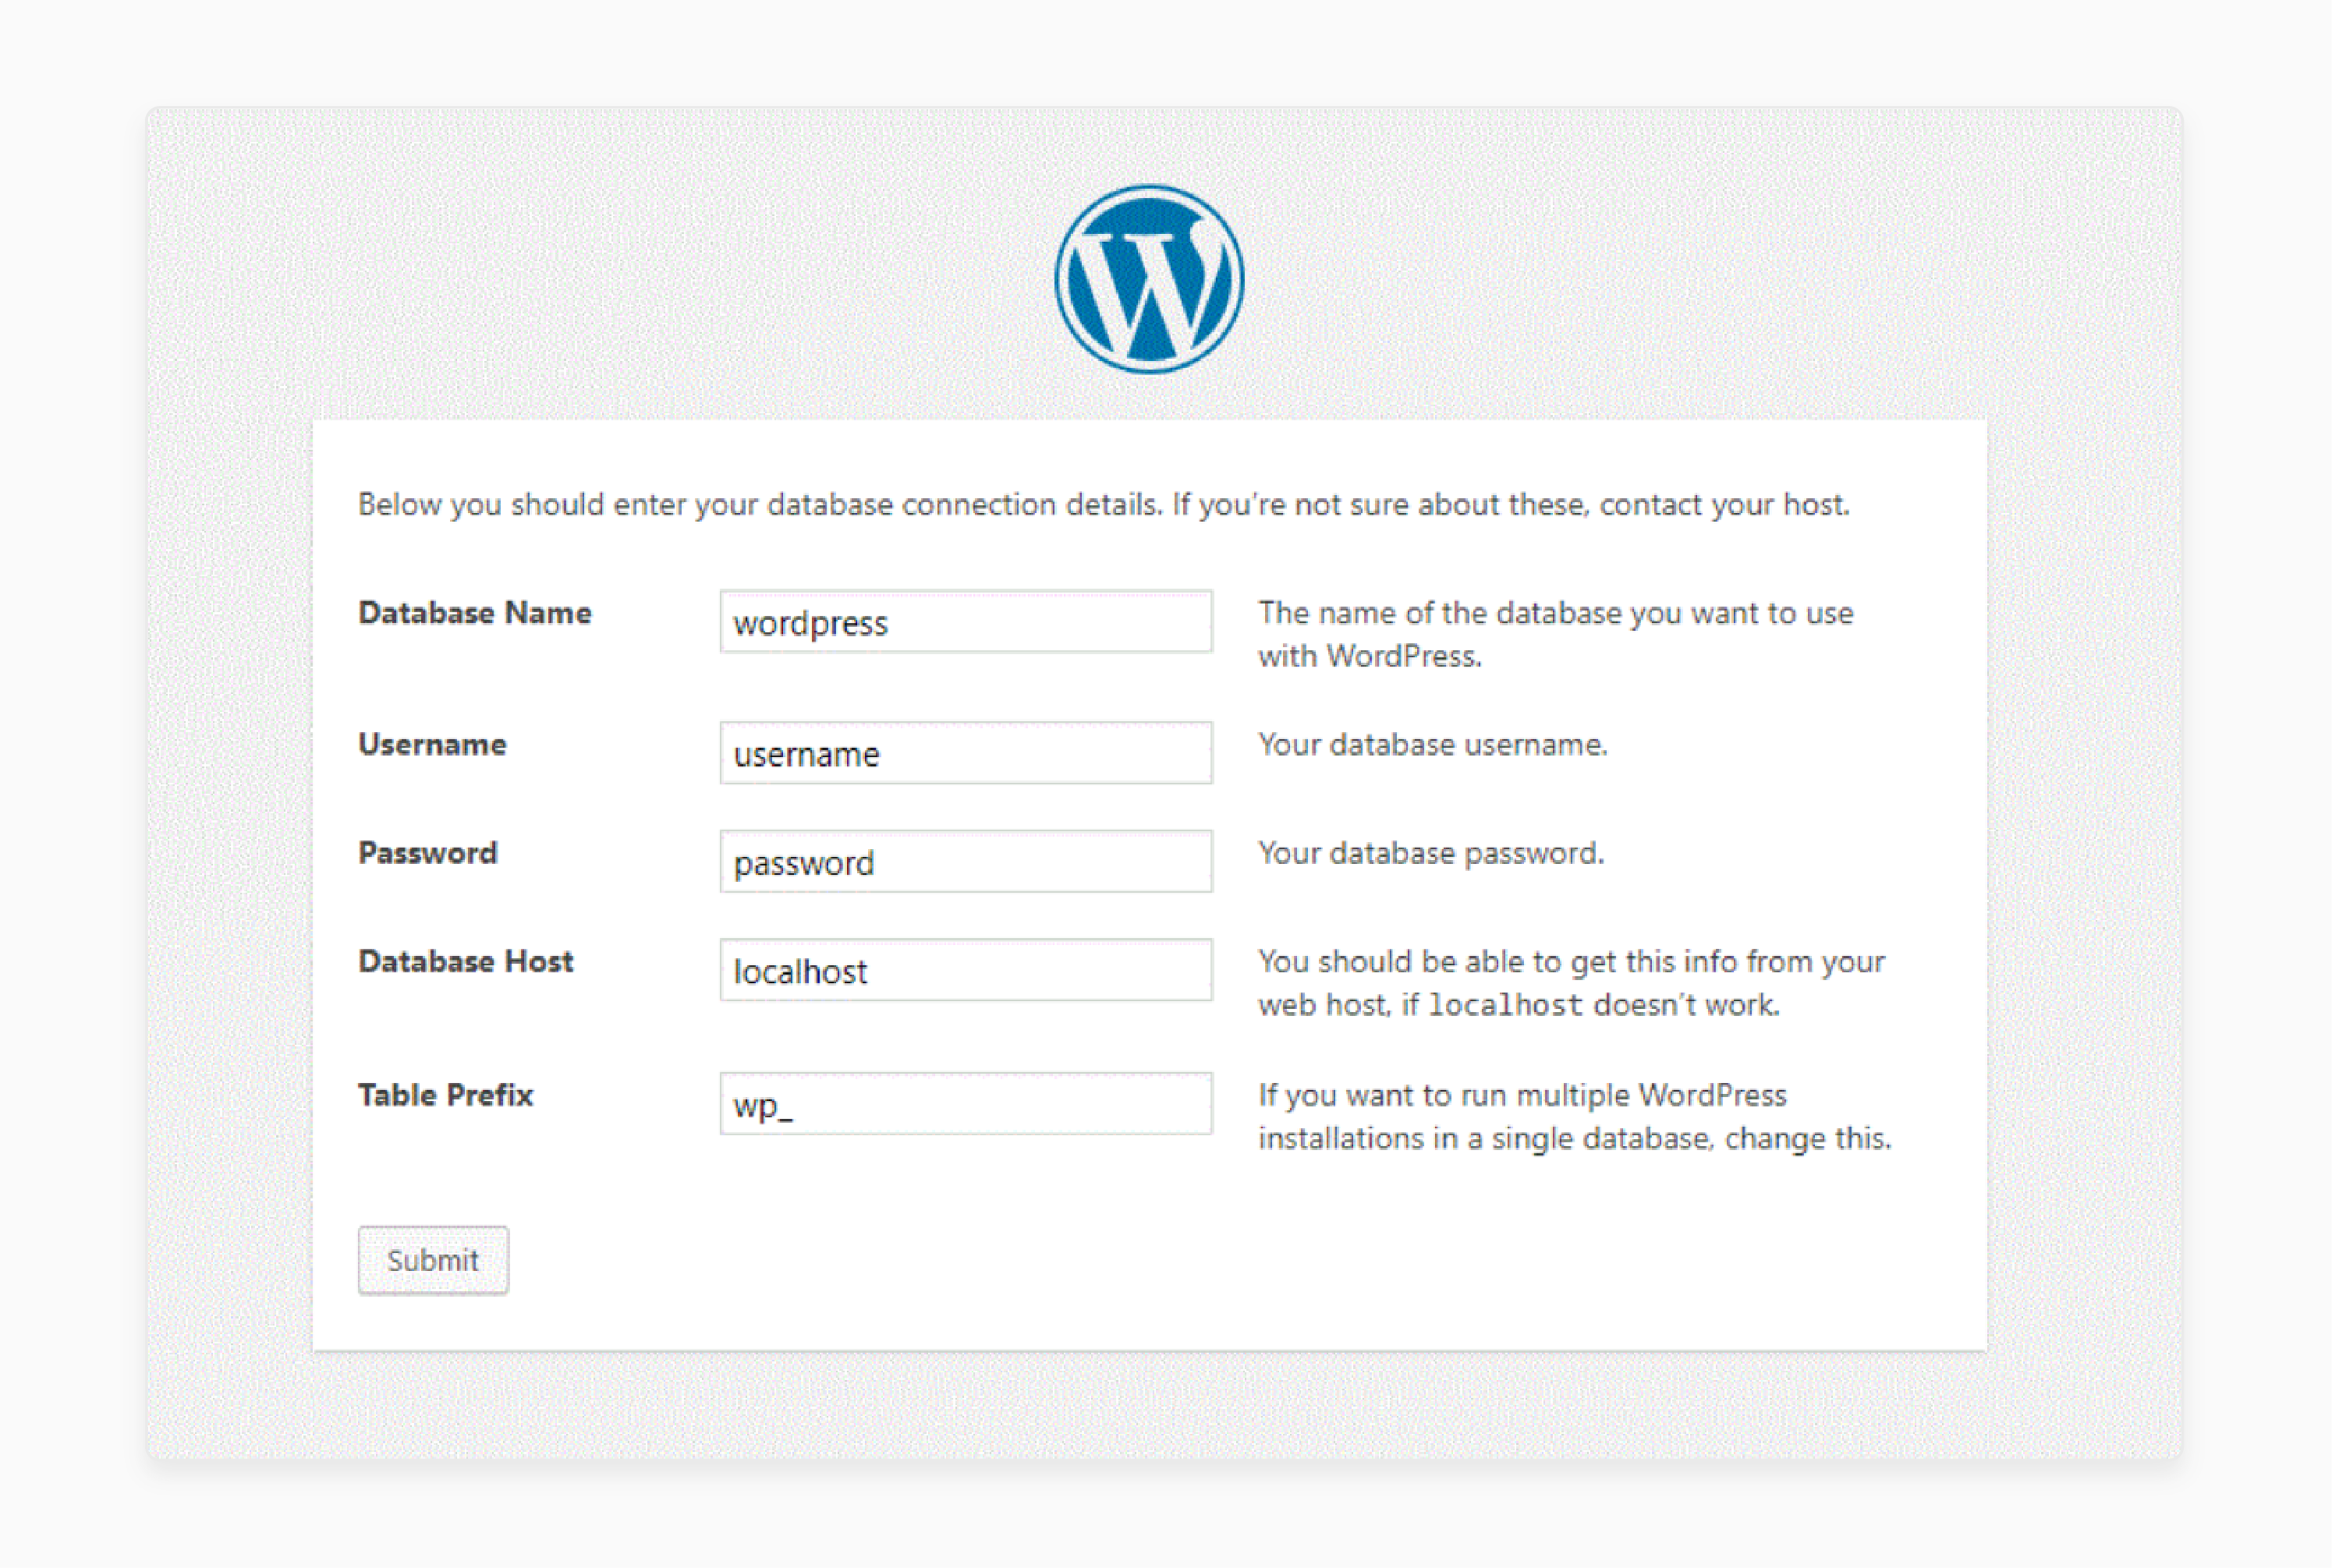
- Create a new WordPress database.
- Save your database credentials.
- Configure table prefix for security.
- Run the WordPress installation wizard.
- Set up admin username and password.
- Configure your WordPress address.
- Set up SEO-friendly permalinks.
- Install Yoast for WordPress SEO.
- Configure page content settings.
- Create strong admin passwords.
- Set user roles and permissions.
- Update the security settings.
Step 3: Install FishPig WordPress Integration
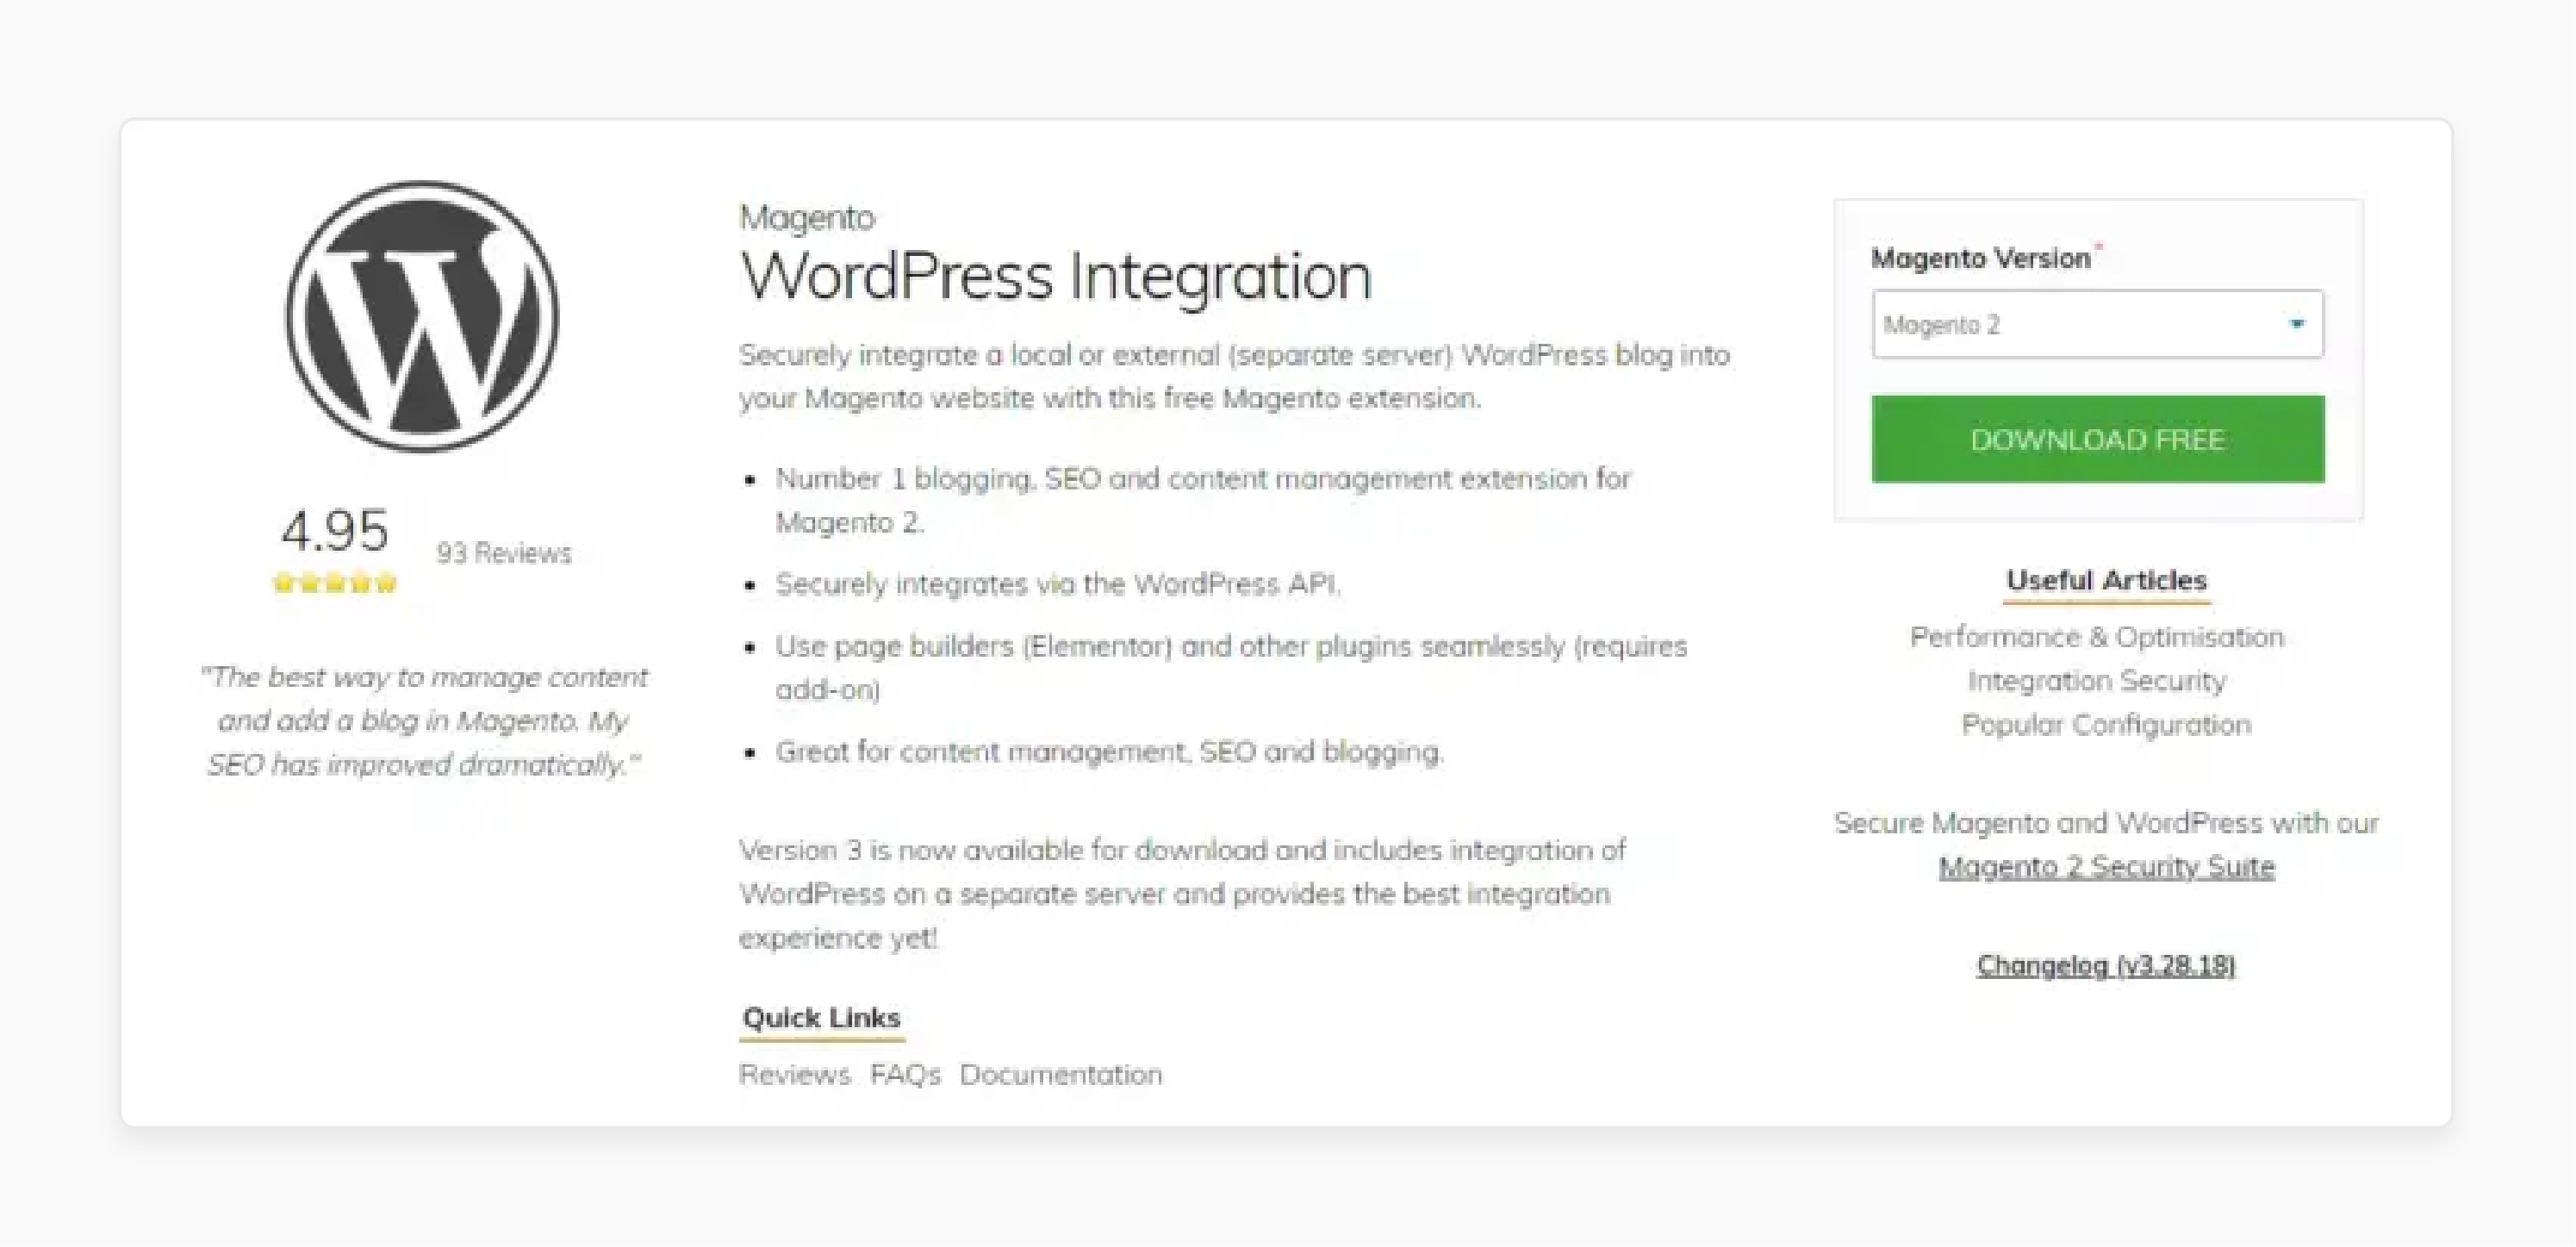
- Download the FishPig extension from the official marketplace. For example, the FishPig Magento WordPress Extension as it is completely free and easy to install.
- Extract the archived folder.
- Unzip the files on your computer.
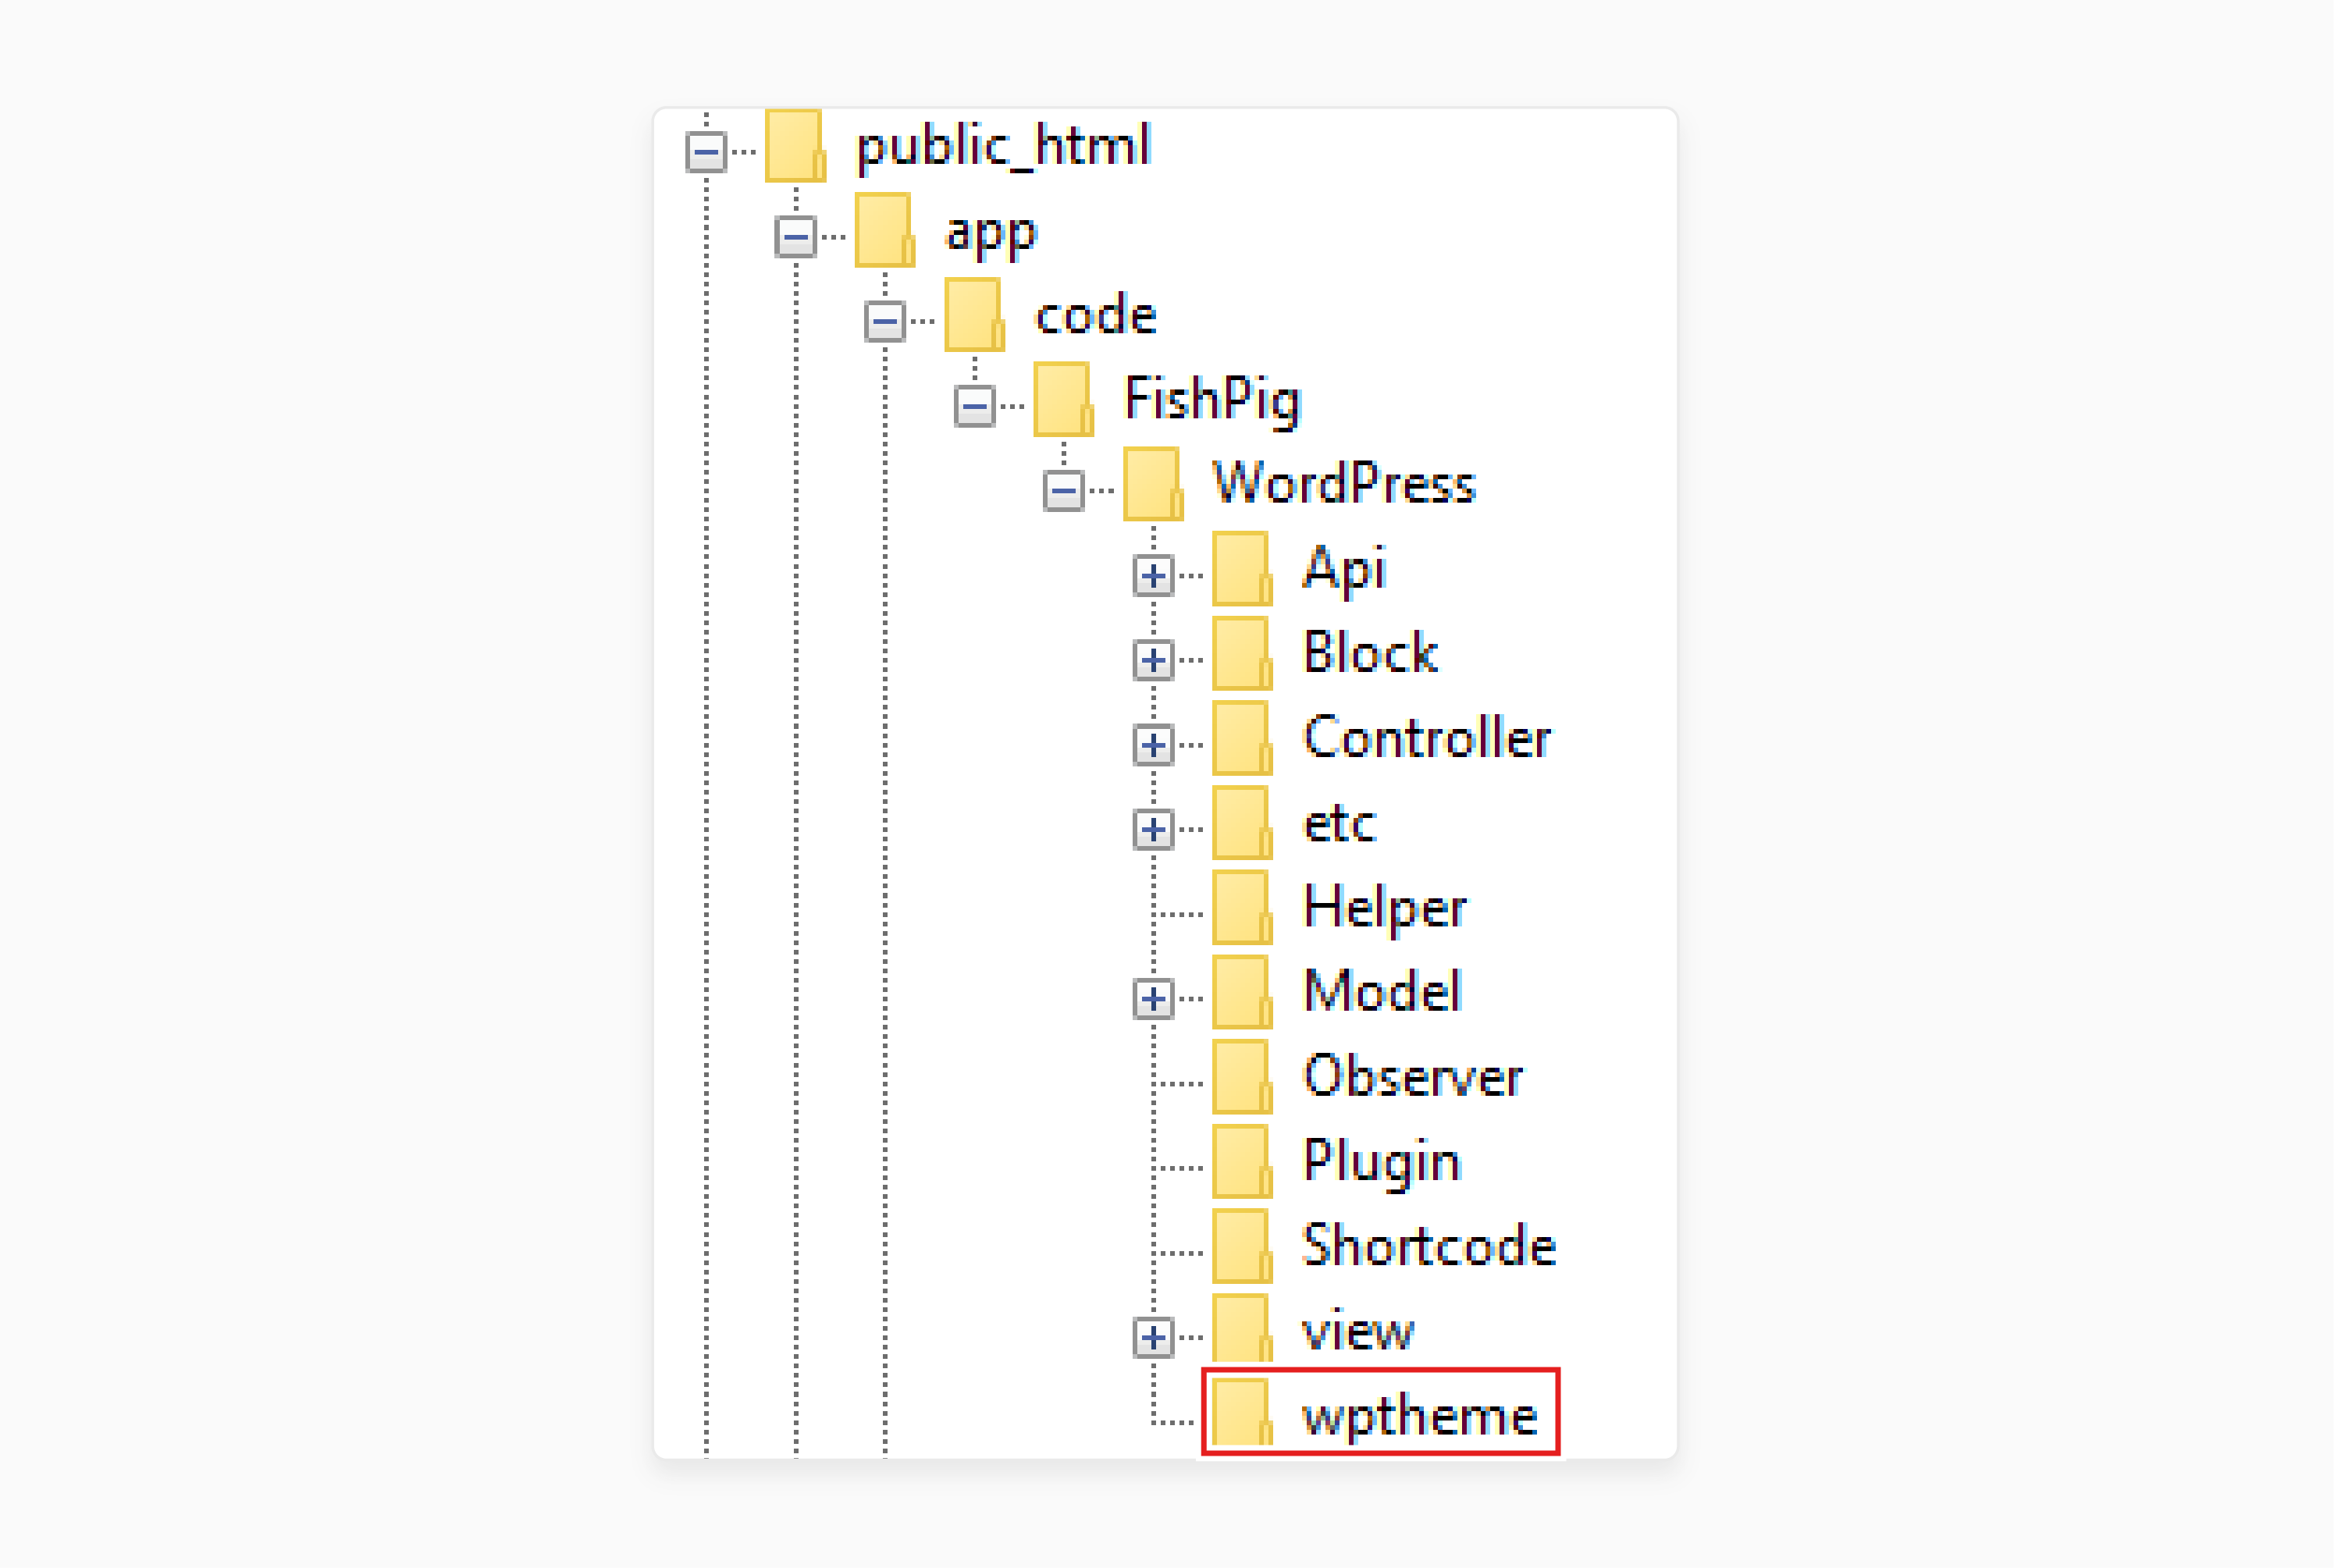
- Upload the file to your Magento 2 store by using
app/code/FishPig.
- Using an FTP client or file manager, navigate to your Magento root directory on your hosting server.
- Run the following commands:
php bin/magento module: enable FishPig_WordPress
php bin/magento setup: upgrade
php bin/magento setup: di:compile
php bin/magento cache: clean
php bin/magento cache: flush
- Rename the folder "WordPress" to "wp".
- Open your web browser.
- Type the name of your Magento store and add
/wp/at the end. For example,https://www.yourwebsite.com/wp/.
Note: You might see an error message. It will go once you complete the next step.
- You will be redirected to the WordPress installation page.
- Follow the instructions on the screen.
- Create a new database or enter your existing Magento database details.
Note: You can still use your existing database since WordPress uses wp_ as table prefix. It is separated from Magento tables.
- Place files in the
app/code/FishPig/WordPressfolder. - Go back to your root directory and paste this into a wp folder in
wp/wp-content/themes. - Rename this folder to FishPig.
- Verify the correct file placement.
- Open the command line and run the following commands:
php bin/magento module:enable FishPig_WordPress
php bin/magento setup:upgrade
- Run activation commands to install the module using Composer in your Magento 2 root directory.
composer require FishPig/magento2-wordpress-integration:^3.28.7
php bin/magento module:enable FishPig_WordPress
php bin/magento setup:upgrade
- Complete the setup process.
Step 4: Configure the Magento WordPress Integration Module
- In Magento Admin, navigate to Stores > Configuration > FishPig > WordPress.
Note: From here, you can adjust settings like URL, Login, Blog Route, and Custom Post Types.
- In WordPress, go to Settings > Permalinks and select "Post name".
- Connect your Magento store to the WordPress database using the details found in the wp-config.php file.
- Go to Stores > Configuration > FishPig > WordPress > Database in Magento.
- Enter the database information.
- Set the WordPress Installation Path in Stores > Configuration > FishPig > WordPress > Path.

Step 5: Install WordPress Theme
- Go to the admin panel of your WordPress account.
- Navigate to Settings > General.
- Get your WordPress address and Site address. It is usually the same, i.e.,
https://yoursite.com/wp. - Change the Site Address from
https://yoursite.com/wptohttps://yoursite.com/blog. - Click on save changes.
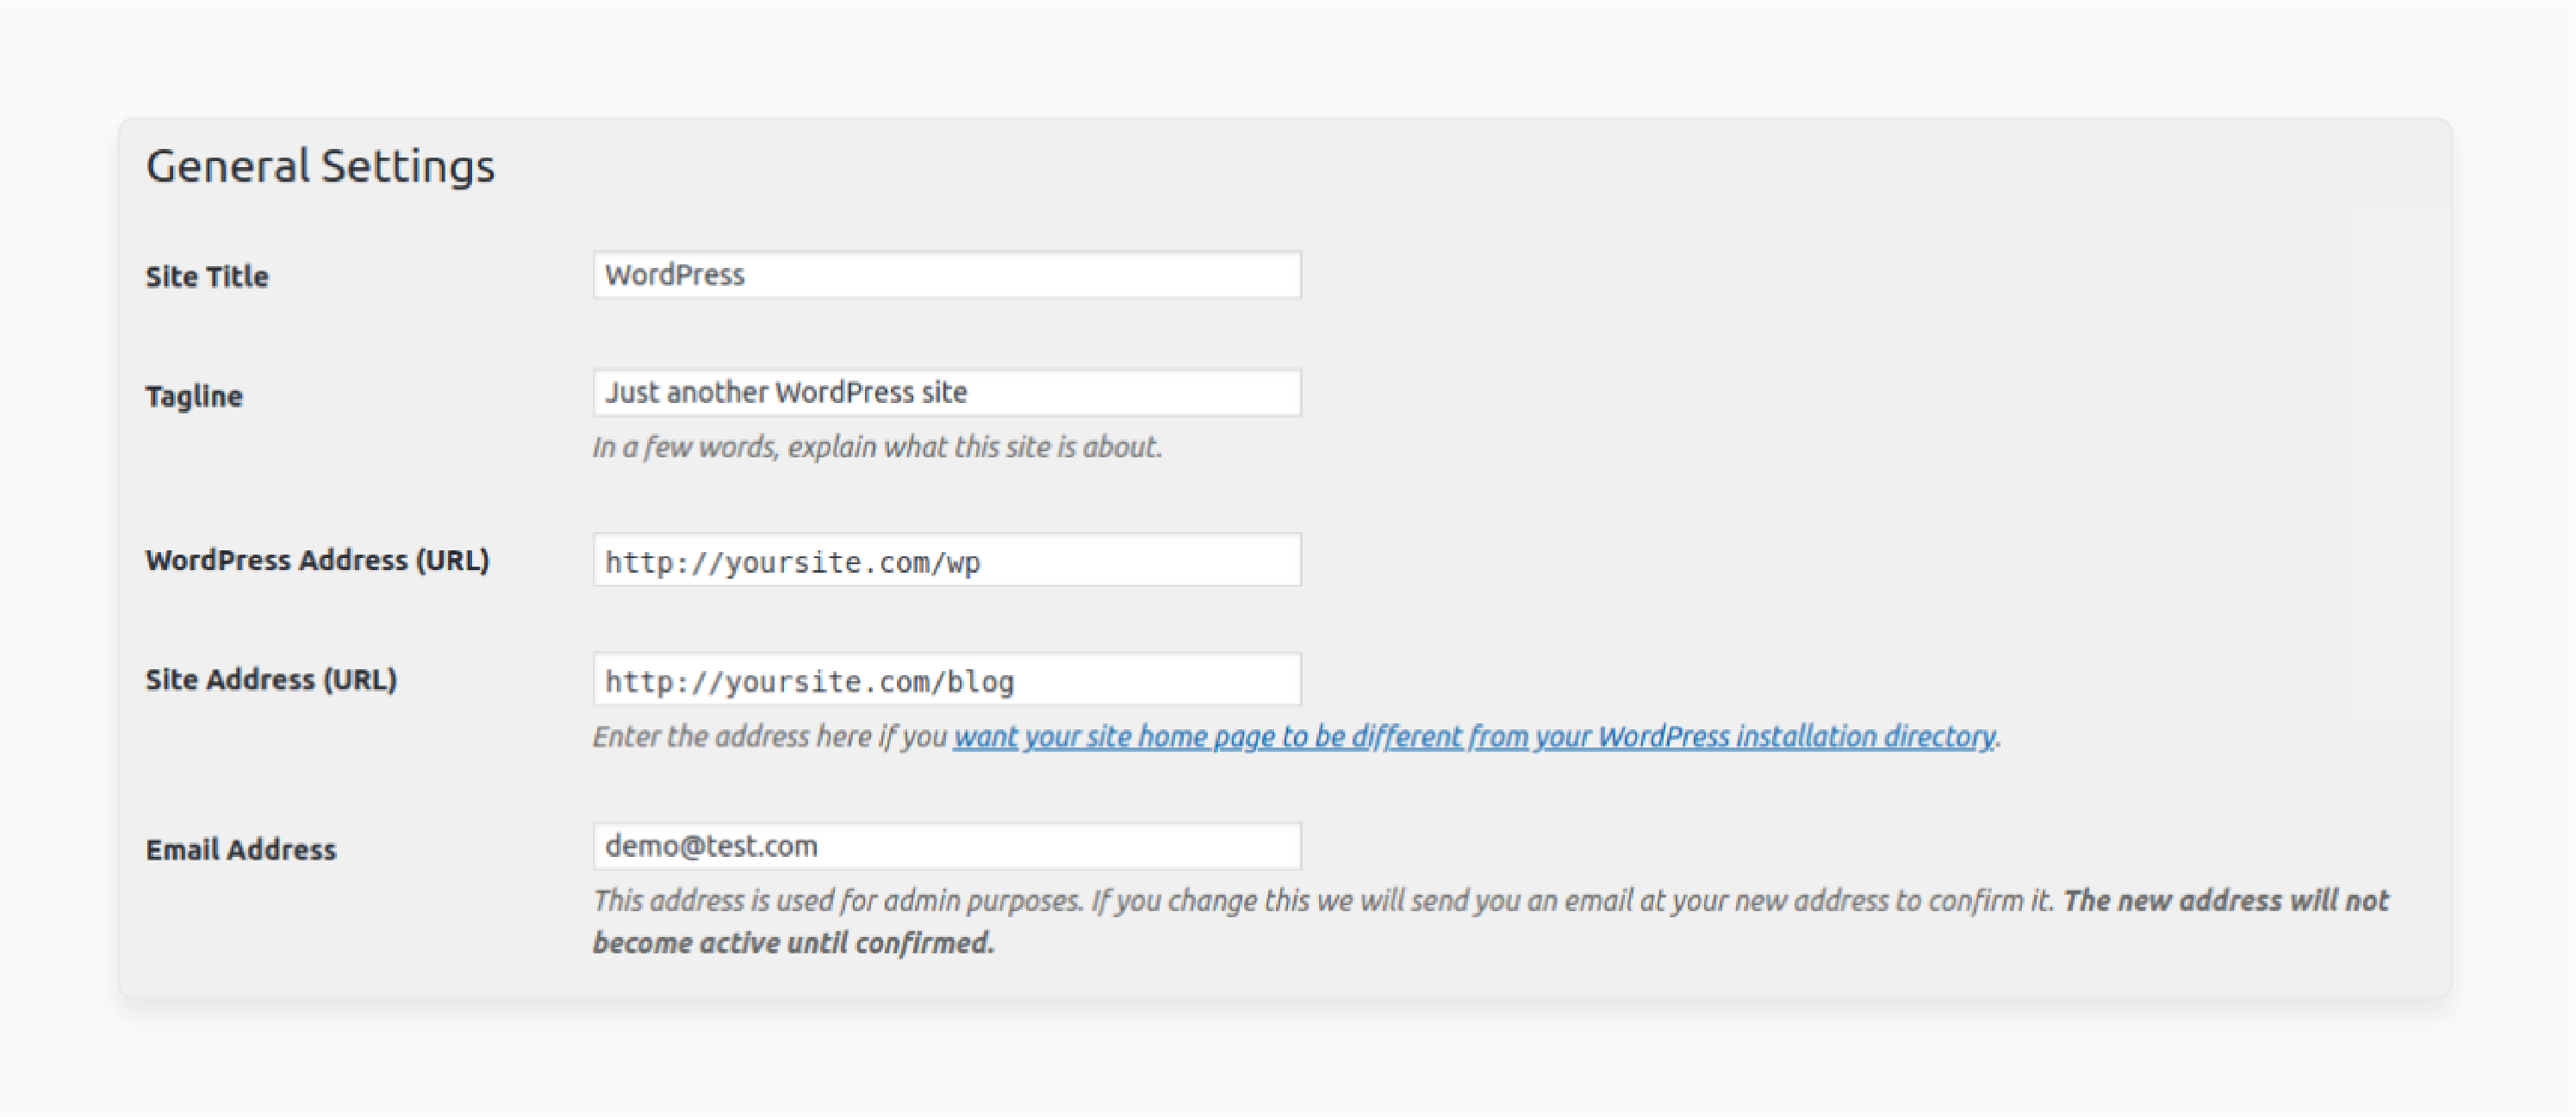
When using FishPig to integrate WordPress with Magento, WordPress operates in a headless mode. This means that the WordPress theme is not displayed—Magento handles that instead.
Step 6: Install Local Mode Theme
If a theme update is detected, it will be updated automatically. If errors occur, you can manually update it using the following command:
bin/magento FishPig:wordpress:build-theme
Step 7: Install External Mode Theme
- Activate the FishPig theme.
- View your website blog frontend by adding
/blogat the end of your Magento website URL.
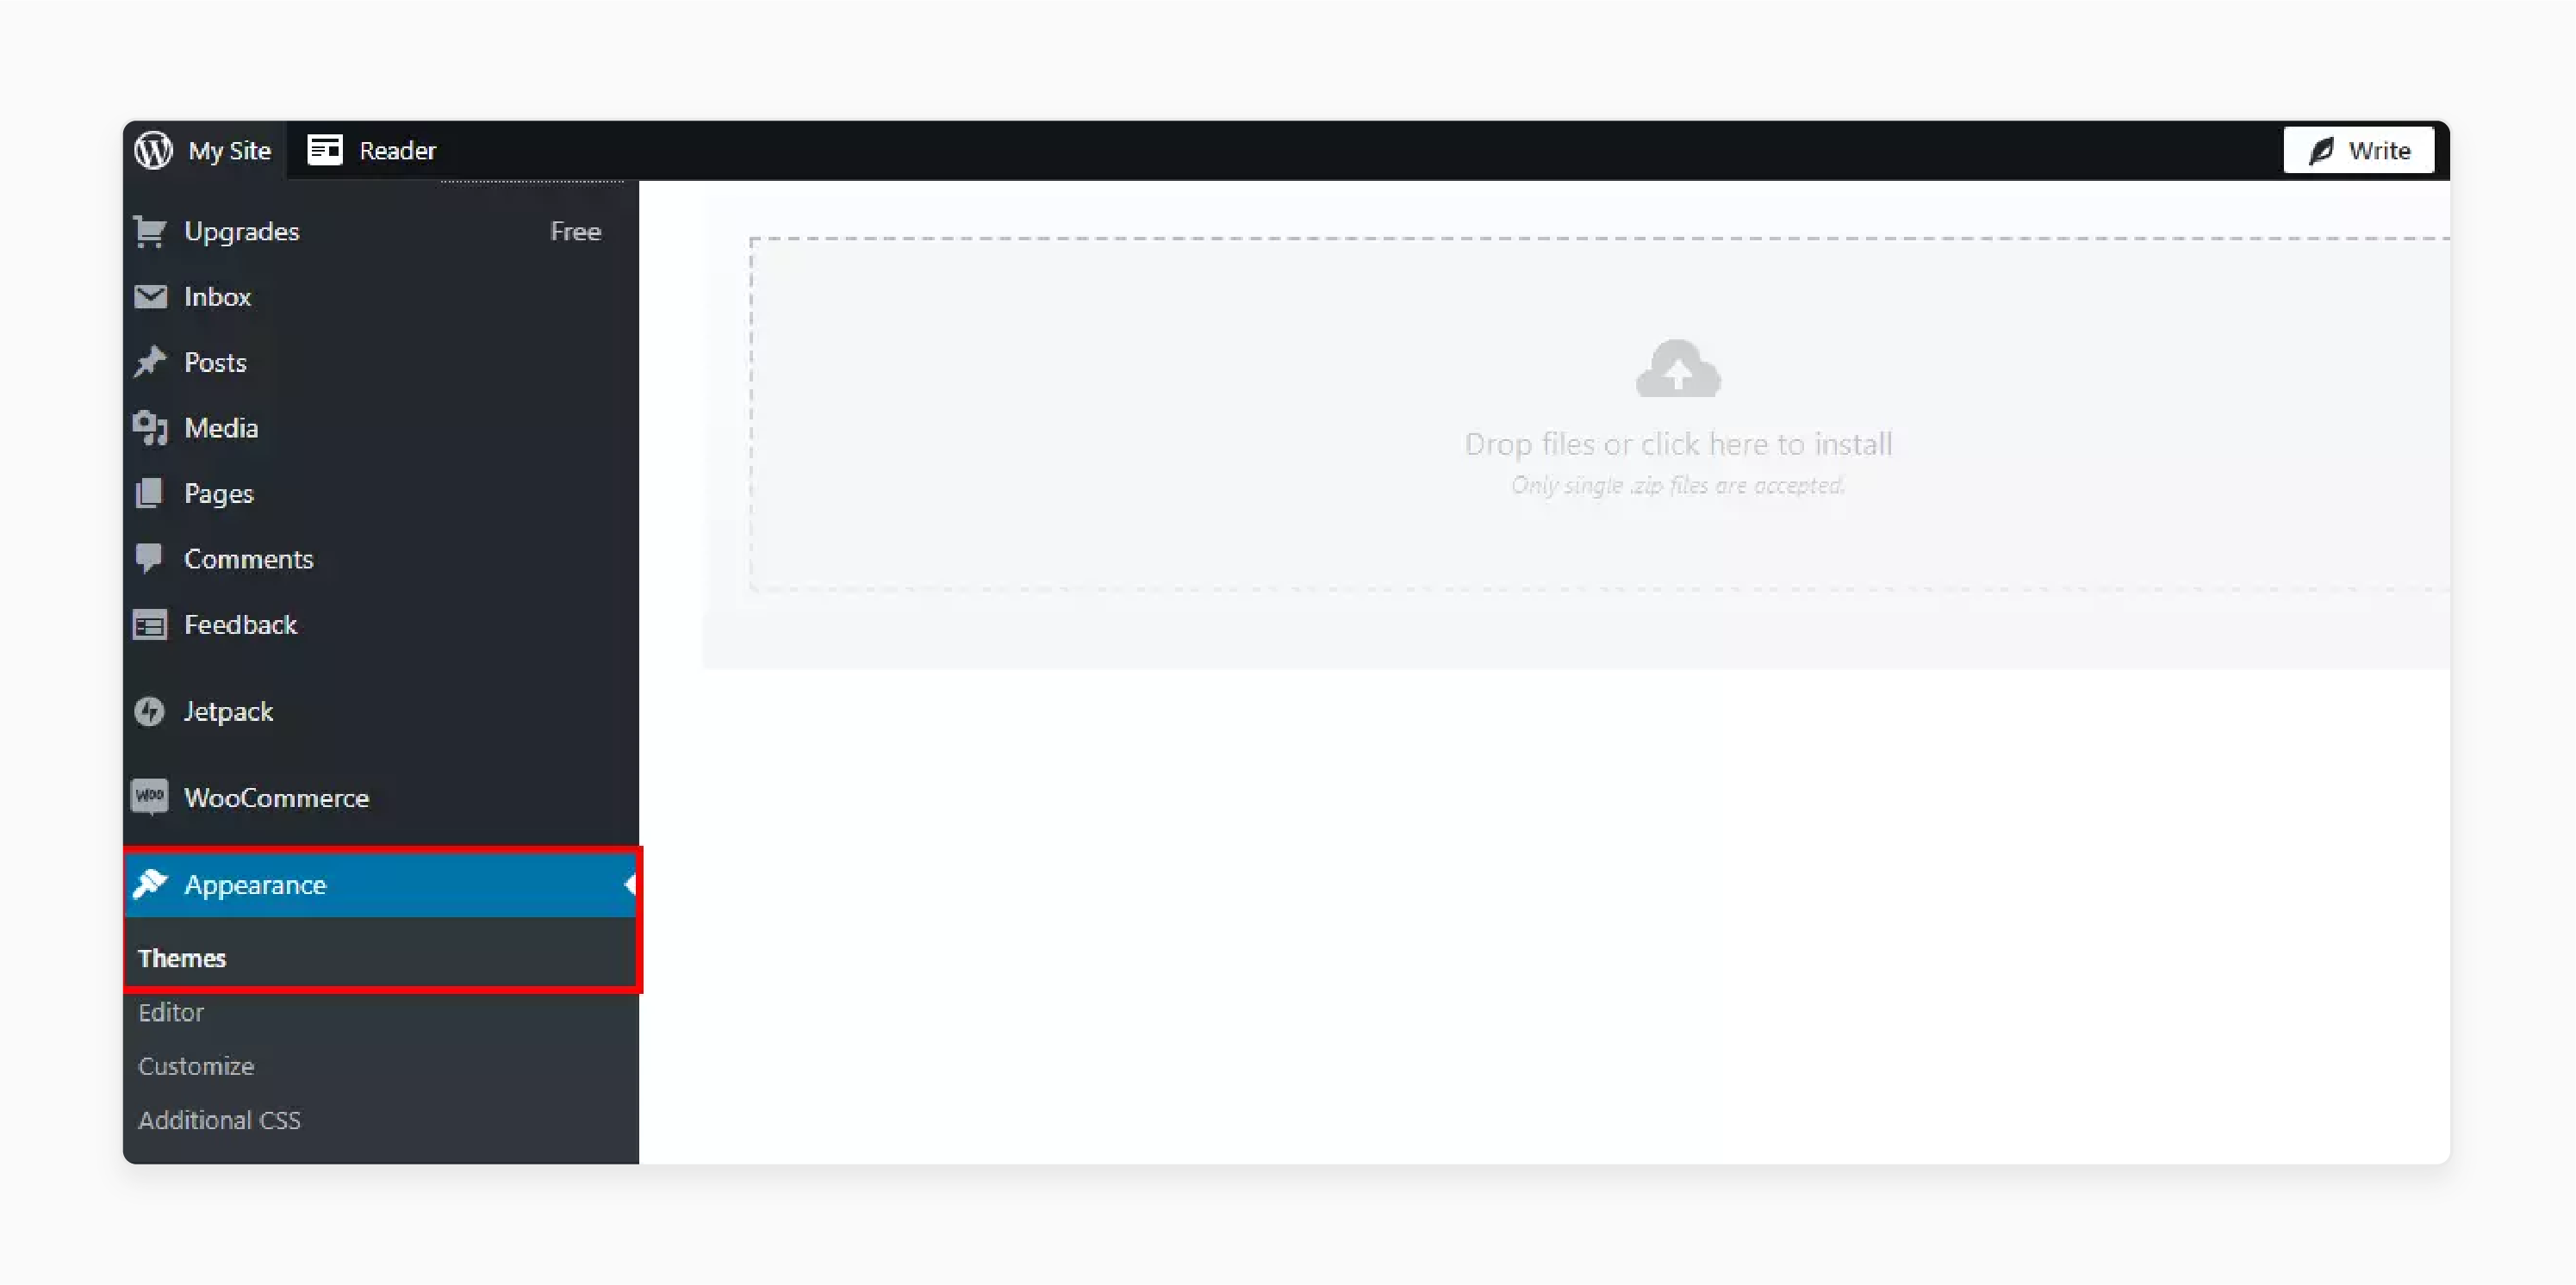
Note: If WordPress is on an external server, manually install the updated theme via WP Admin > Appearance > Themes > Add New > Upload Theme.
Step 8: Verify Integration
Verify that the integration works by accessing your WordPress and Magento admin panels. You may also need additional extensions for advanced features. For example, FishPig's Attribute Splash Pages or Advanced Custom Fields.
Tools And Extensions For Optimizing Magento WordPress Integration Using FishPig
| Optimization Category | Strategy | Implementation Details |
|---|---|---|
| WordPress Core Optimization | - Theme Selection - Plugin Management - Media Optimization - Caching Setup |
- Use a lightweight FishPig theme optimized for Magento 2. - Install only essential plugins and avoid redundancy. - Implement WebP format automatic image compression. - Configure browser caching and implement page caching. |
| Magento 2 Performance | - Database Optimization - Content Compression - Catalog Management - Extension Control |
- Regular table cleanup and proper indexing. - Enable Gzip and minify CSS/JS files. - Use a flat catalog for improved performance. - Maintain minimal essential extensions. |
| FishPig Specific Tools | - Speed Extension - Cache Module |
- Asset minification and image optimization features. - Sub-0.5 second TTFB optimization. |
| Integration Best Practices | - URL Structure - Content Management - Design Consistency |
- Maintain consistent URL patterns across platforms. - Centralized management through Magento admin. - Unified theme elements and navigation. |
| Technical Optimization | - Server Configuration - CDN Implementation - Security Measures |
- Enable PHP opcache and optimize MySQL settings. - Geographic content distribution. - Regular updates and clean coding practices. |
Customization Of Magento 2 WordPress Using The FishPig Theme
1. Template Customization
When WordPress is integrated into Magento, the WordPress theme does not control the blog's frontend display. The Magento module provides basic templates that display your blog data. It can be customized easily to meet your design needs.
Here are the template paths, depending on your installation method:
-
Manual Installation:
app/code/FishPig/WordPress/view/frontend/templates -
Composer Installation:
vendor/fishpig/magento2-wordpress-integration/view/frontend/templates
To customize these templates, avoid modifying the original files directly. Instead, copy them to your custom theme while maintaining the same path. It ensures your changes are preserved during updates.
2. Layout XML
Layout XML files is an integral part of Magento's frontend theme system. They build pages with individual blocks. These files enable significant changes with minimal code, provided you understand their structure.
The module uses various layout handles. For example, some static, others dynamic, depending on the content. To view all available layout handles, use the following code:
print_r($block->getLayout()->getUpdate()->getHandles()); exit;
Note: Working with XML files requires some knowledge of Magento templates & XML syntax. Consult a developer for advanced customization.
3. Page Layout
By default, the module uses a 2-columns-left layout. However, you can change it to 1-column, 2-columns-right, 3-columns, empty, or any custom page layout. To change the layout, create a custom layout XML file.
4. Block Templates (.phtml Files)
You can modify the templates of any block in Magento by locating the relevant layout name. The key templates to customize are the post list and single post view templates.
Security Considerations For Magento And WordPress Integration With FishPig
When integrating WordPress with Magento, a key factor is securing both platforms. External and Local Modes offer two approaches for managing this.
1. External Mode
In External Mode, WordPress is installed on a separate server, isolated from Magento. This separation minimizes the risk of any WordPress vulnerabilities affecting your Magento store.
For enhanced security, restrict external database connections on the WordPress server to the Magento server's IP address.
2. Local Mode
Local Mode involves installing both platforms on the same server. It can introduce security risks. Vulnerable plugins or themes in one platform could compromise the other.
If WordPress is in a Magento subdirectory, a WordPress compromise could jeopardize Magento. To mitigate this risk:
-
Keep WordPress updated, including the core and all plugins.
-
Uninstall all themes except the FishPig theme.
-
Only use plugins from reputable sources.
-
Use separate databases with distinct users and a custom table prefix.
-
Remove unnecessary core files.
-
Add IP restrictions to WordPress using a
.htaccessfile.
Troubleshooting FishPig WordPress And Magento Extensions
| Issue Category | Problem | Solution |
|---|---|---|
| Installation Issues | Failed Extension Setup | - Verify Magento 2 compatibility. - Check the PHP version requirements. - Confirm proper composer installation. - Clear the Magento cache after installation. |
| Database Connection | WordPress Integration Failure | - Verify database credentials. - Check the table prefix configuration. - Ensure proper database permissions. - Validate WordPress connection settings. |
| URL Configuration | Broken Links/404 Errors | - Confirm base URL settings. - Check the .htaccess configuration. - Verify permalink structure. - Ensure proper routing setup. |
| Performance Problems | Slow Page Load Times | - Optimize database queries. - Enable proper caching. - Check for plugin conflicts. - Monitor server resources. |
| Content Display | Missing or Incorrect Content | - Clear the FishPig cache. - Check the template compatibility. - Verify content permissions. - Review shortcode implementation. |
| Plugin Conflicts | Integration Breakdowns | - Test in conflict resolution mode. - Disable the conflicting plugins. - Update the outdated extensions. - Check the compatibility matrix. |
| Security Issues | Access Control Problems | - Review the authentication settings. - Check the SSL configuration. - Verify user permissions. - Monitor the security logs. |
| Theme Integration | Design Inconsistencies | - Match the theme elements. - Sync CSS files. - Verify the responsive design. - Check template overrides. |
| API Communication | Failed Data Exchange | - Validate the API endpoints. - Check the authentication tokens. - Monitor the API rate limits. - Review the error logs. |
| Update Related | Version Compatibility | - Follow the update sequence. - Backup before updates. - Test in a staging environment. - Review the changelog requirements. |
FAQs
1. Are there free add-ons available for FishPig WordPress integration?
The core Magento 2 extension requires a license. However, several free Magento 2 WordPress integration add-ons enhance functionality. For example, widgets and shortcode modules. These add-on features can extend your integration capabilities without additional cost. However, premium extensions often offer more advanced features and dedicated support.
2. Can I use Elementor with the FishPig WordPress integration?
Yes, the integration of WordPress with Magento fully supports Elementor page builder. You can create dynamic content layouts that seamlessly display in your online store. The extension for Magento is compatible with most WordPress page builders. Some articles include guidance for using these tools effectively. For example, MGT Commerce's Magento WordPress integration tutorial.
3. Will integrating WordPress with Magento affect my store's page speed?
When you integrate a WordPress blog with Magento, the impact on page speed depends on your setup. You can host your WordPress on a separate server. It often provides better performance than a local installation. The WordPress plugins you choose can significantly influence loading times. It's essential to optimize both platforms when configuring your WordPress blog in Magento.
4. How do I display Magento products within WordPress posts?
Showcase Magento products directly within your WordPress posts using shortcodes and widgets. It creates a seamless connection between your content and store items. The data synchronization happens automatically between your Magento server and WordPress. It ensures product information stays current across both platforms.
5. Can I use WordPress page builders with FishPig's widgets in external mode?
Yes, the widgets add-on module works seamlessly in external integration mode. It allows you to use WPBakery Page Builder and other builders. They are used to design content that's used to display the blog on your Magento storefront. This compatibility ensures you can create dynamic layouts. It maintains the security benefits of running WordPress separately.
6. How does the WordPress SEO plugin work with FishPig in different setups?
You can choose a local or external integration. Your WordPress SEO plugin settings automatically sync between the frontend and backend of both platforms. It ensures your content maintains consistent SEO optimization across your entire store, regardless of where it's displayed or managed.
7. How do I manage WordPress content from my Magento admin panel?
The Magento 2 module creates a seamless connection. It lets you access WordPress admin features directly from your Magento dashboard. It eliminates the need to switch between platforms constantly. It makes it simple to manage and display WordPress content on any Magento page.
Summary
FishPig WordPress Magento 2 keeps your ecommerce and blog operations streamlined. This integration allows store owners to:
- Enhance the user experience by unifying content and ecommerce.
- Improve both user experience and SEO performance.
- Ensure an improved user experience and optimized SEO.
- Combine WordPress's content management system with Magento's ecommerce features.
- Manage their blog and product pages through a unified platform.
- Enhance your Magento store with powerful content management capabilities.
Consider Magento optimized server to manage content & ecommerce seamlessly with FishPig WordPress integration.


