Configure Magento 2 Sitemap XML
Generating Magento 2 sitemap creates a plain-text file that lists all the URLs of your Magento 2 website. It allows Google crawlers to read and index important pages, boost SEO, and create a website structure.
We look at how to configure XML Sitemap for Magento 2 stores.
How to Configure Magento 2 Sitemap XML
1. Set the Frequency of updates

-
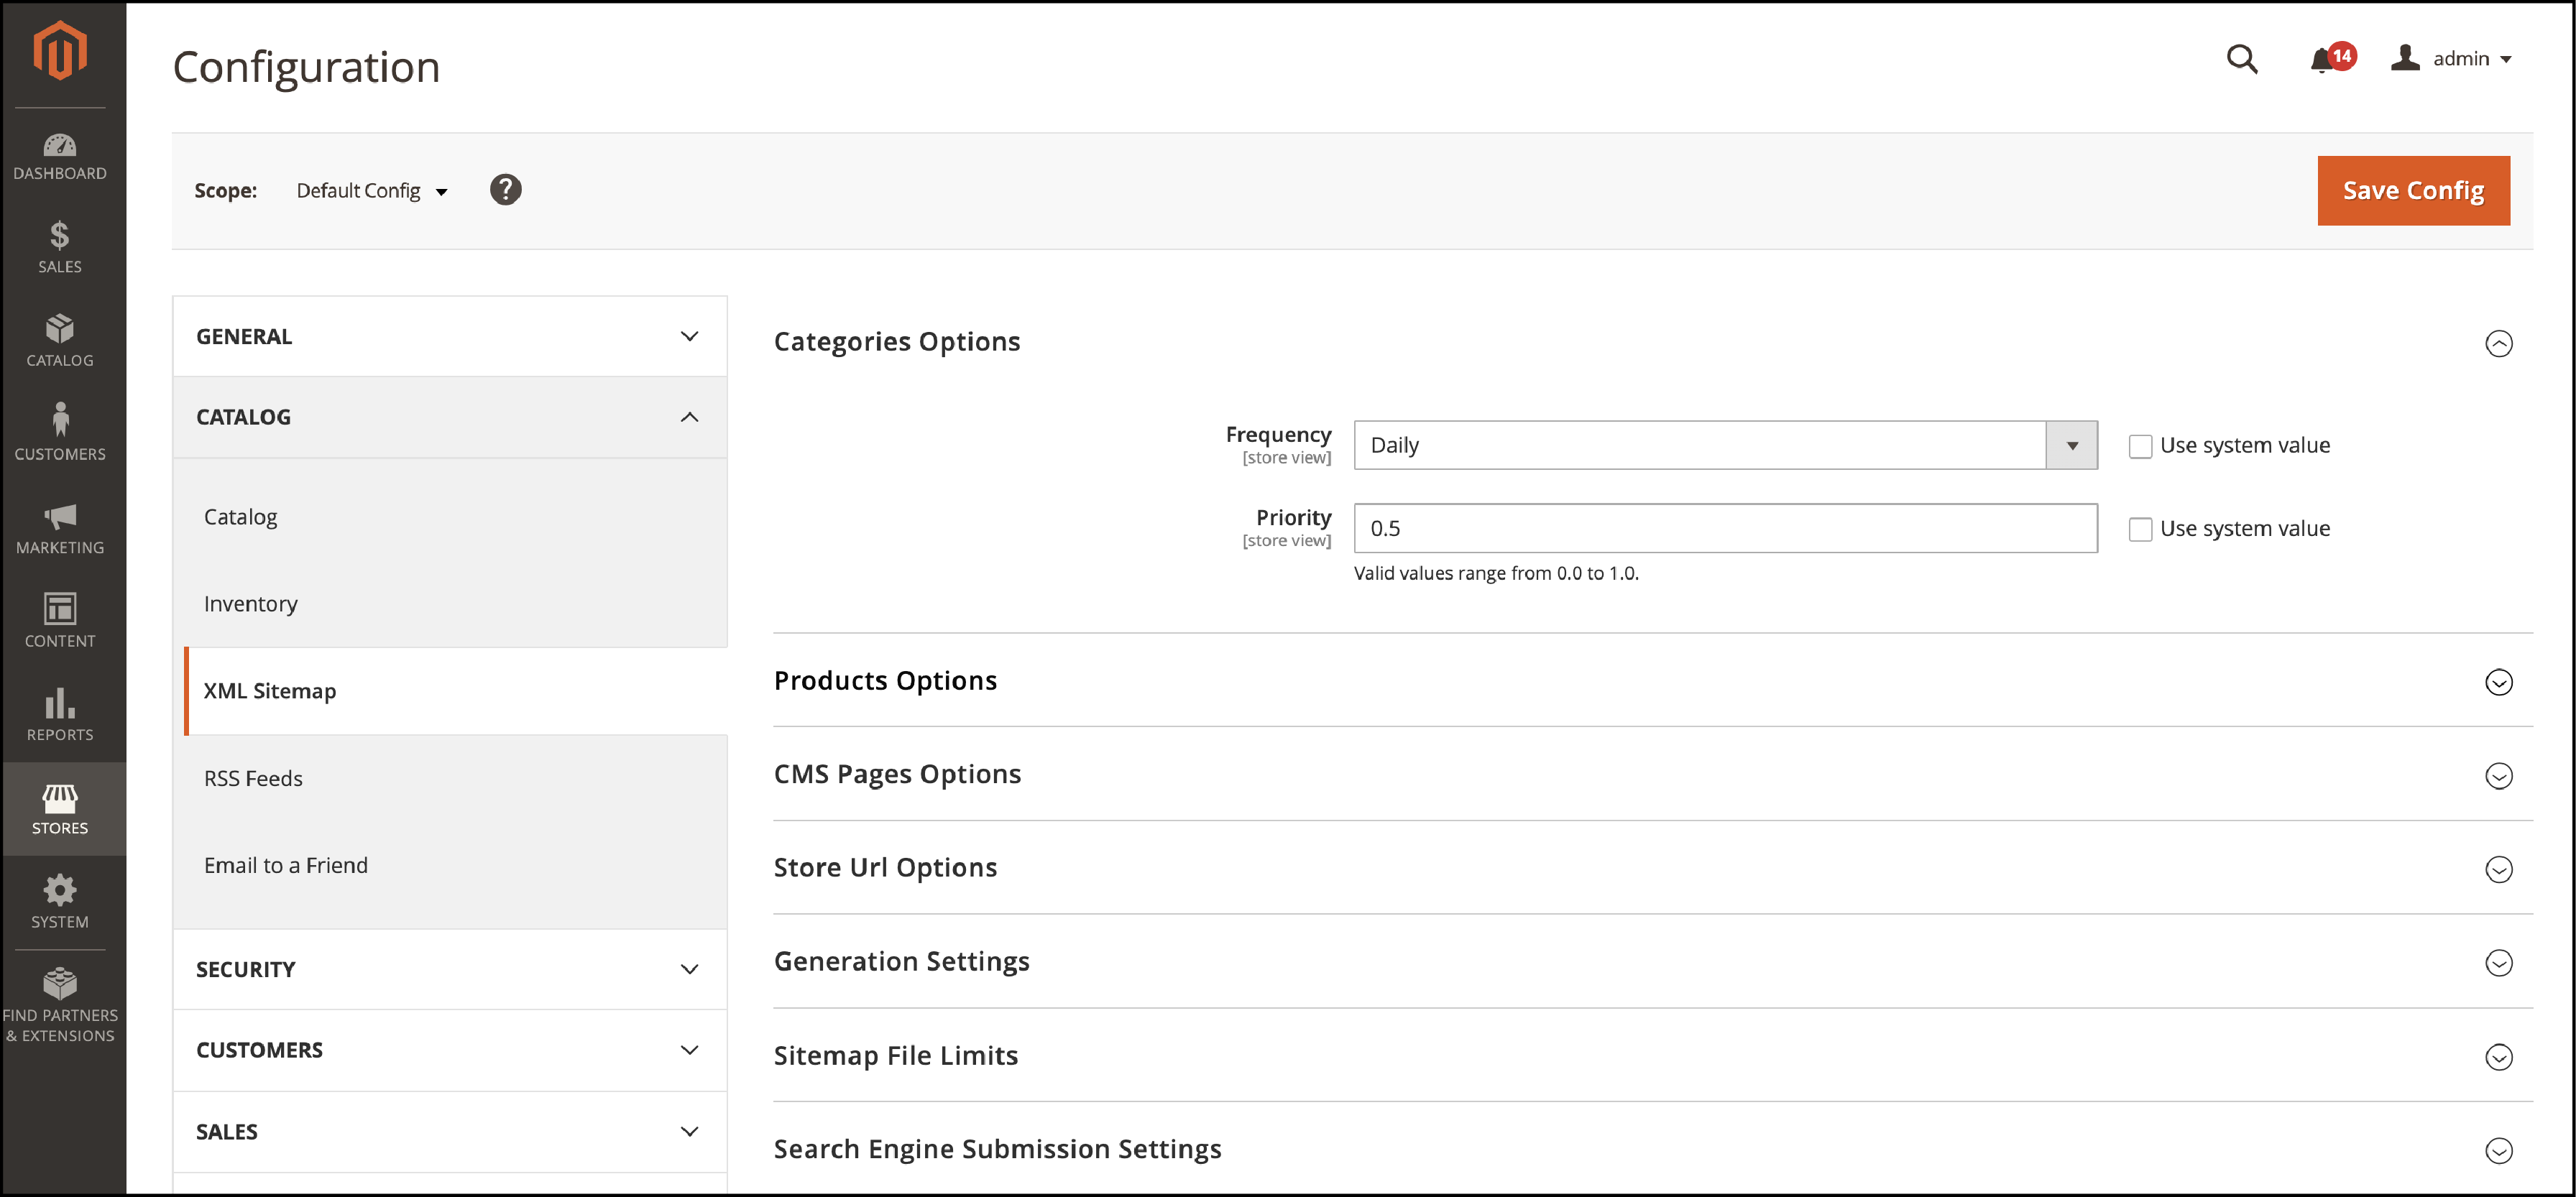
From the Admin Panel, click on
Stores. -
Select
Configurationin the Setting section -
Find the XML Sitemap under
Catalog. -
Open the
Categories Options, and set the Updated Frequency.
2. Frequency and Priority of Content Updates
-
On the Admin panel, navigate to Stores > Settings > Configuration.
-
Click on XML Sitemap under
Catalog. -
Open the Categories Options section and assign the options in the
Frequencyfield.

-
You can choose from Always, Hourly, Daily, upto Yearly or Never.
-
In the Priority field, the priority value ranges from
0.0 to 1.0. Set the 0 if the priority is low and 1 for high priority.
Now we set the Product Options.

-
As we did for Categories, set the Frequency and Priority of the Sitemap.
-
In the
Productsection, you will find the following option: -
Add Images into Sitemap
You get three options to set the extent that images are included in the sitemap.
- None
- Base Only
- All
- Next, we go to the CMS Page Options section.
Configure the Frequency and Priority settings as we did in the Categories and Product Section.
- Click on
Save Configafter completing it.
3. Generating the Sitemap
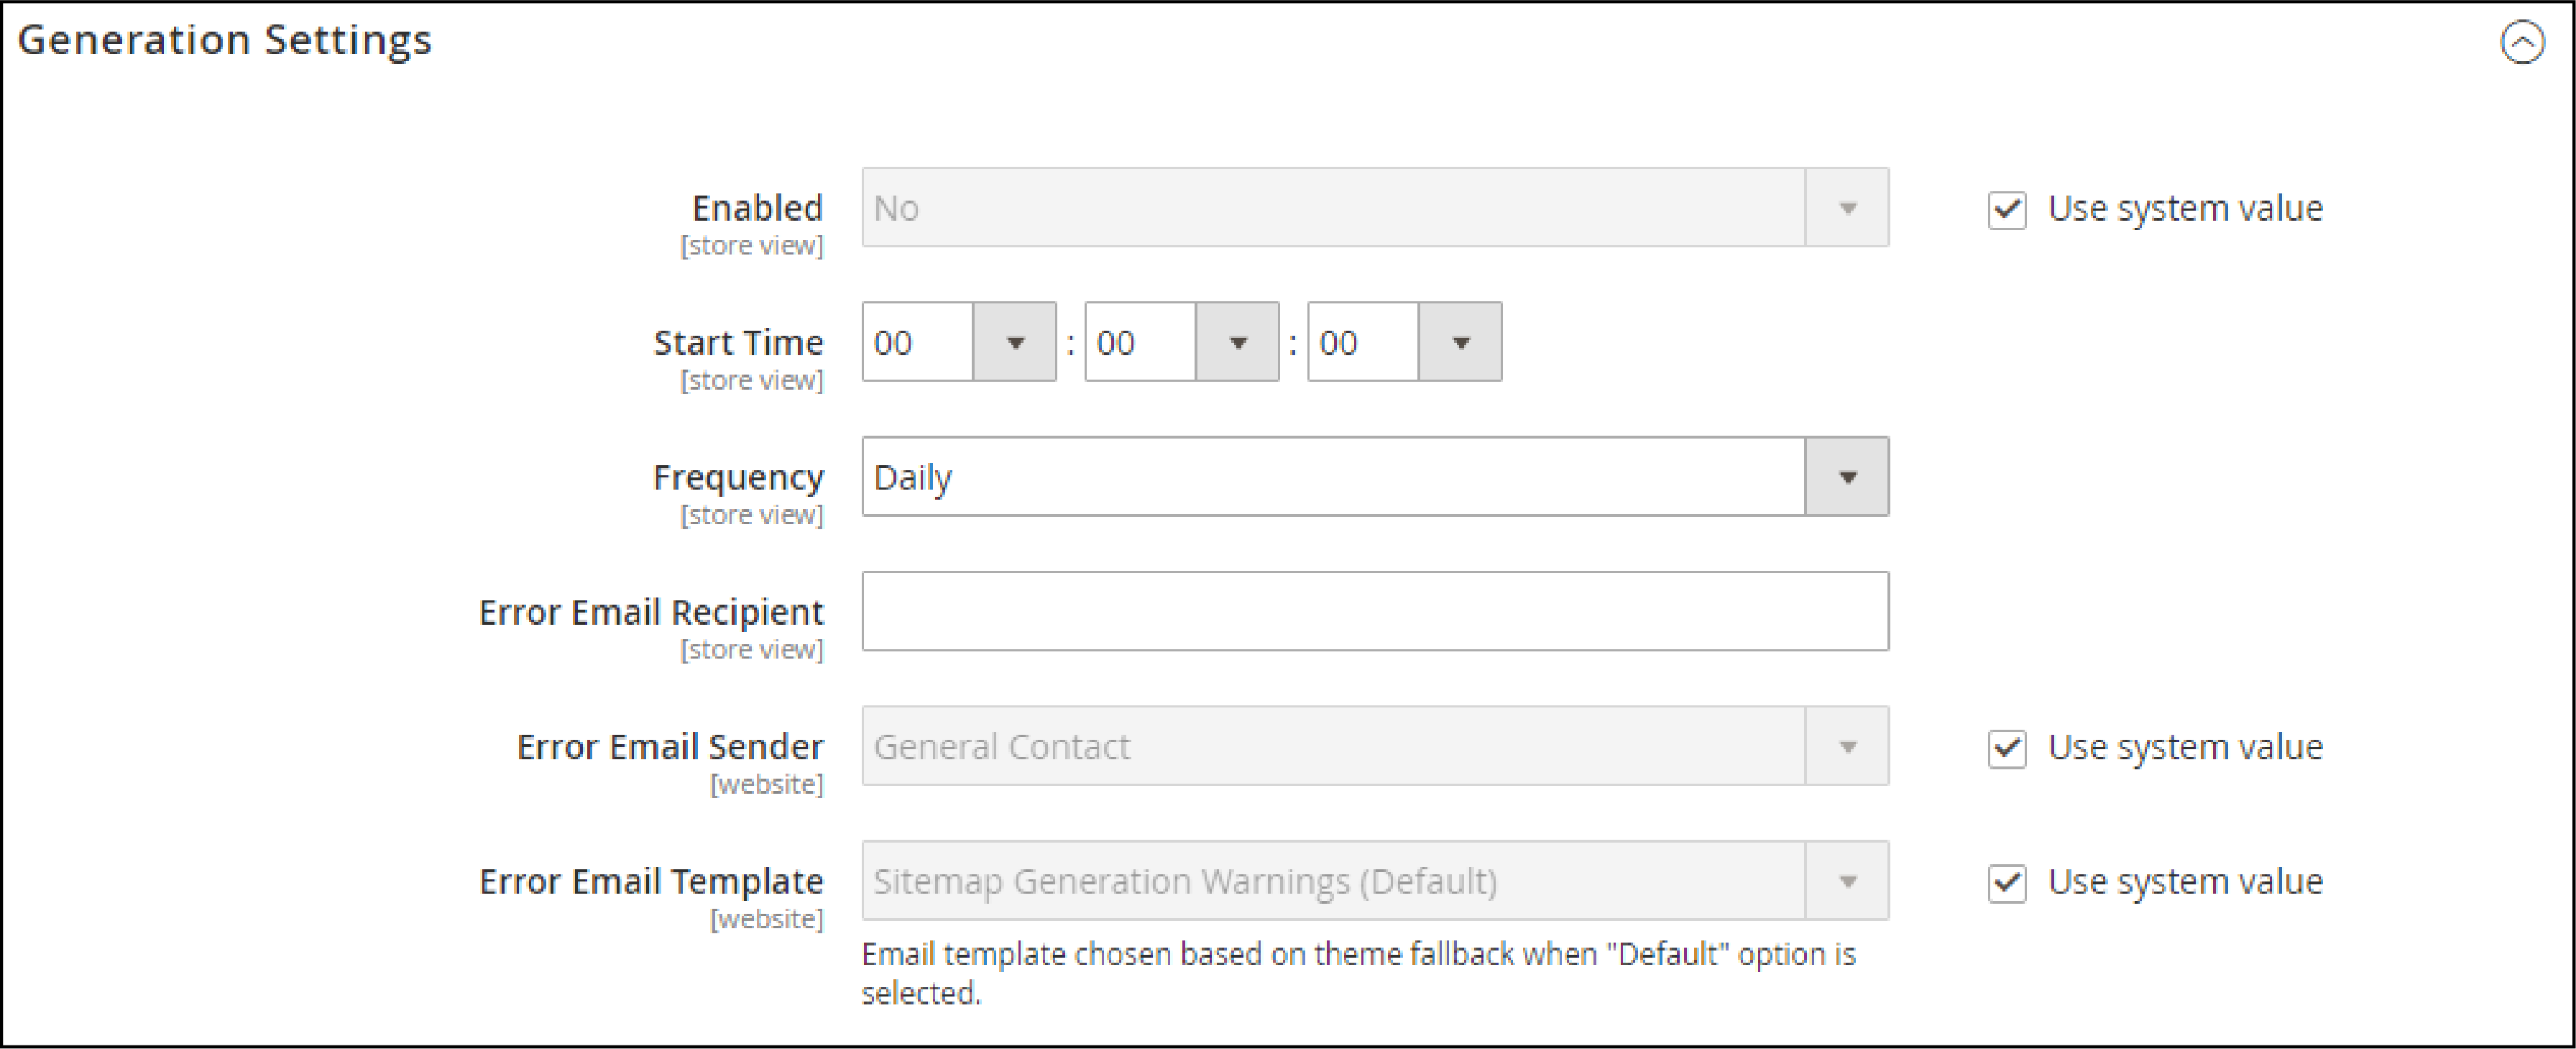
- Navigate to the Generation Setting section

- Enable the sitemap as you select
Yesfrom the options - Customize the following functions below-
-
In the
Start Timefield, set the hour, minute, and second to begin the sitemap updates. -
In the
Frequencyfield, choose one of the following.
- Daily
- Weekly
- Monthly
-
Add the email address to the
Error Email Recipientfield. It specifies the email to receive the notification in case of any errors on the sitemap update. -
In
Error Email Sender, choose one from the following options:
- General Contact
- Sales representative
- Customer support
- Custom email
- Select the template used for the error notification in the
Error Email Senderfield.
4. Magento Sitemap File Limits
-
Configure Magento Sitemap in File Limits.
-
Go to the
Sitemap File Limitssection.

-
Maximum No of URLs Per File: The maximum number of URLs made into one file. The default limit is 50,000, but you can increase it based on your requirements.
-
Maximum File Size: Add the size of the file in bytes. Default size is 10,485,760. You can customize it based on your Magento hosting limits.
5. Search Engine Submission Settings
- Navigate to the Search Engine Submission Settings section

- Enable the
Robot.txtfield and selectYes. You will get the instructions for the Google Crawlers. It shows which pages to index and which ones are not allowed to index. - Click
Save Configto implement the changes.
Summary
Configuring the XML Sitemap for your Magento 2 website helps Google correctly identify and crawl your pages. It allows you to target specific pages for high search engine ranking. The sitemap also improves user experience so visitors can navigate your site quickly.
We have covered how to configure XML sitemap for Magento 2. For more insights on the Magento platform, check out MGT Commerce tutorials.


