Configure Magento 2 Shopping Cart
Magento 2 Cart Configuration
1. Configure the Redirect Link to Magento Cart
This activity appears when the customer places an item in the Magento shopping cart and encourages them to proceed to checkout.
-
From the Magento admin panel, go to Stores > Configuration
-
Click on Sales > Checkout
-
Expand the
Shopping Cartsection

-
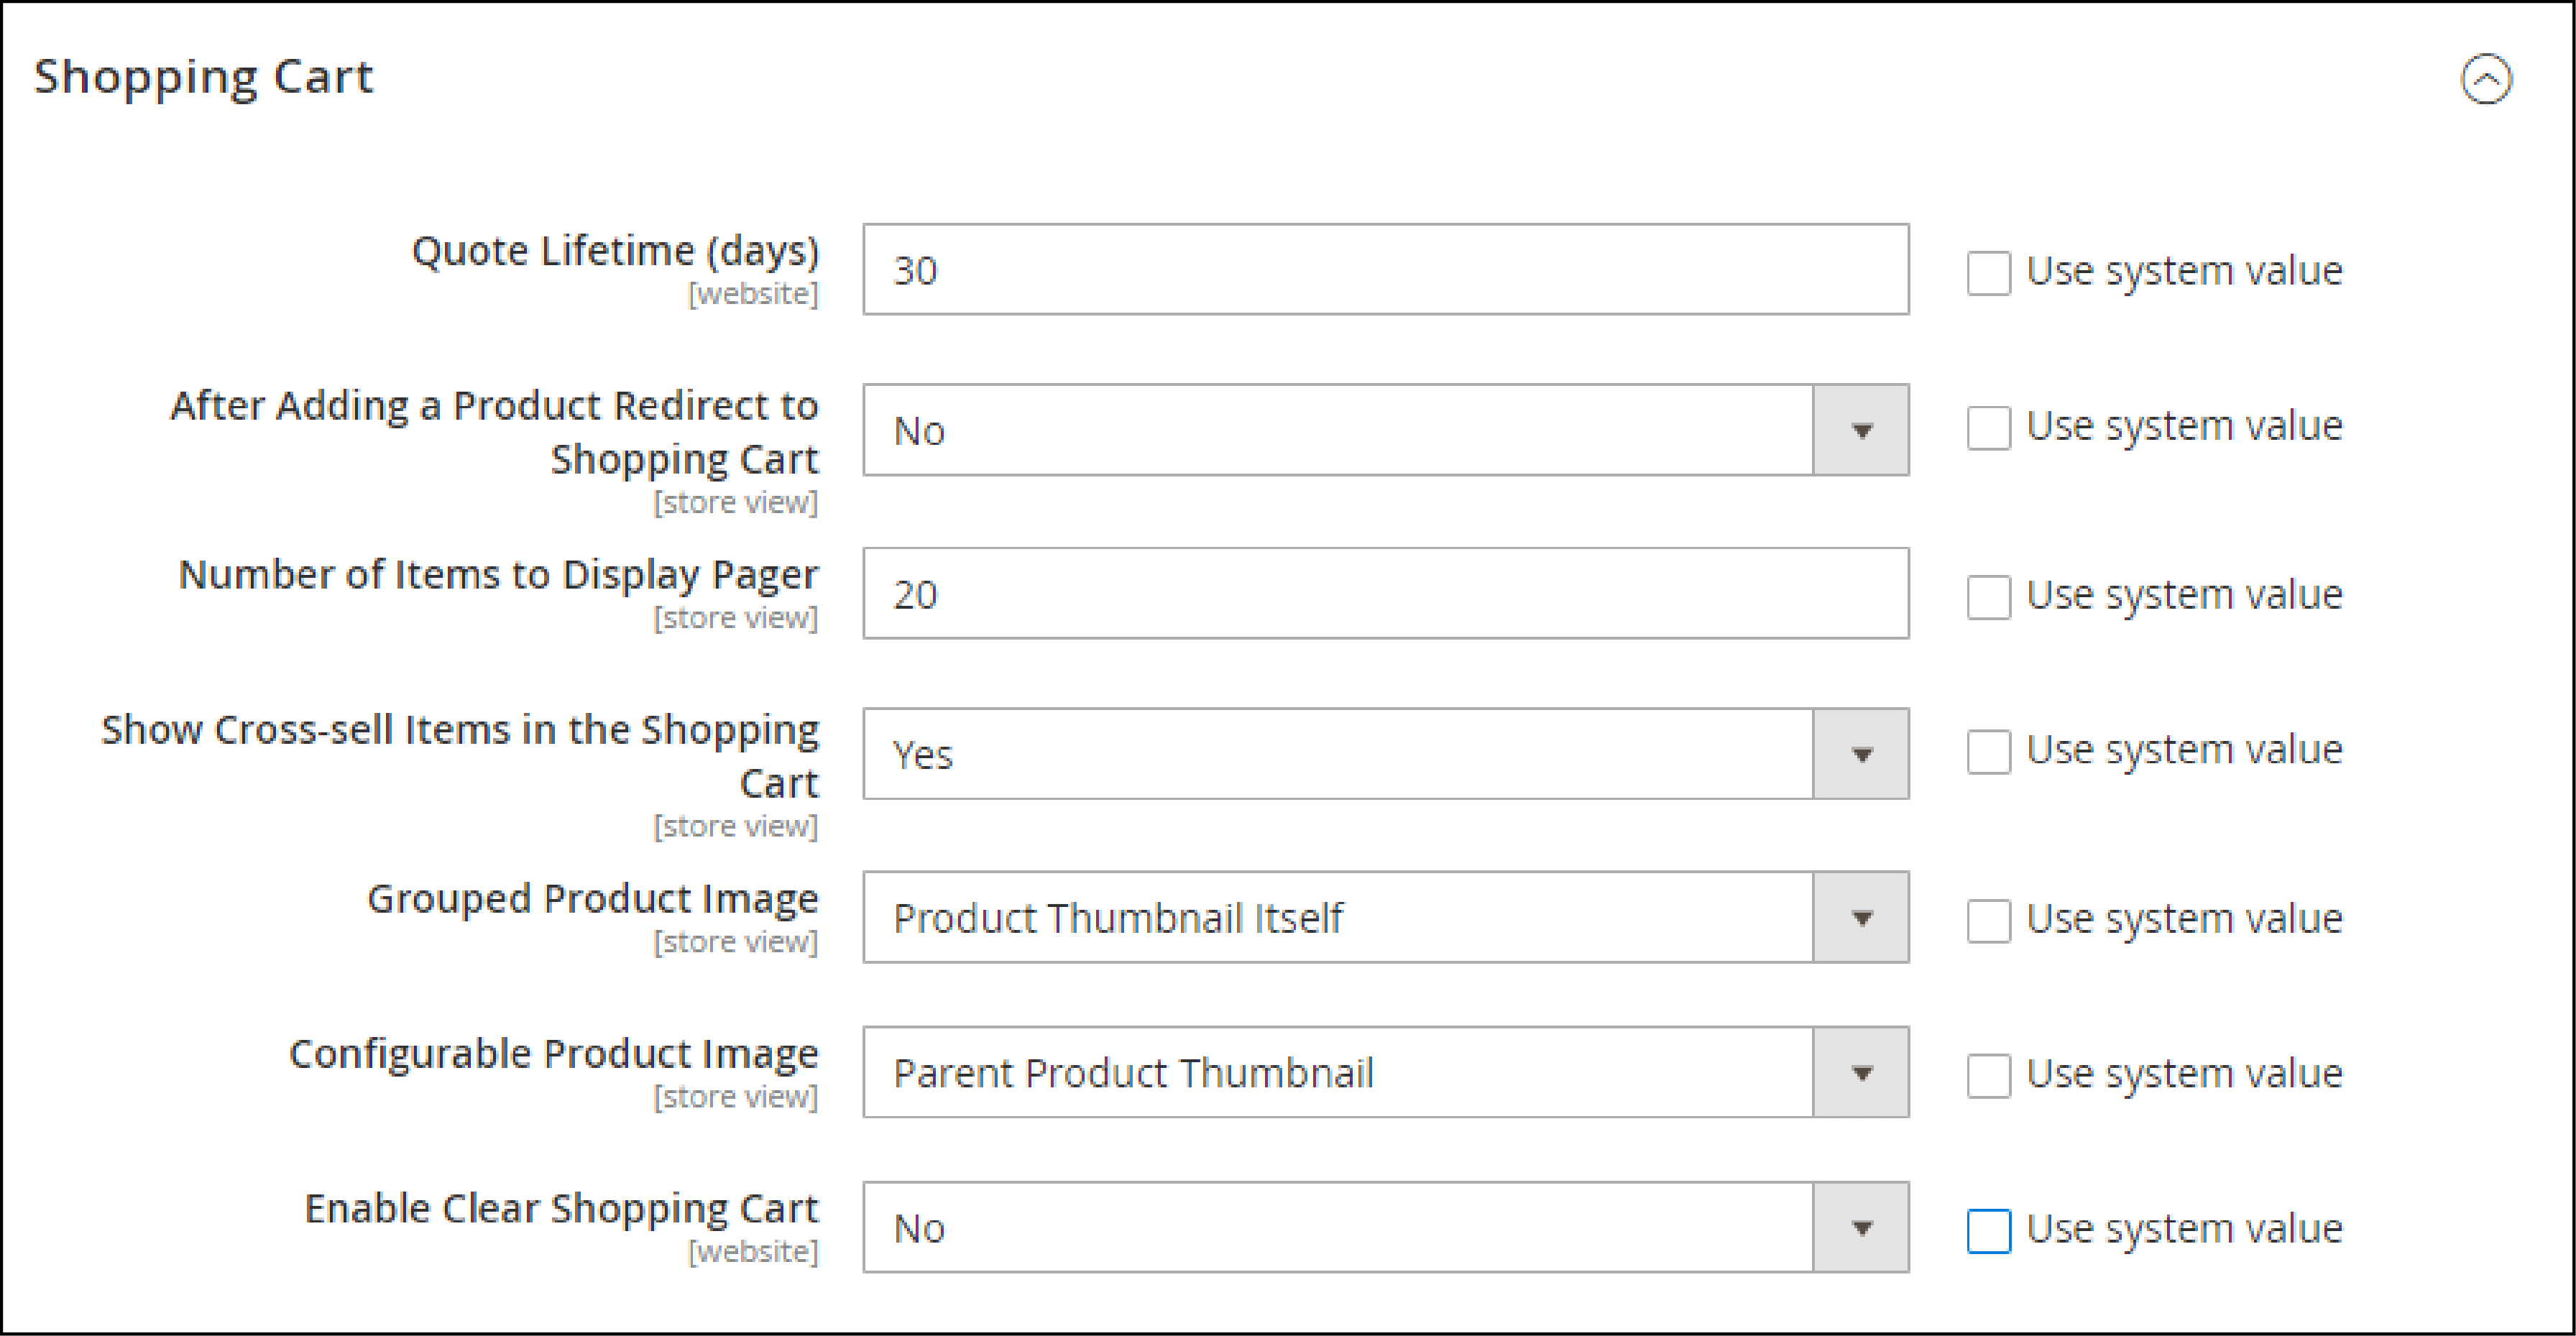
Set all the settings based on your store requirements. It includes options such as
Number of products to displayshowing cross-sell items. You can addGroupedandConfigurableproduct images. -
Click on
Save Config.
2. Configure the Magento 2 Cart Link
You can configure the options, so the cart icon displays the number of different products.

-
Navigate to the Cart Link section under the Checkout section
-
Expand
My Cart Linkand select your preferredDisplay Cart Summaryoptions.

-
Save Configto implement the changes.
3. Set Up the Mini Sidebar for Magento Cart
Mini sidebar cart displays at the top-right corner on the hover that shows the summary of your Magento shopping cart.
-
Navigate to Stores > Configuration
-
From the left panel, go to
Salesand chooseCheckout -
Expand the
Mini Cartsection

-
Set the
Number of Items to Display ScrollbarandMaximum Number of Items to Display. -
Click Save Config to implement the changes.
4. Configure the Gift Options for Magento Cart
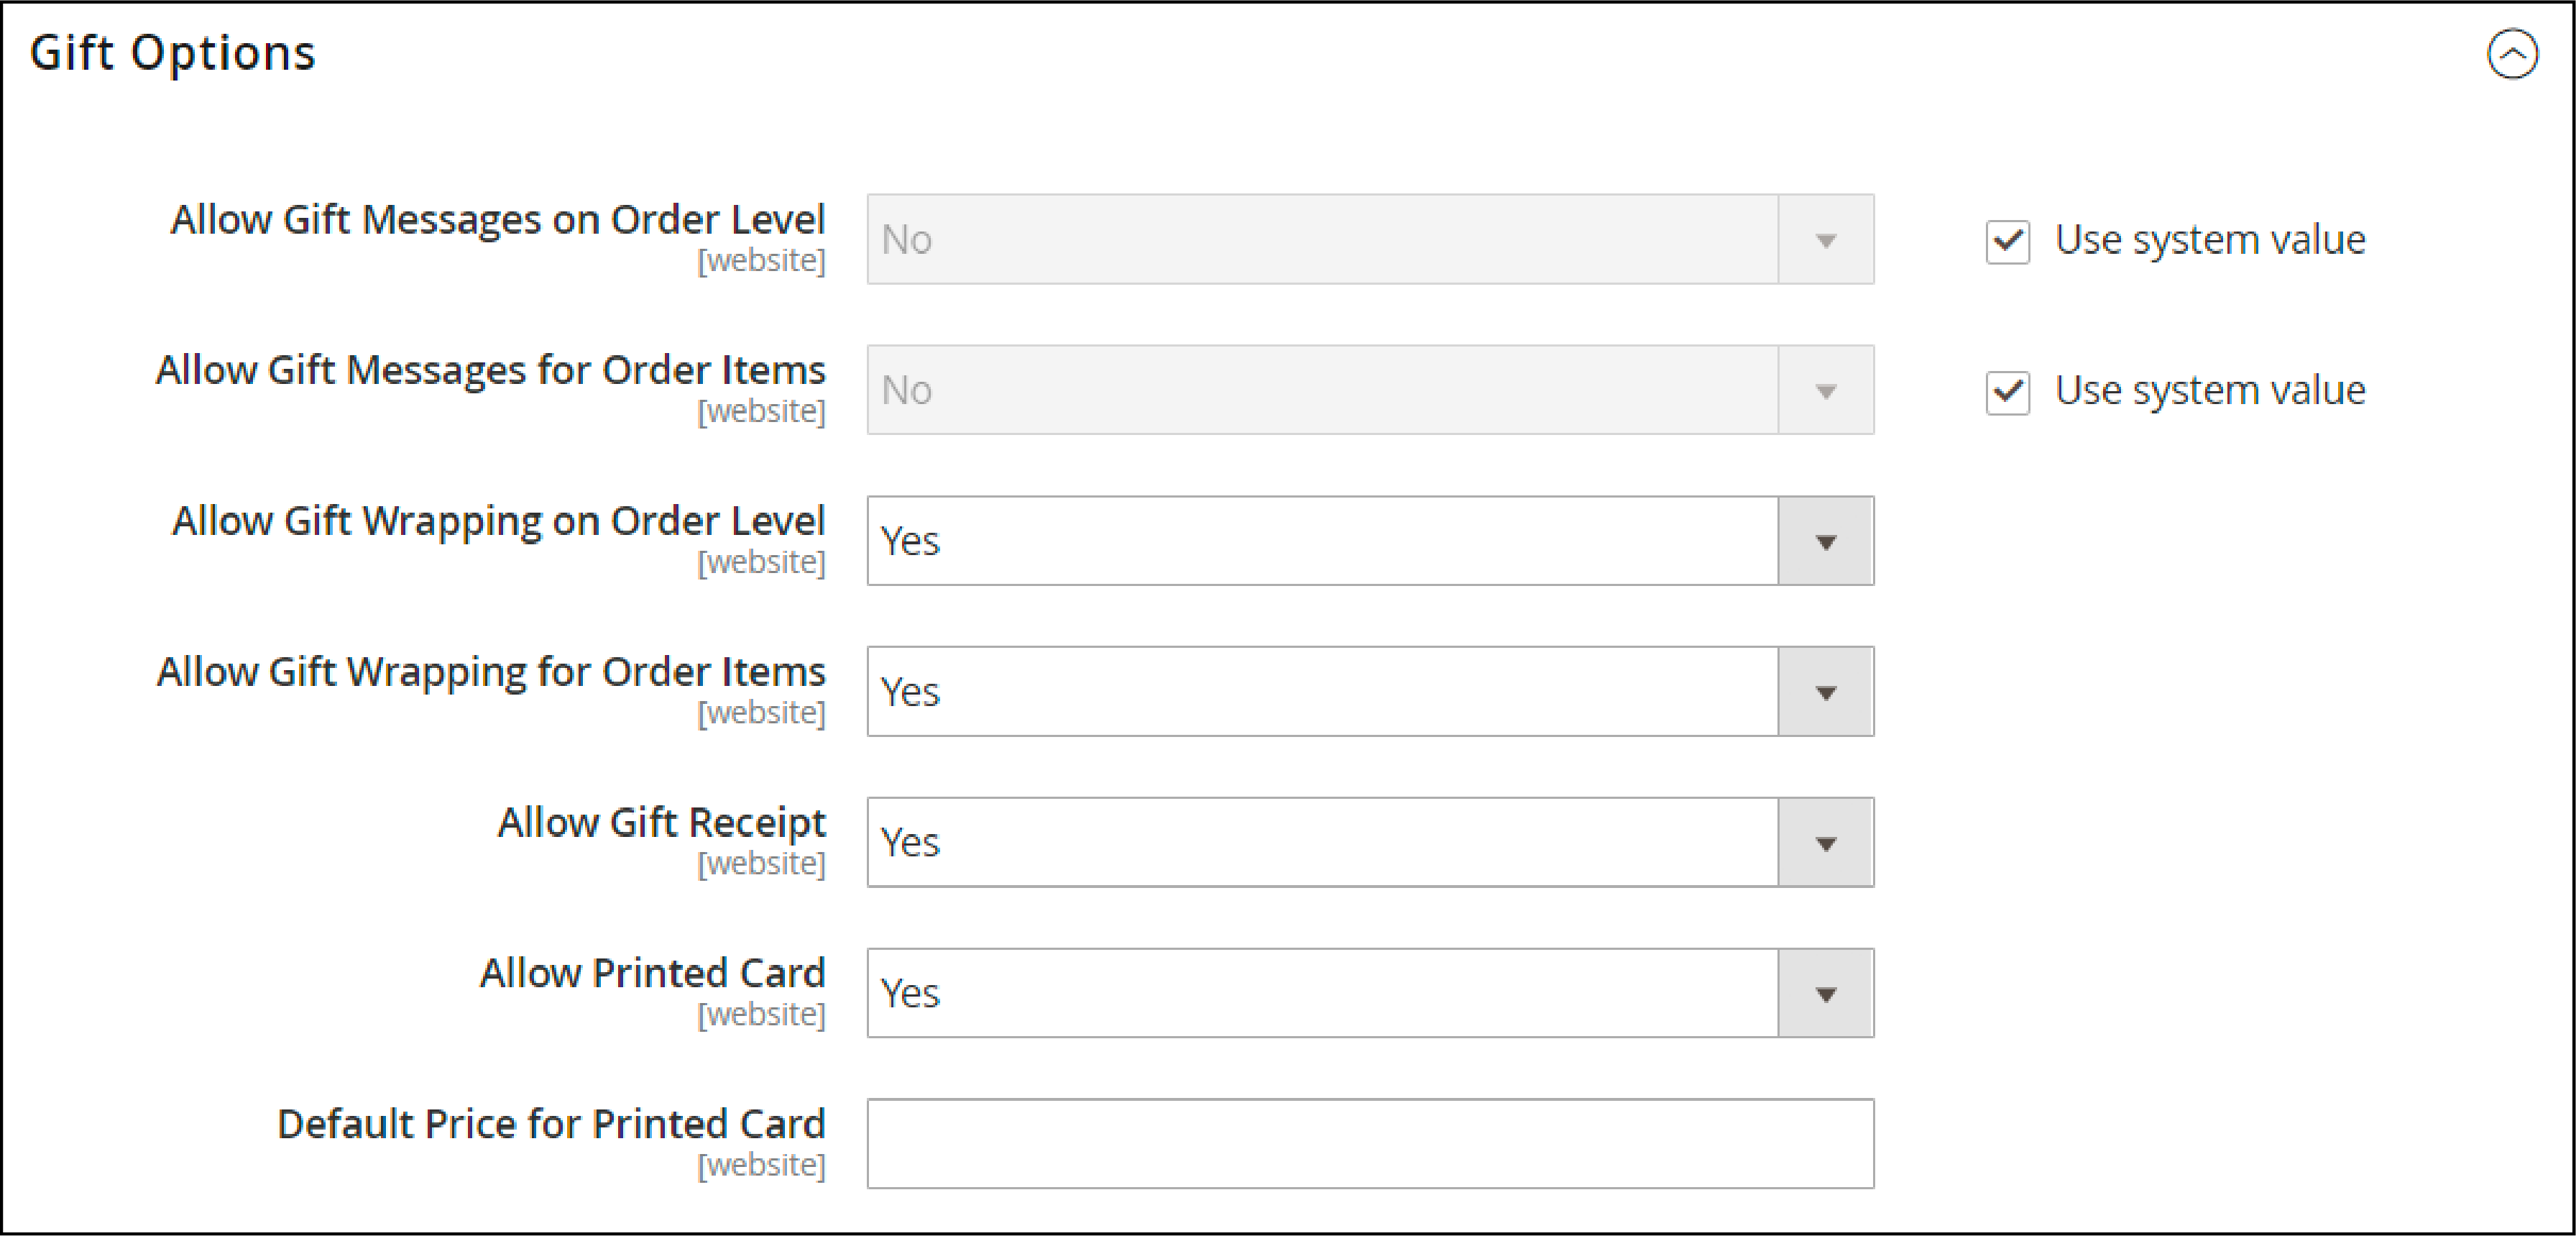
Allow your customers to add a gift message or greeting cards to the cart.
-
Go to Store > Configuration.
-
Select the
Salessection and choose theGift Options -
Allow the following permissions and select
Yes

-
Save Configto add the new changes.
5. Set Up Persistent Magento 2 Shopping Cart
The Magento 2 Persistent cart keeps track of unpurchased items that are left in the cart. It saves the information for the customer's next visit.
You can specify the cookies' time and other customer activity options.
Magento Persistent Shopping Cart Flow
The Magento 2 Persistent shopping cart is based on the value set from the backend. It records whether the customer uses different gadgets to shop from the store.
For example, the customer may start buying on their desktop computer. Later, the customer completes the purchase funnel from their phone. The Magento persistent shopping cart allows the customer finish the purchase.
Enable the Persistent Shopping Cart in Magento 2
-
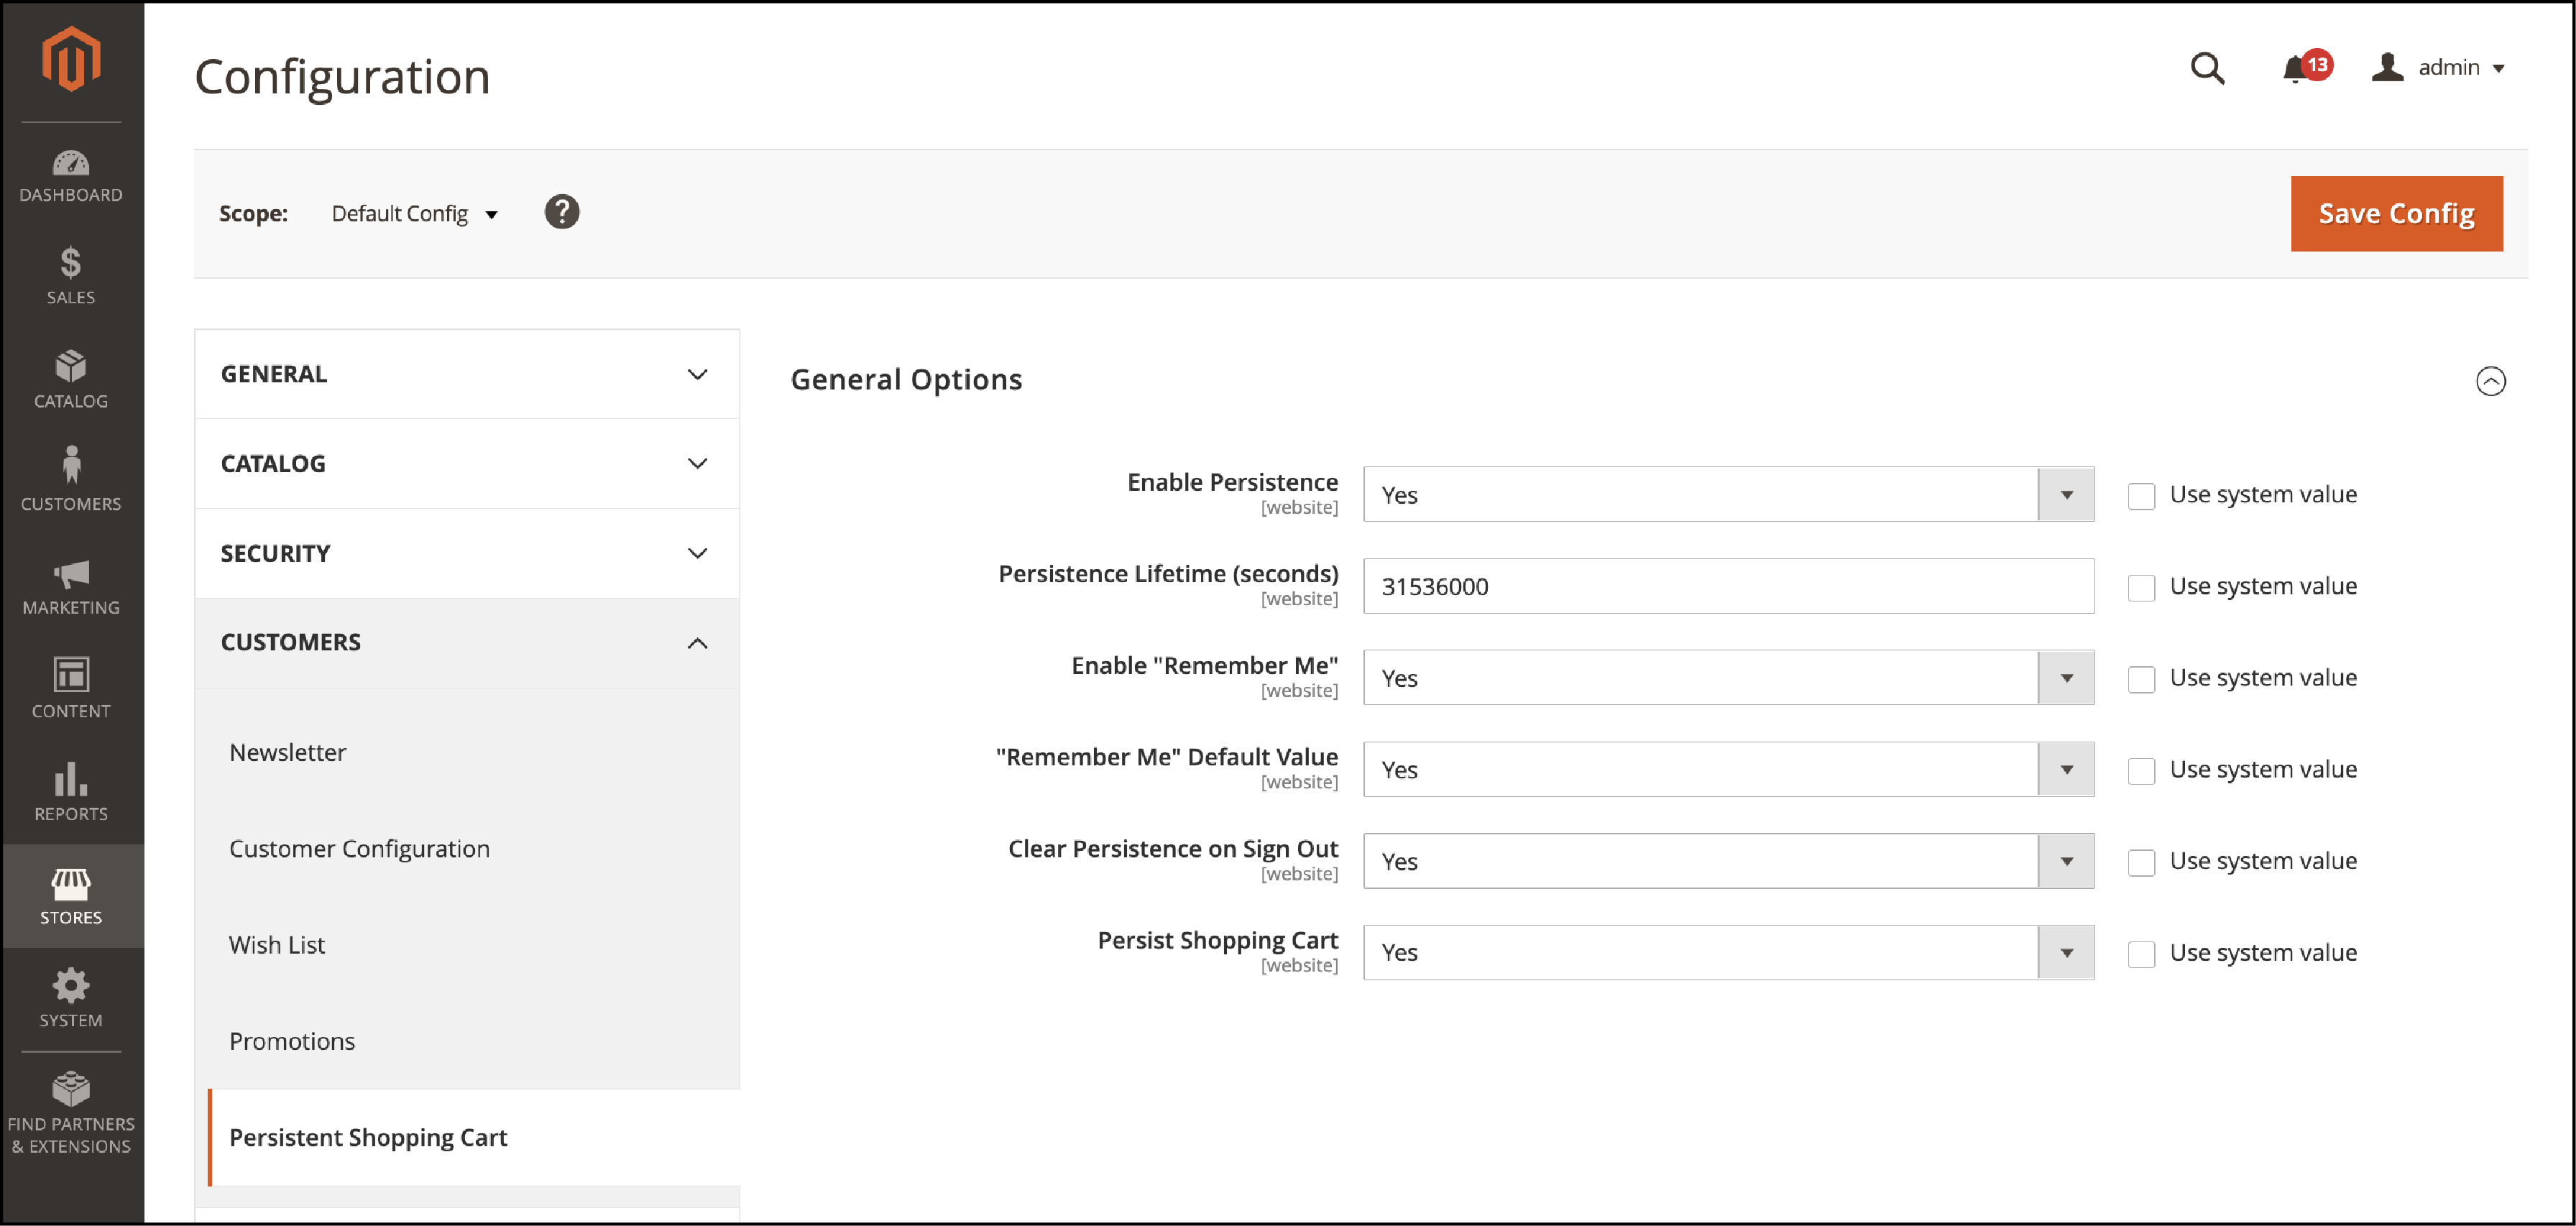
From the Magento Admin panel, go to Stores > Configuration
-
Expand Customers and select
Persistent Shopping Cart.

-
Enable Persistence to
Yes. -
You will see for
Persistence Lifetime(seconds). Specify the time in seconds for how long you want the persistent cookie to last. -
Note: The default value is
31,536,000, equal to one year. It is the maximum time allowed. -
For the
Enable Remember Meoption, select from the following:Yes: Displays the Remember Me checkbox on the login page. Customers can save their Magento shopping cart information.
No: Persistence is enabled, but users won’t get to save their information.
-
Set
Clear Persistence on Sign Outto Yes or No.Yes: The shopping cart is cleared when the registered user logs out.
No: The shopping cart is saved when the registered user logs out.
-
Set the
Persist Shopping Cartto Yes or No.Yes: If the session cookies expire, the persistence is retained.
No: The Magento shopping cart is not retained once the session cookie expires.
-
Click on
Save Configto save all the settings.
Summary
Magento 2 shopping cart offers the activities performed by your store customers. You can set up variations like redirect to cart, quote lifetime, cart thumbnail, etc., for your store.
We covered the different ways to configure the shopping cart. It allows users to complete the purchase funnel and improves the overall customer experience.
For more guides on configuring Magento 2, check out MGT Commerce tutorials.


