
How to Install Magento 2 Demo Data in 3 Steps?
Ready to simplify your store setup and testing process? Magento 2 Demo Data is a key tool for testing and development. It provides pre-loaded sample data like products and categories. This helps create a realistic Magento 2 store.
This tutorial will cover how Magento 2 sample data makes setup simple.
Key Takeaways
-
What are the aspects of demo data in Magento 2?
-
Frontend and admin panel features of demo data.
-
Set up instructions to install demo data using CLI.
-
Best practices ensure efficient use of demo data and fewer issues.
-
Benefits improve the performance and reliability of demo data.
What is Magento 2 Demo Data?
Magento 2 Demo Data is a pre-configured sample data module. It creates a complete demo store for testing and development.
Magento 2 demo data helps users install sample data. It includes products, categories, and CMS pages. Demo data test store functionality in a realistic environment. The sample data setup uses PHP and the Magento CLI to set up the data.
It pulls required files from a GitHub repository or the official Magento repository. After installation, the sample data provides a test store environment. It mimics a real Magento store.
Frontend Features of Magento 2 Demo Data
1. Home Page

The demo homepage uses the Luma theme by default. You can change it to the Blank theme by using the admin panel. The homepage is designed to display promotions, featured products, and categories. Visitors can navigate easily using content blocks and the top menu.
Key Features:
-
Highlight promotions and top-selling products.
-
Use menus for easy navigation.
-
Add content blocks for banners and featured collections.
The homepage offers ecommerce owners a way to showcase their Magento instance. It improves the shopping experience for customers.
2. Category Page
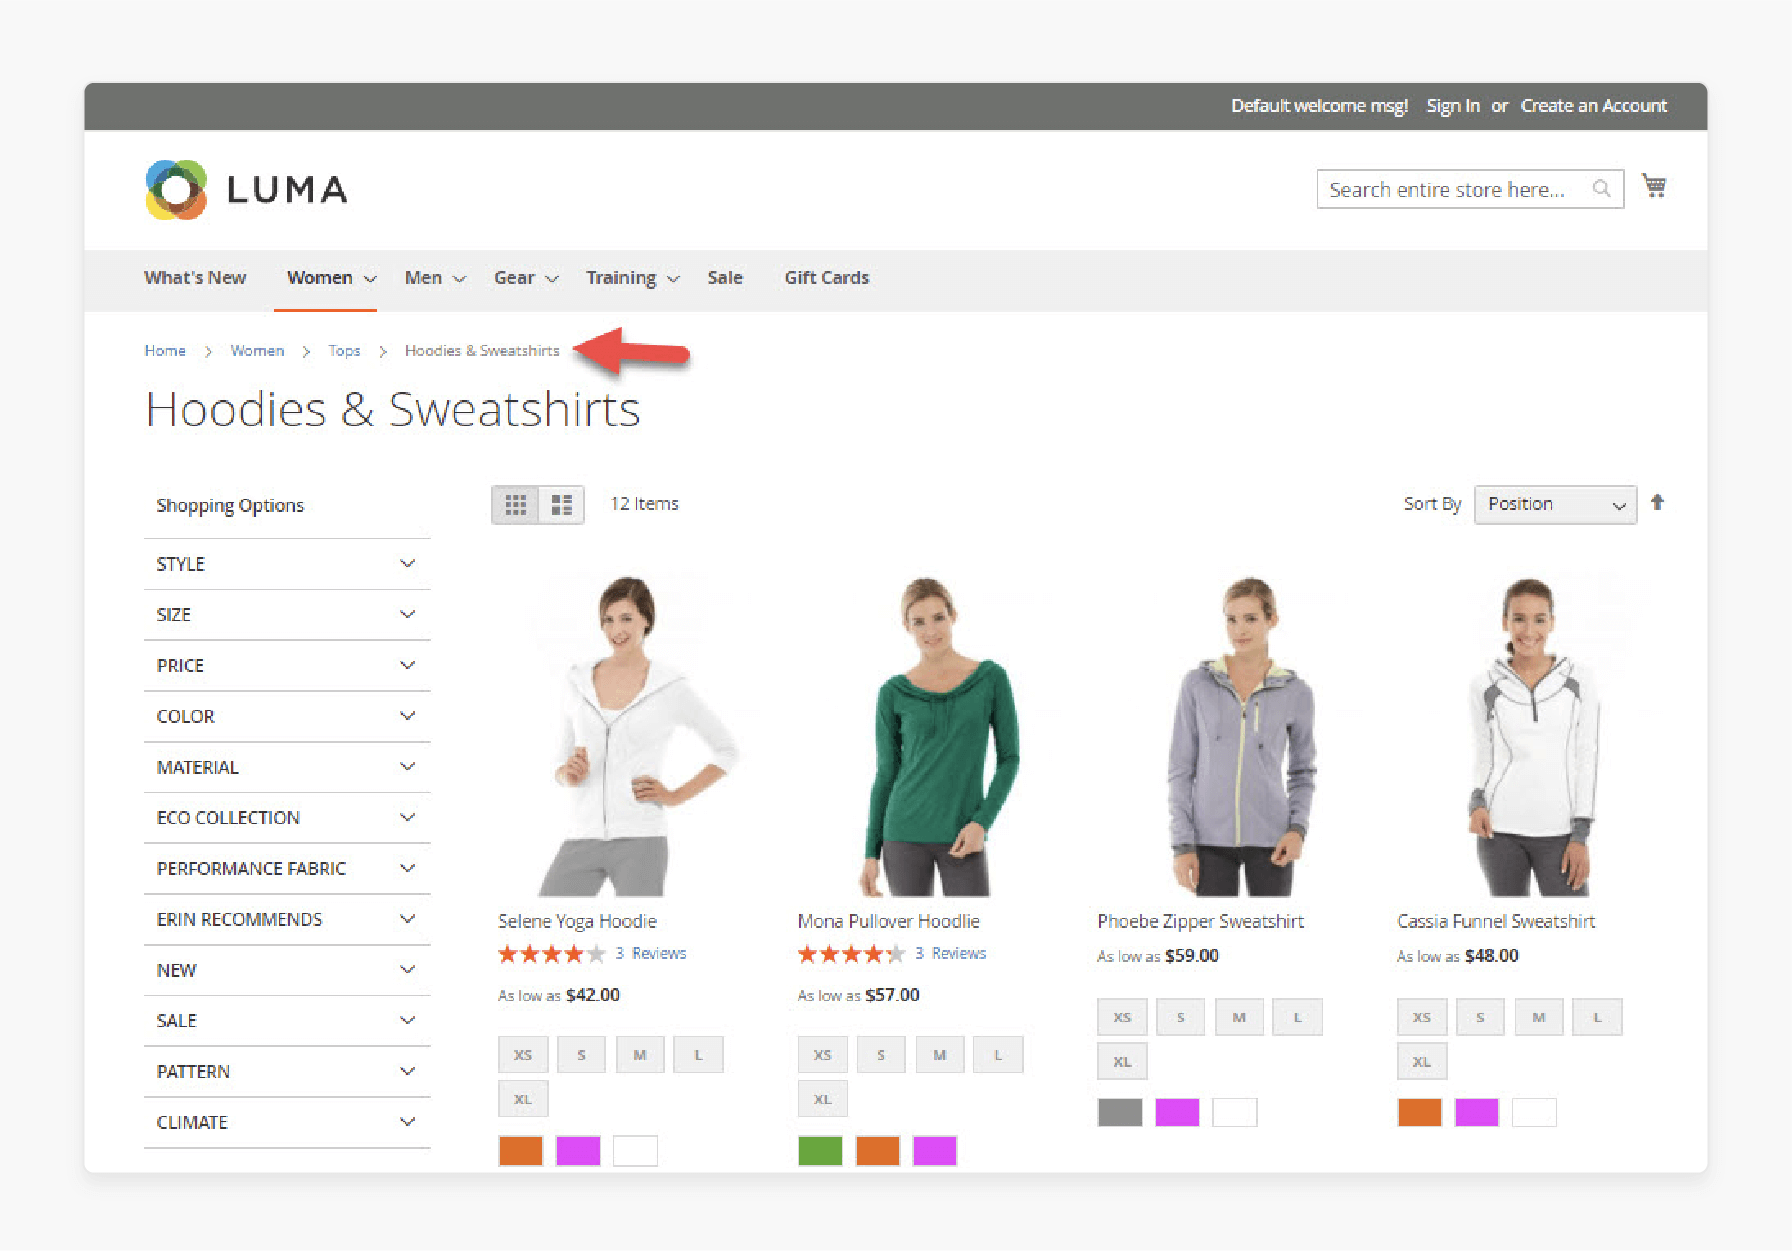
Category pages organize products into categories and subcategories. For example, the “Women” category might include “Tops” with subcategories like “Hoodies & Sweatshirts.” These pages let customers filter products or sort them by attributes.
Key Features:
-
Show page layout with clear navigation.
-
Allow sorting by size, color, or price.
-
Let customers add products to the cart without visiting product pages.
A demo ecommerce store can use categories like “New Arrivals.” It helps to test how customers browse and filter products.
3. Product Page

The product page displays all the details about a product. The sample data includes configurable products, which allow customers to select options. It provides size or color.
Key Features:
-
Image gallery: Shows product images with swipe navigation.
-
Description section: Includes details, specifications, and reviews.
-
Related products: Suggest complementary or upsell items.
-
Add to Cart: Simplifies the process of adding items for purchase.
This page highlights the storefront's ability to organize and display product details. It helps the store owners refine their product pages.
4. Checkout Page
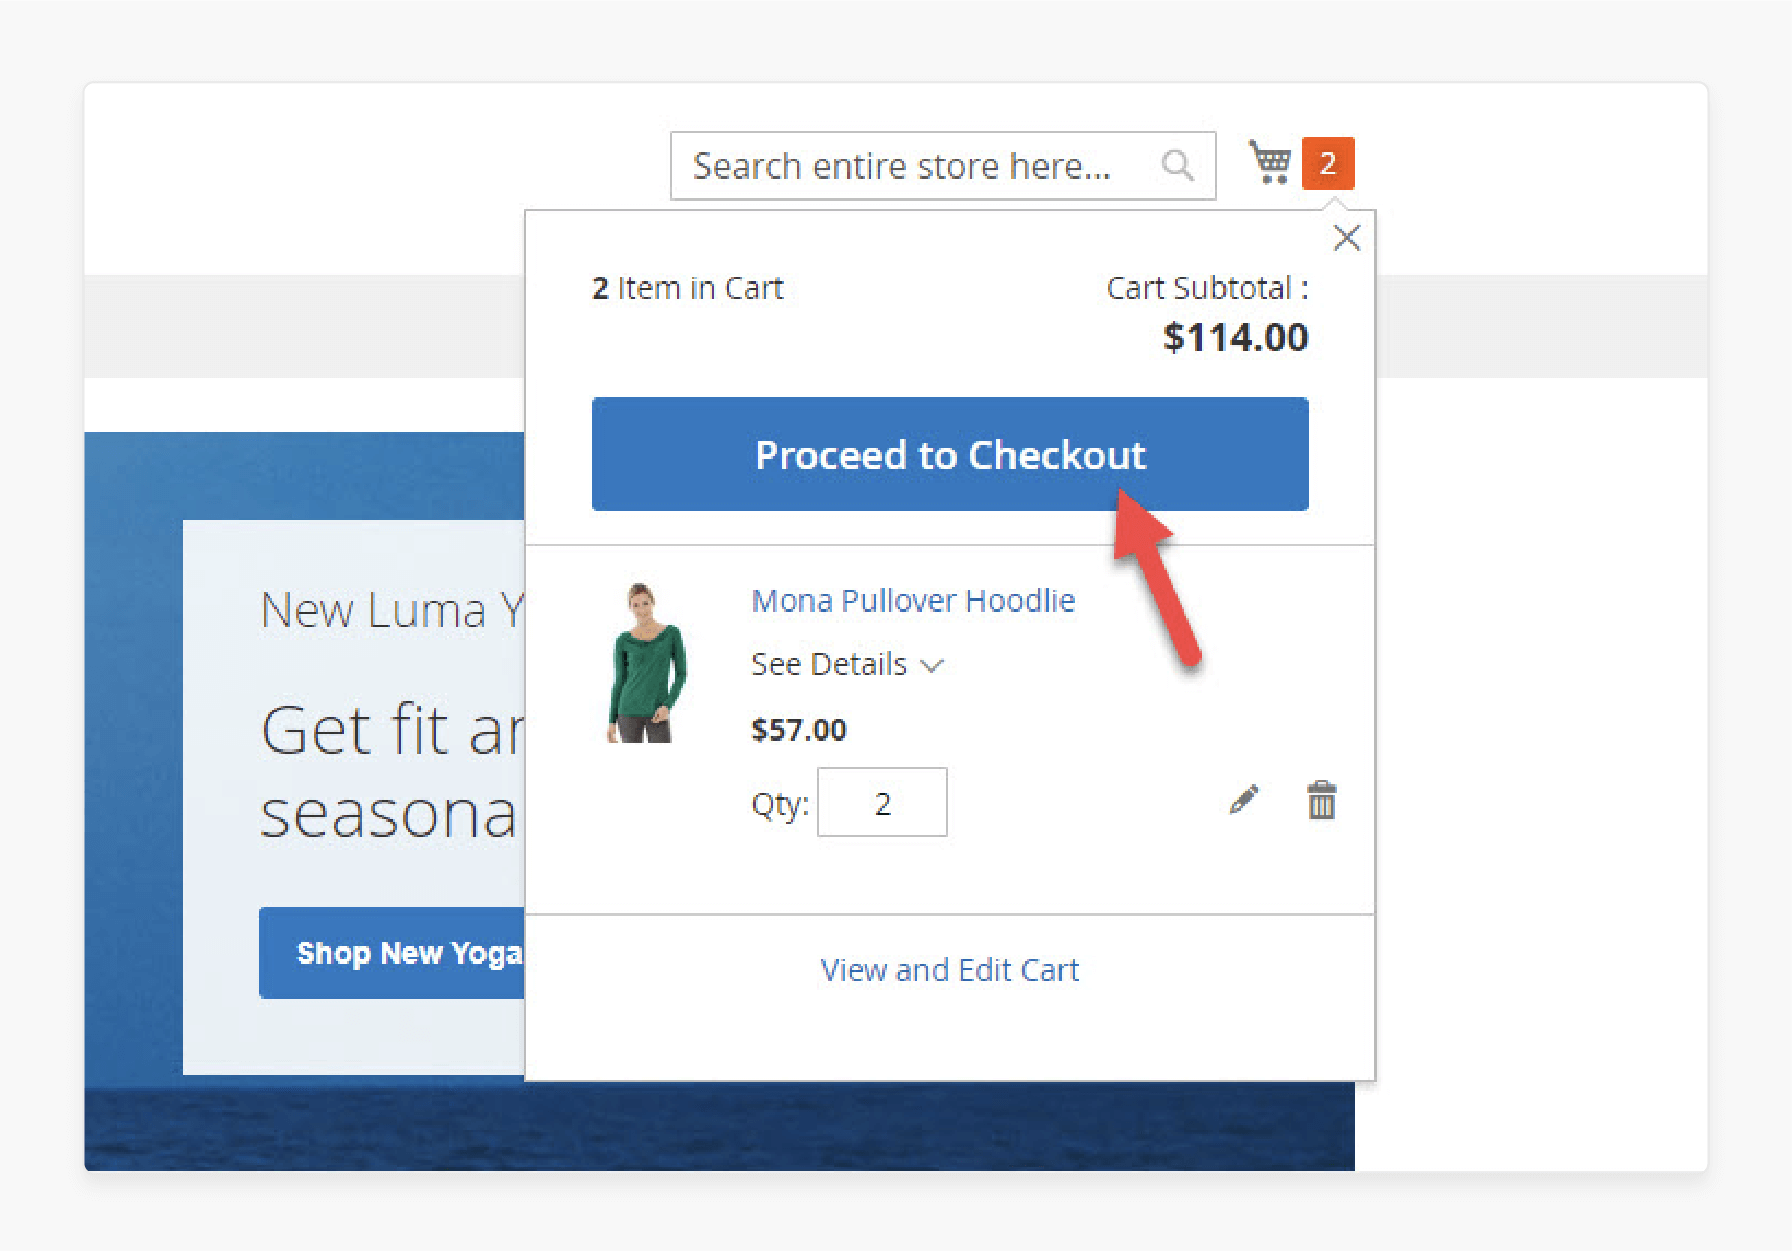
The checkout page lets customers complete their purchases after adding items to the cart. It includes steps for entering shipping and payment details.
Checkout Process:
-
Enter shipping details like email, address, and phone number.
-
Select a shipping method.
-
Review the order details before placing it.
-
Apply promotional pricing rules or gift cards if available.
This page ensures a smooth checkout process, enhancing the shopping experience for customers.
5. Account Creation Page
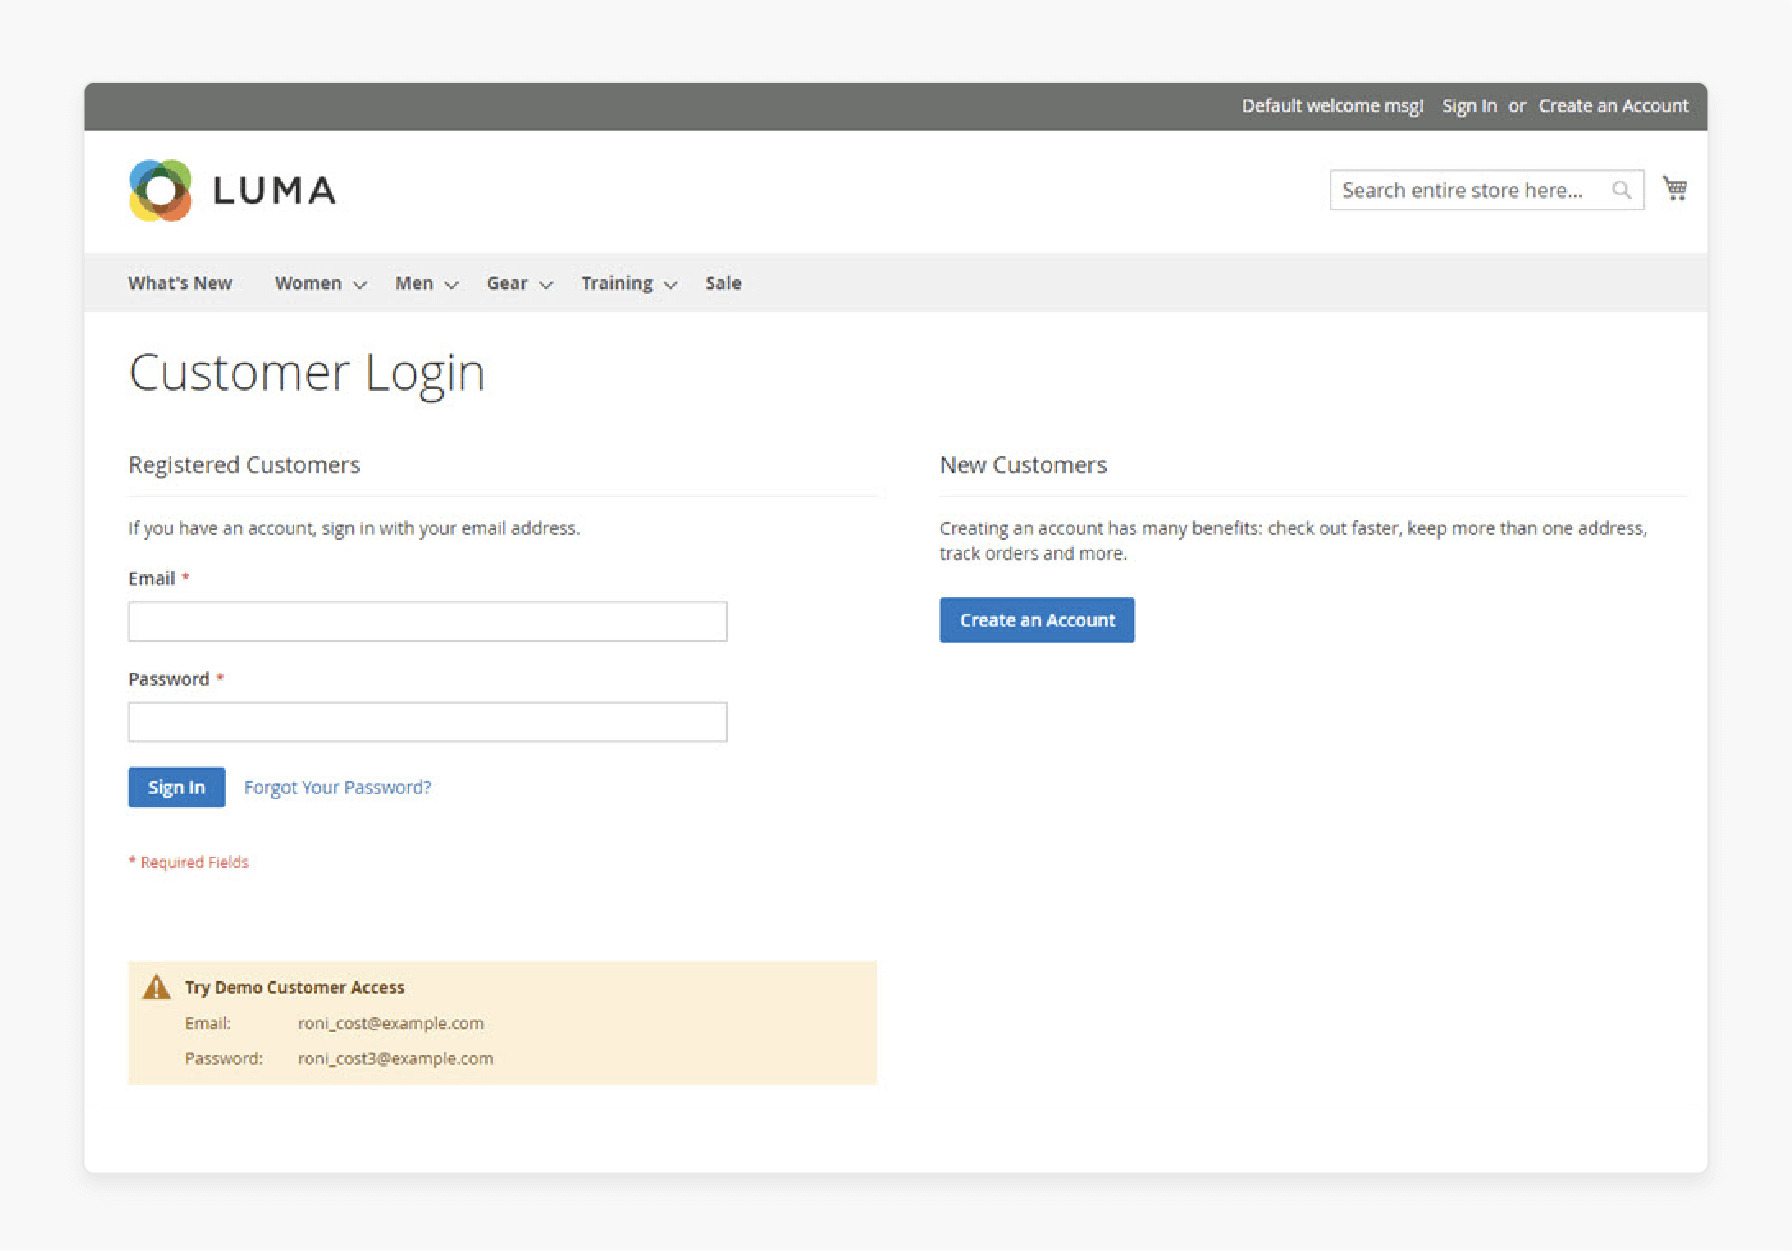
The account creation page lets visitors register or log in. Most test stores include sample credentials to test account features. It provides order tracking or account management.
Key Features:
-
Manage personal details, billing, and shipping addresses.
-
Track orders and view purchase history.
-
Adjust newsletter and subscription settings.
This page demonstrates how Magento allows customers to personalize their accounts. It gives the admin tools to manage user data.
6. Other Static Pages
Magento test stores feature static pages that are accessible from the footer. These pages provide helpful information for customers.
Examples:
-
About Us: Share your company’s story.
-
Privacy and Cookie Policy: Outline how customer data is handled.
-
Customer Service: Offer answers to common questions.
-
Orders and Returns: Assist customers with returns and refunds.
-
Contact Us: Let customers send inquiries directly to the store.
Static pages build trust and enhance the professional appearance of an online store.
Magento 2 Backend Demo Features
1. Dashboard
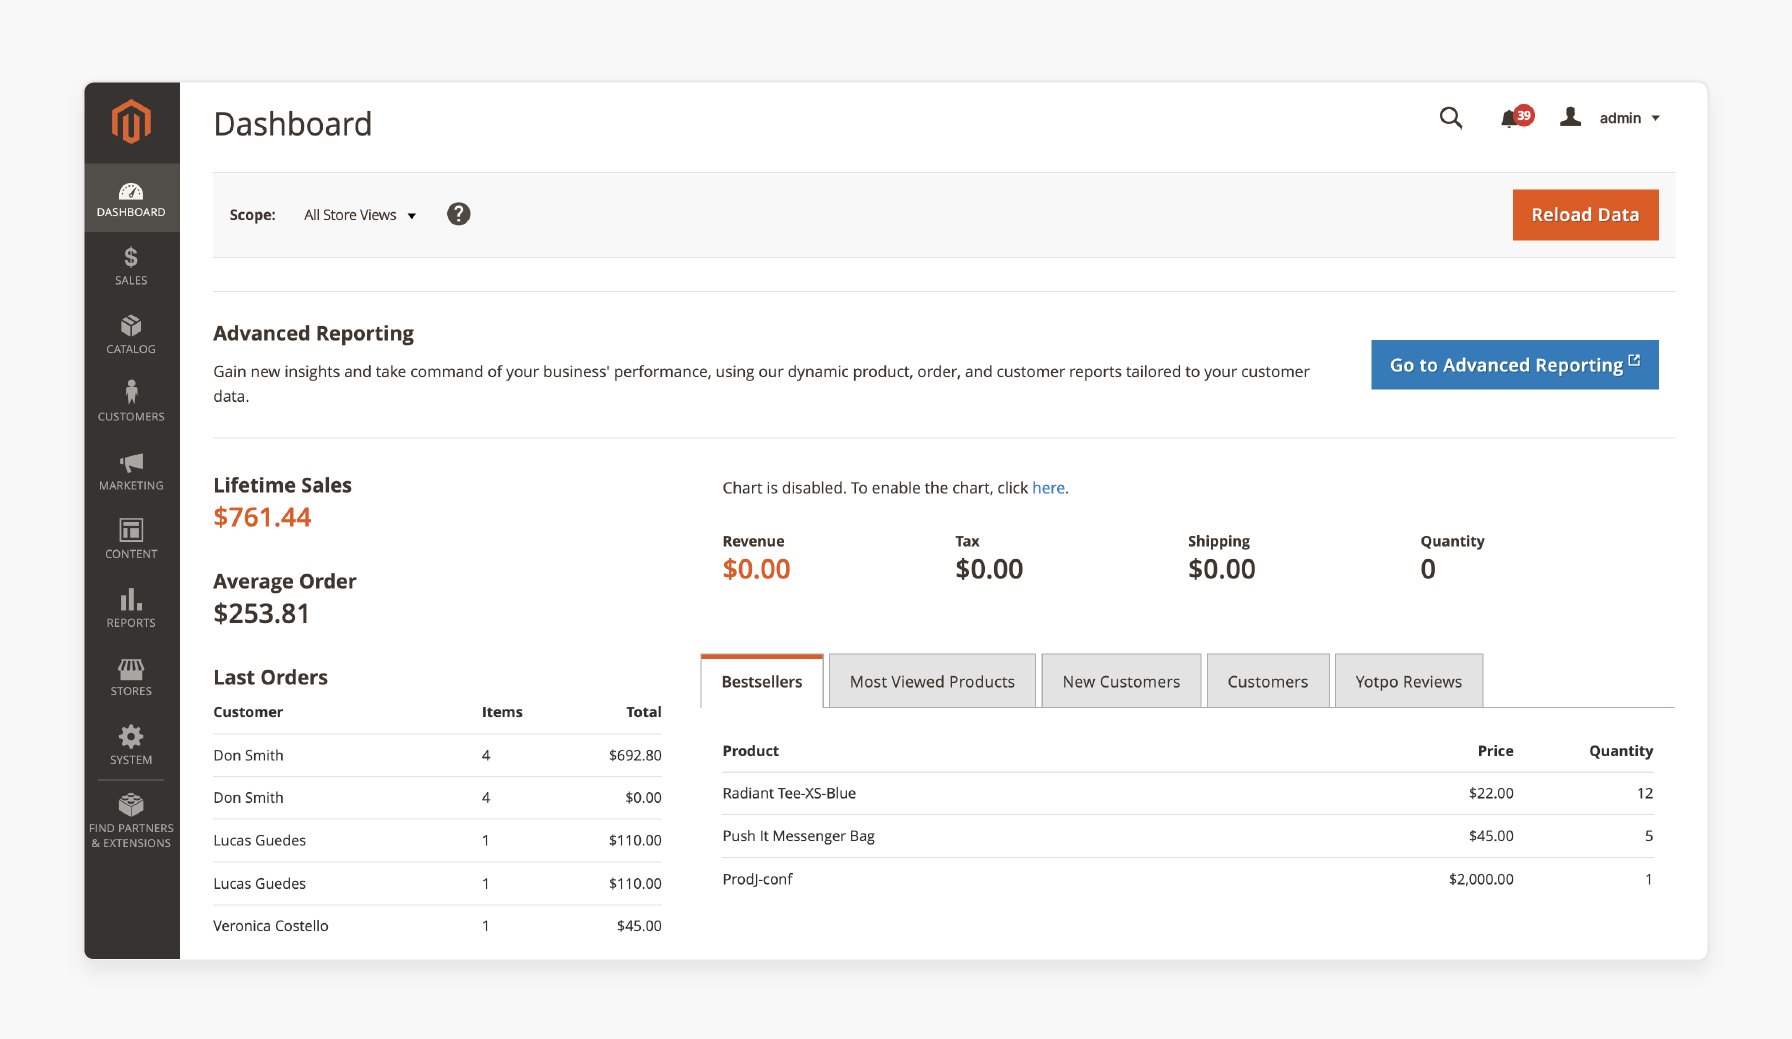
The demo site dashboard shows an overview of key metrics like sales, orders, and revenue. It includes widgets that highlight important features and functionalities. This helps you monitor store performance and make better decisions. Important reports include:
-
Lifetime Sales
-
Average Order
-
Last Order
-
Last Search Terms
-
Top Search Terms
The dashboard shows widgets for best sellers, most viewed products, new customers, and customer details. For deeper insights, use the Go to Advanced Reporting button. Use the admin panel on the left to navigate and configure your storefront.
2. Sales
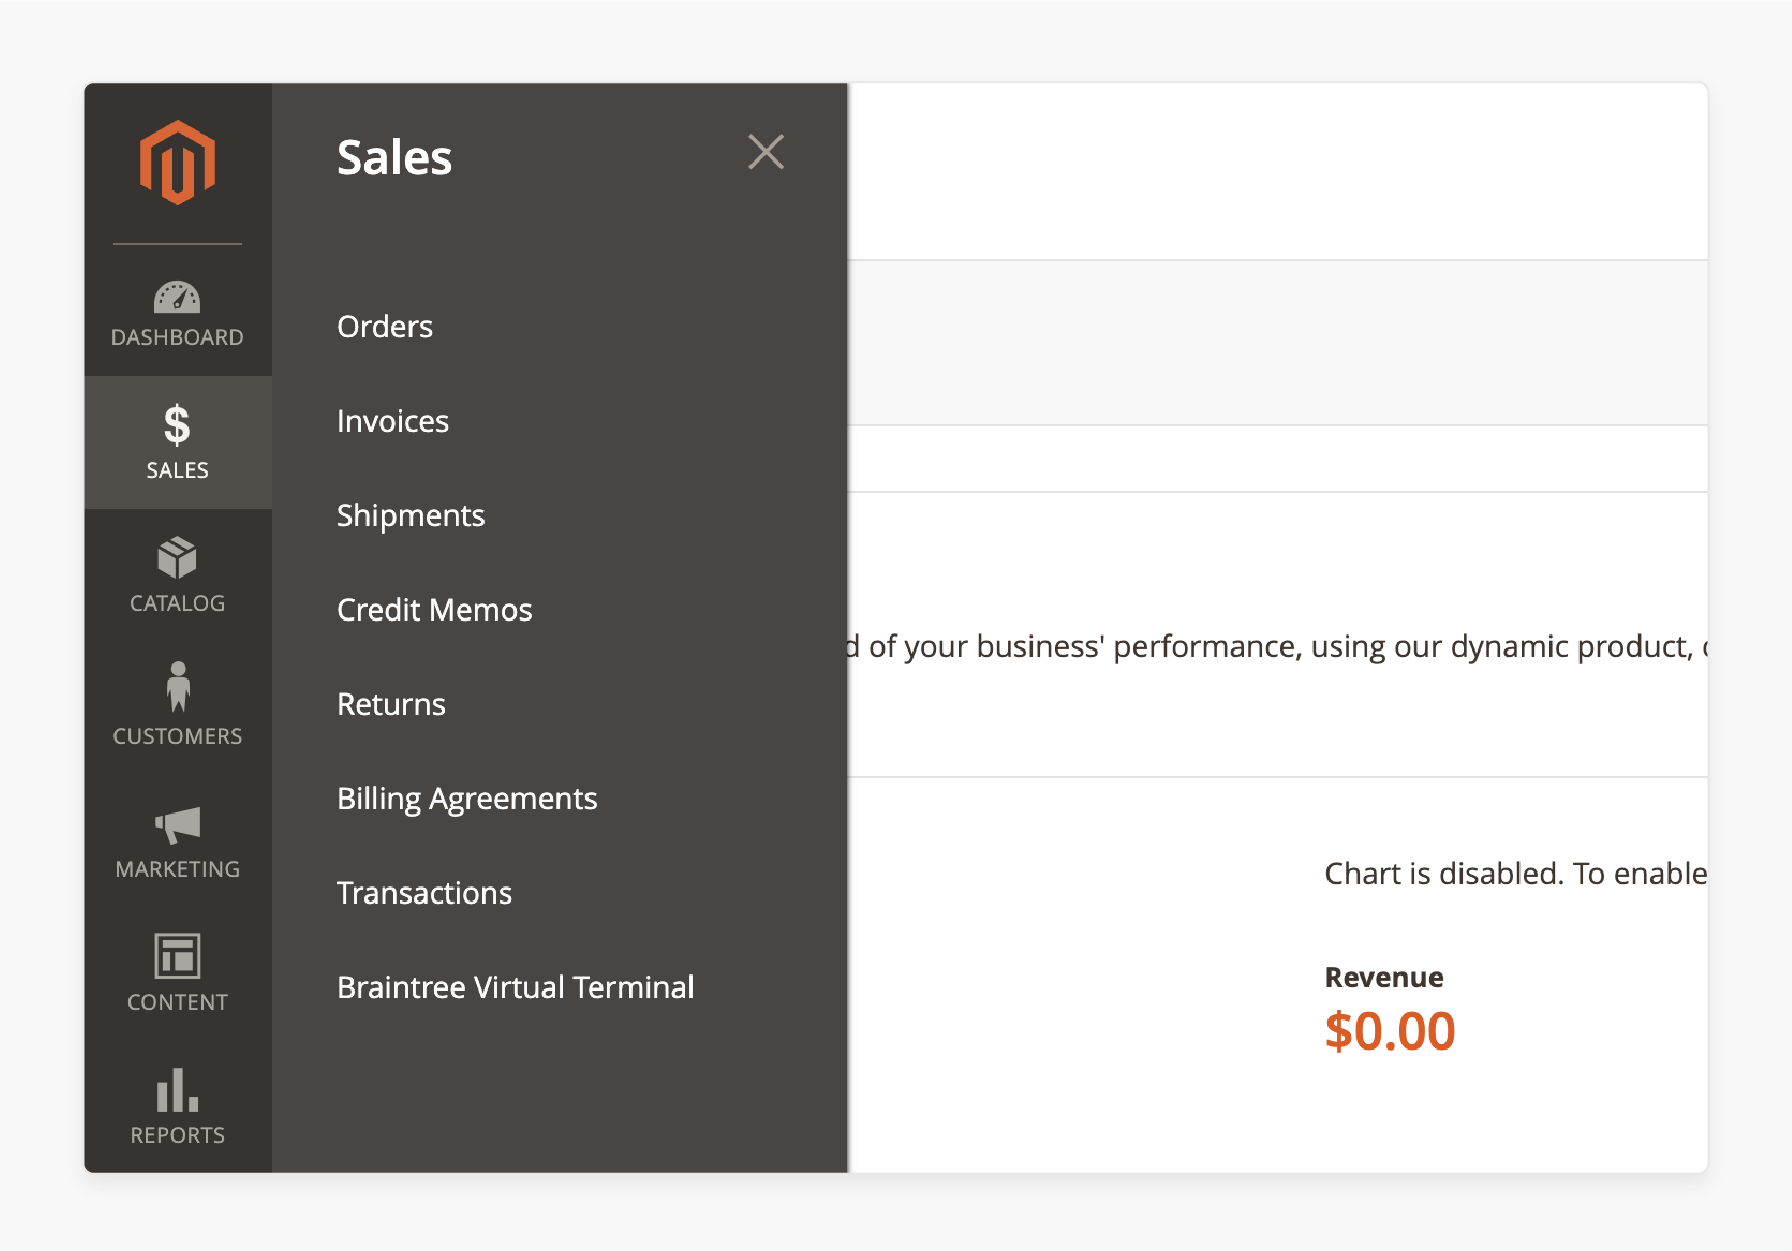
The Sales tab tracks all stages of the order process from start to finish. It includes tools for managing orders, creating invoices, and handling shipments. The tab also provides commerce-specific features to improve sales management.
- Orders
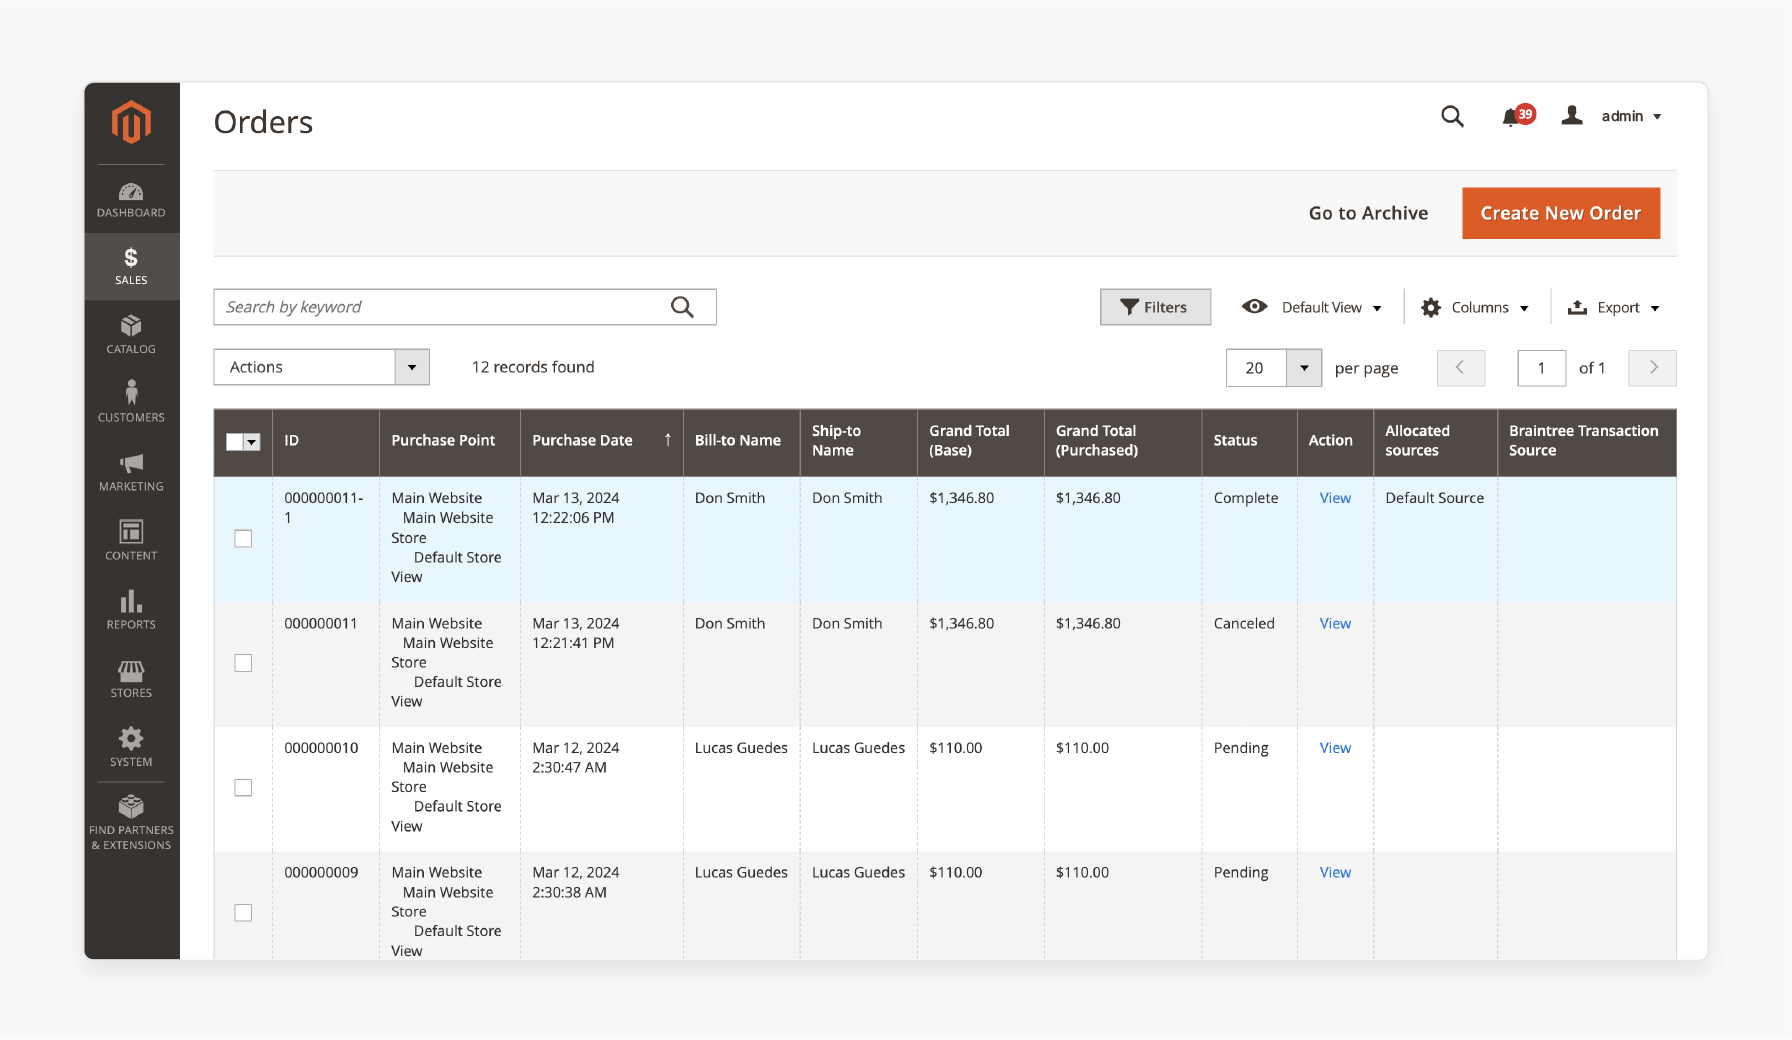
The Orders grid lets you control your orders. Columns include:
-
Order ID
-
Purchase Point (where the order was placed)
-
Purchase Date
-
Billing and Shipping Details
-
Grand Total (Base and Purchased)
-
Order Status (e.g., Completed, Processing, Pending)
-
Actions (e.g., View detailed order information)
-
Allocated Sources
-
Braintree Transaction Source
Export data into CSV or XML formats. To create a new order, click Create New Order.
- Invoices
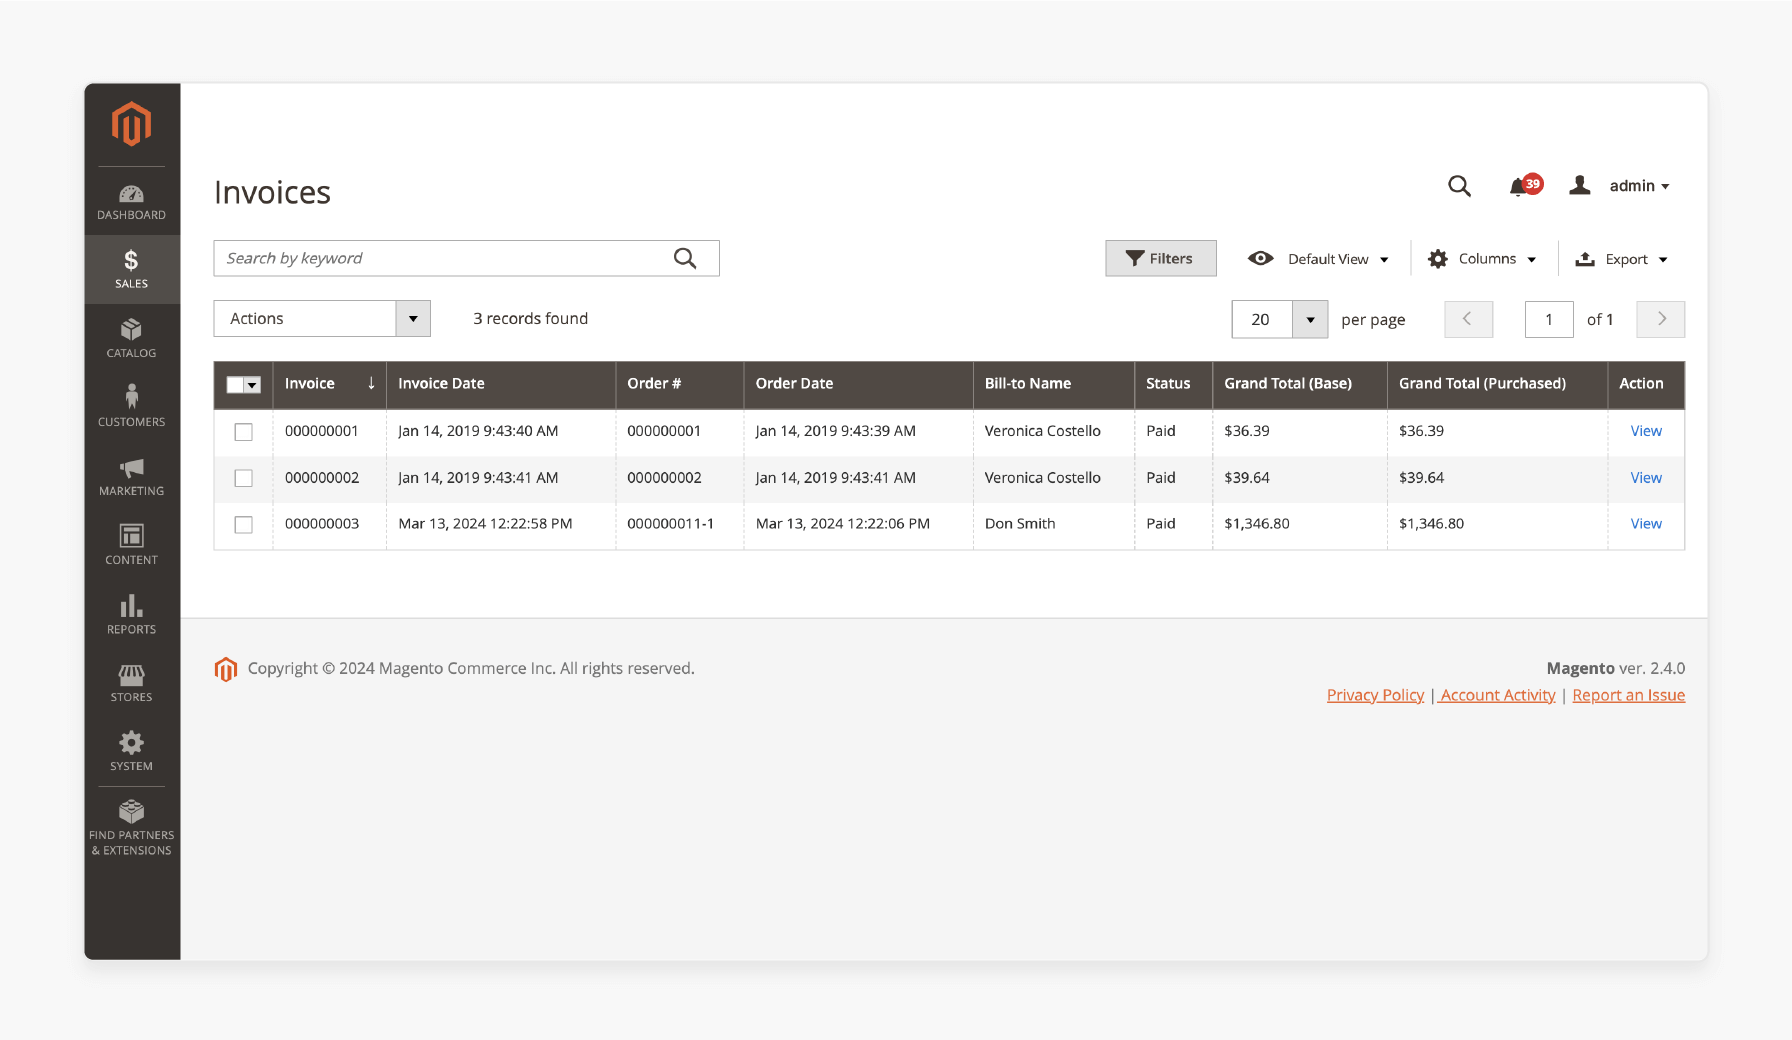
The invoice grid tracks invoice details. It shows:
-
Invoice Number and Date
-
Order Number and Date
-
Billing Details
-
Invoice Status (e.g., Completed, Processing, Pending)
-
Grand Total (Base and Purchased)
-
Actions (e.g., View invoice details)
You can export invoice data into CSV or XML files.
- Shipments
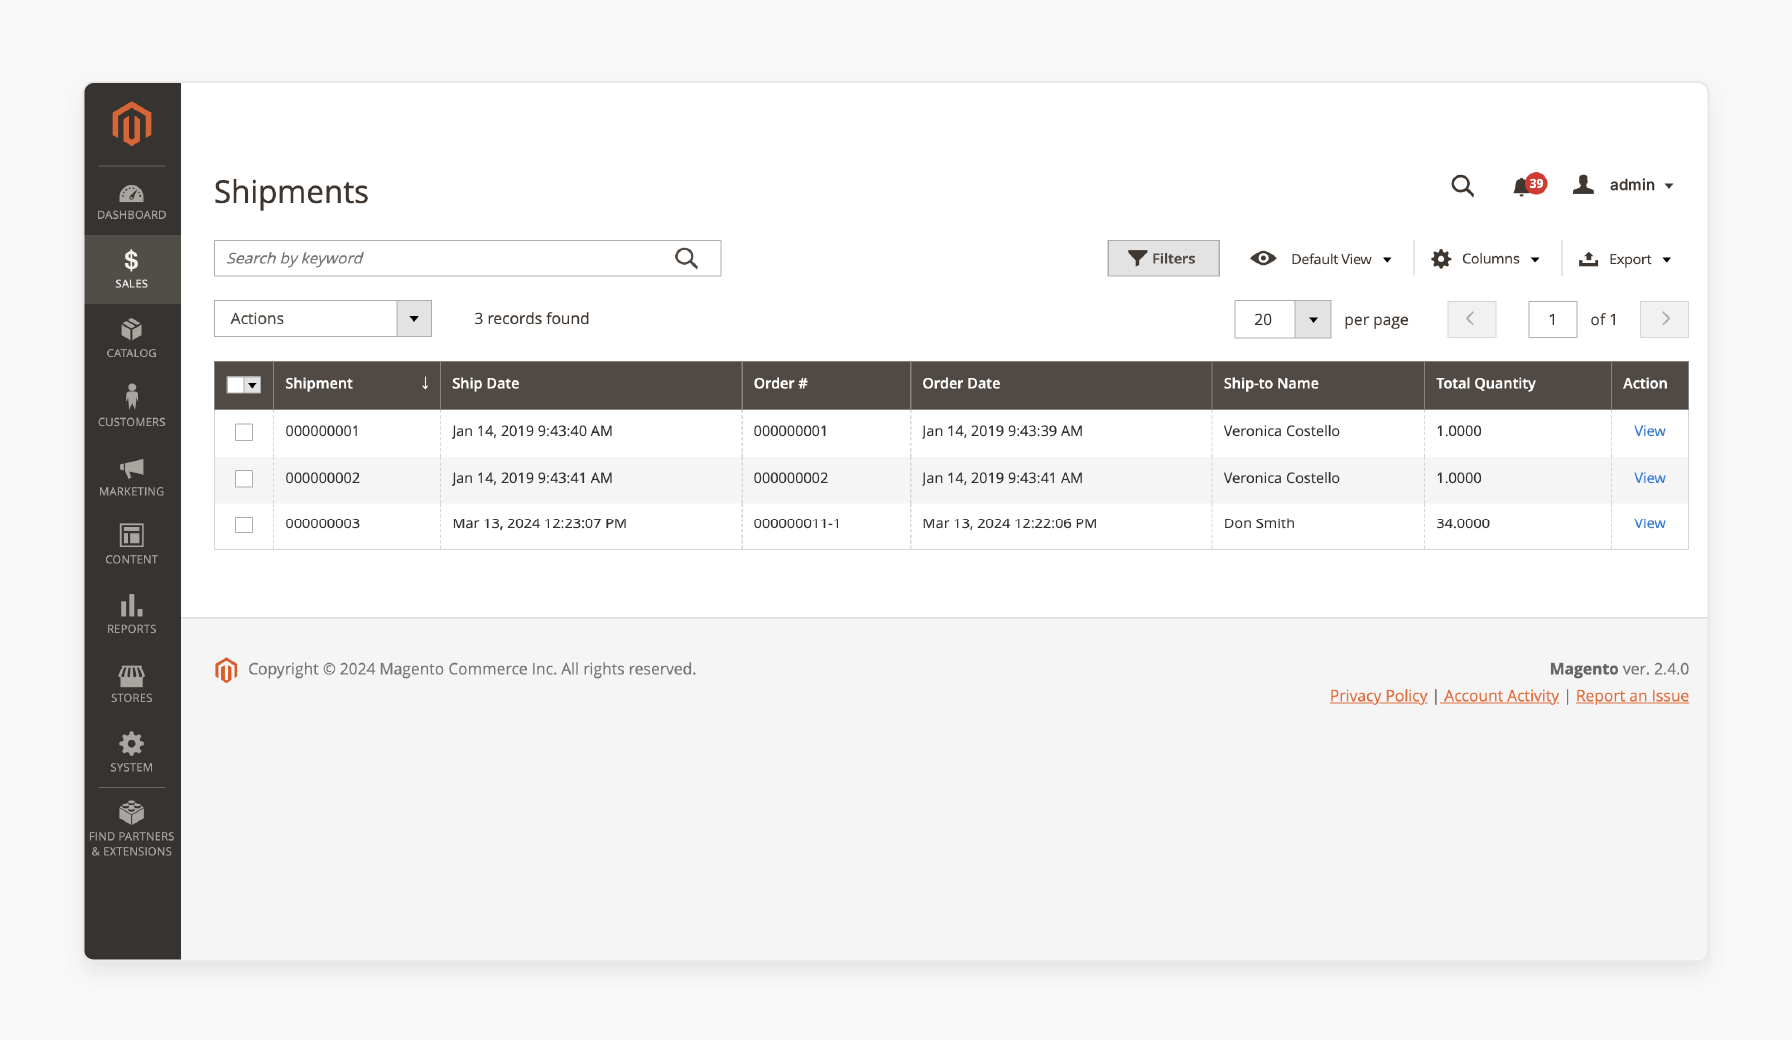
The Shipments grid helps manage shipments. It includes:
-
Shipment Number and Date
-
Order Number and Date
-
Ship-To Name
-
Total Quantity
-
Actions (e.g., View shipment details)
Similar sections, such as Credit Memos, Billing Agreements, and Transactions, provide easy access.
3. Catalog
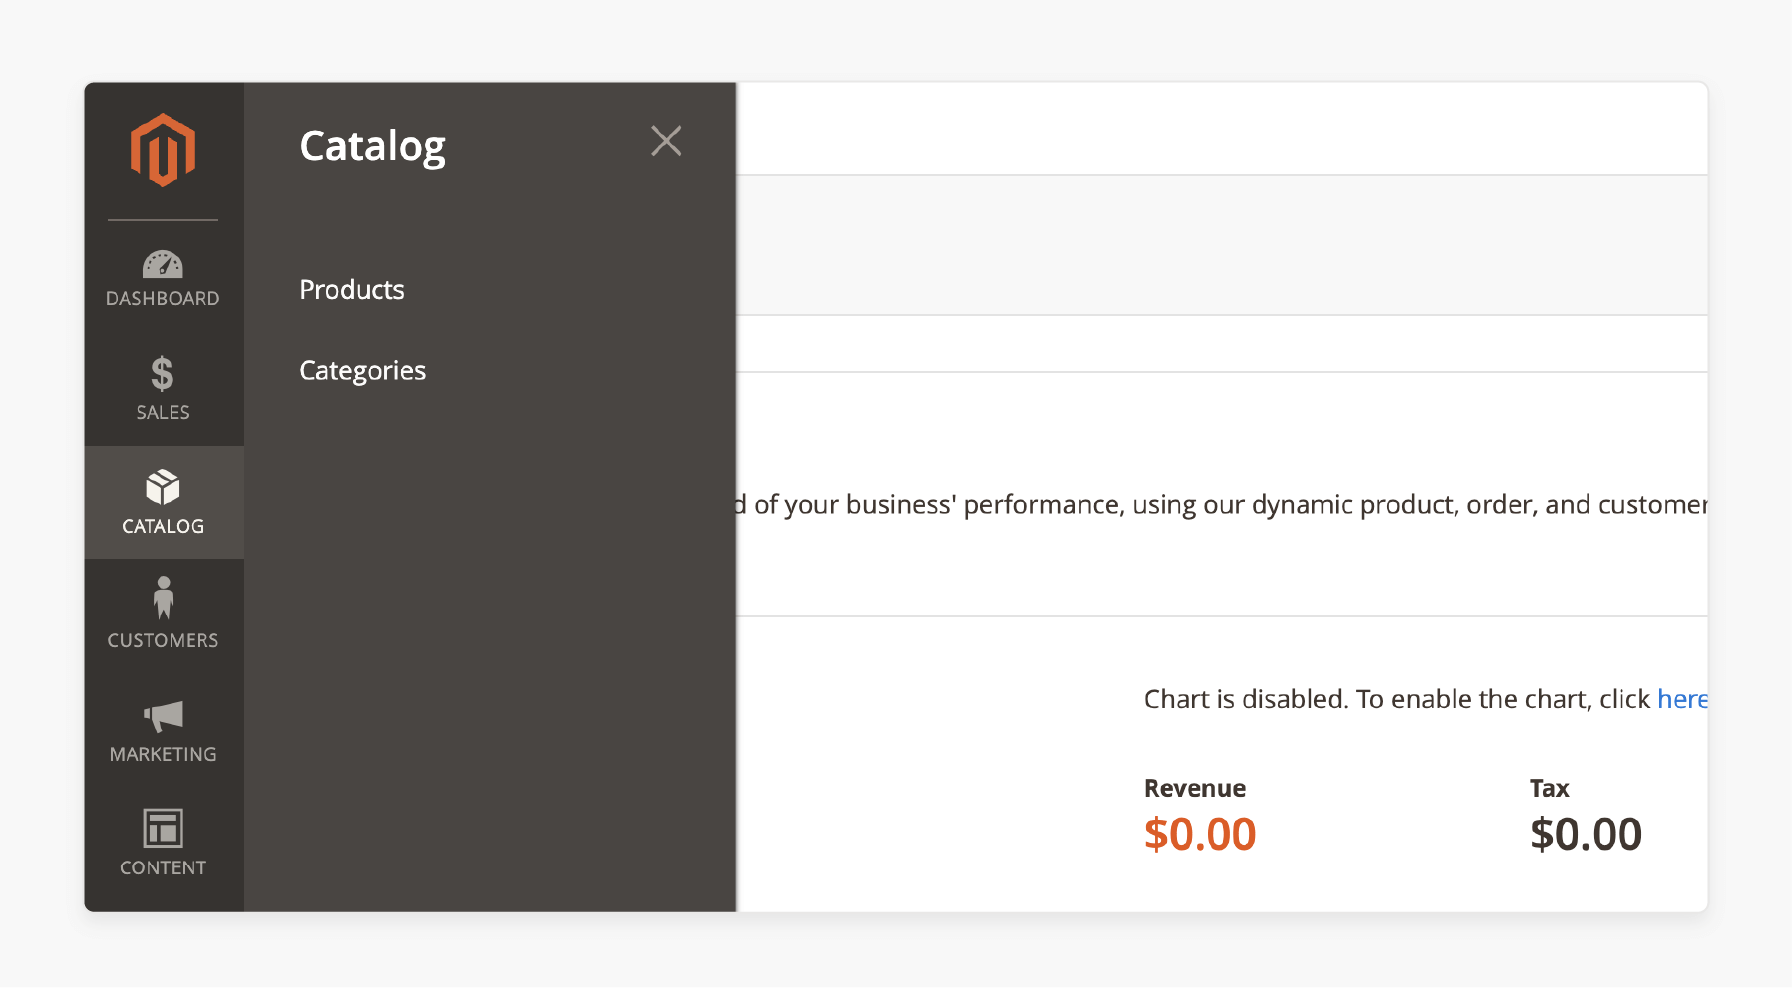
The Catalog menu organizes products and categories. You can create and manage products while assigning them to categories. It includes a sample data overview, which simplifies inventory structure and improves clarity.
-
Products: Create and manage products using a grid with columns. It includes ID, Thumbnail, Name, Type, SKU, Price, Quantity, Visibility, and Status. Use filters to simplify daily tasks.
-
Categories: Help organize products. You can create them independently or while adding products. The category grid lets you manage all categories.
4. Customers
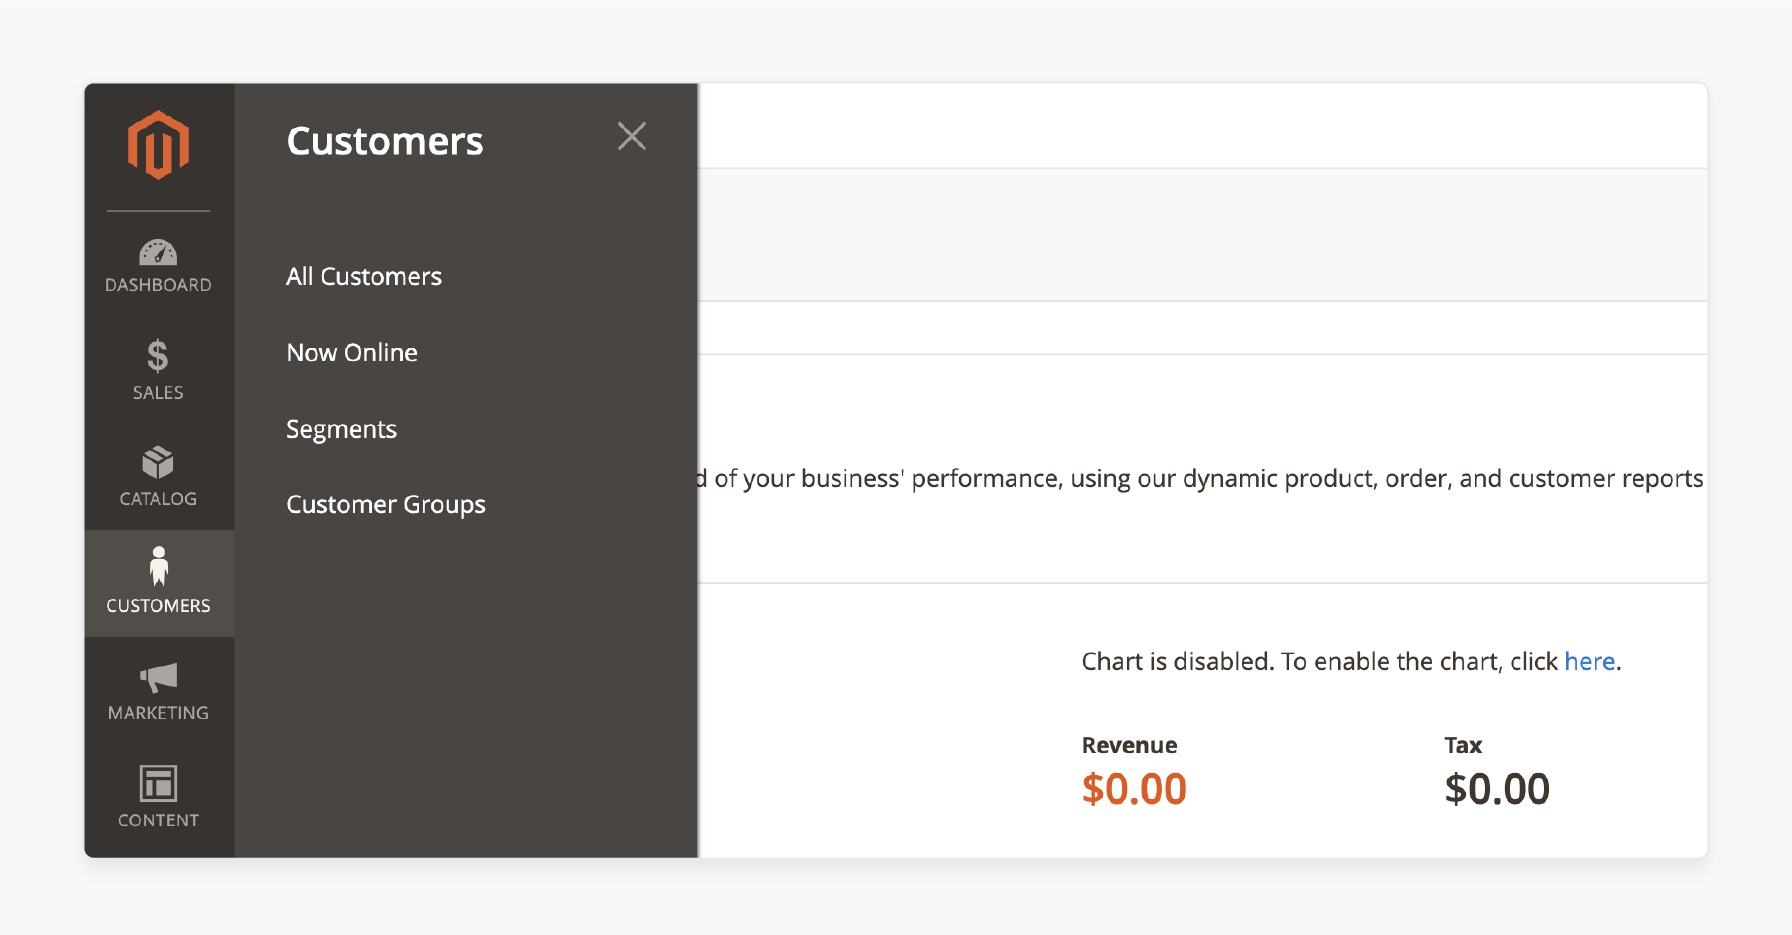
The Customers section stores all customer data. It includes account details and order histories. It helps you group customers for specific actions. It gives you the answer you're looking for in managing customer information.
-
All Customers: View registered customer accounts. Columns include Name, Email, ZIP, Country, Date of Birth, and Account Age. You can export or import customer data in XML or CSV files.
-
Now Online: Track visitors currently on your website.
-
Customer Groups: Group customers for bulk actions.
5. Marketing
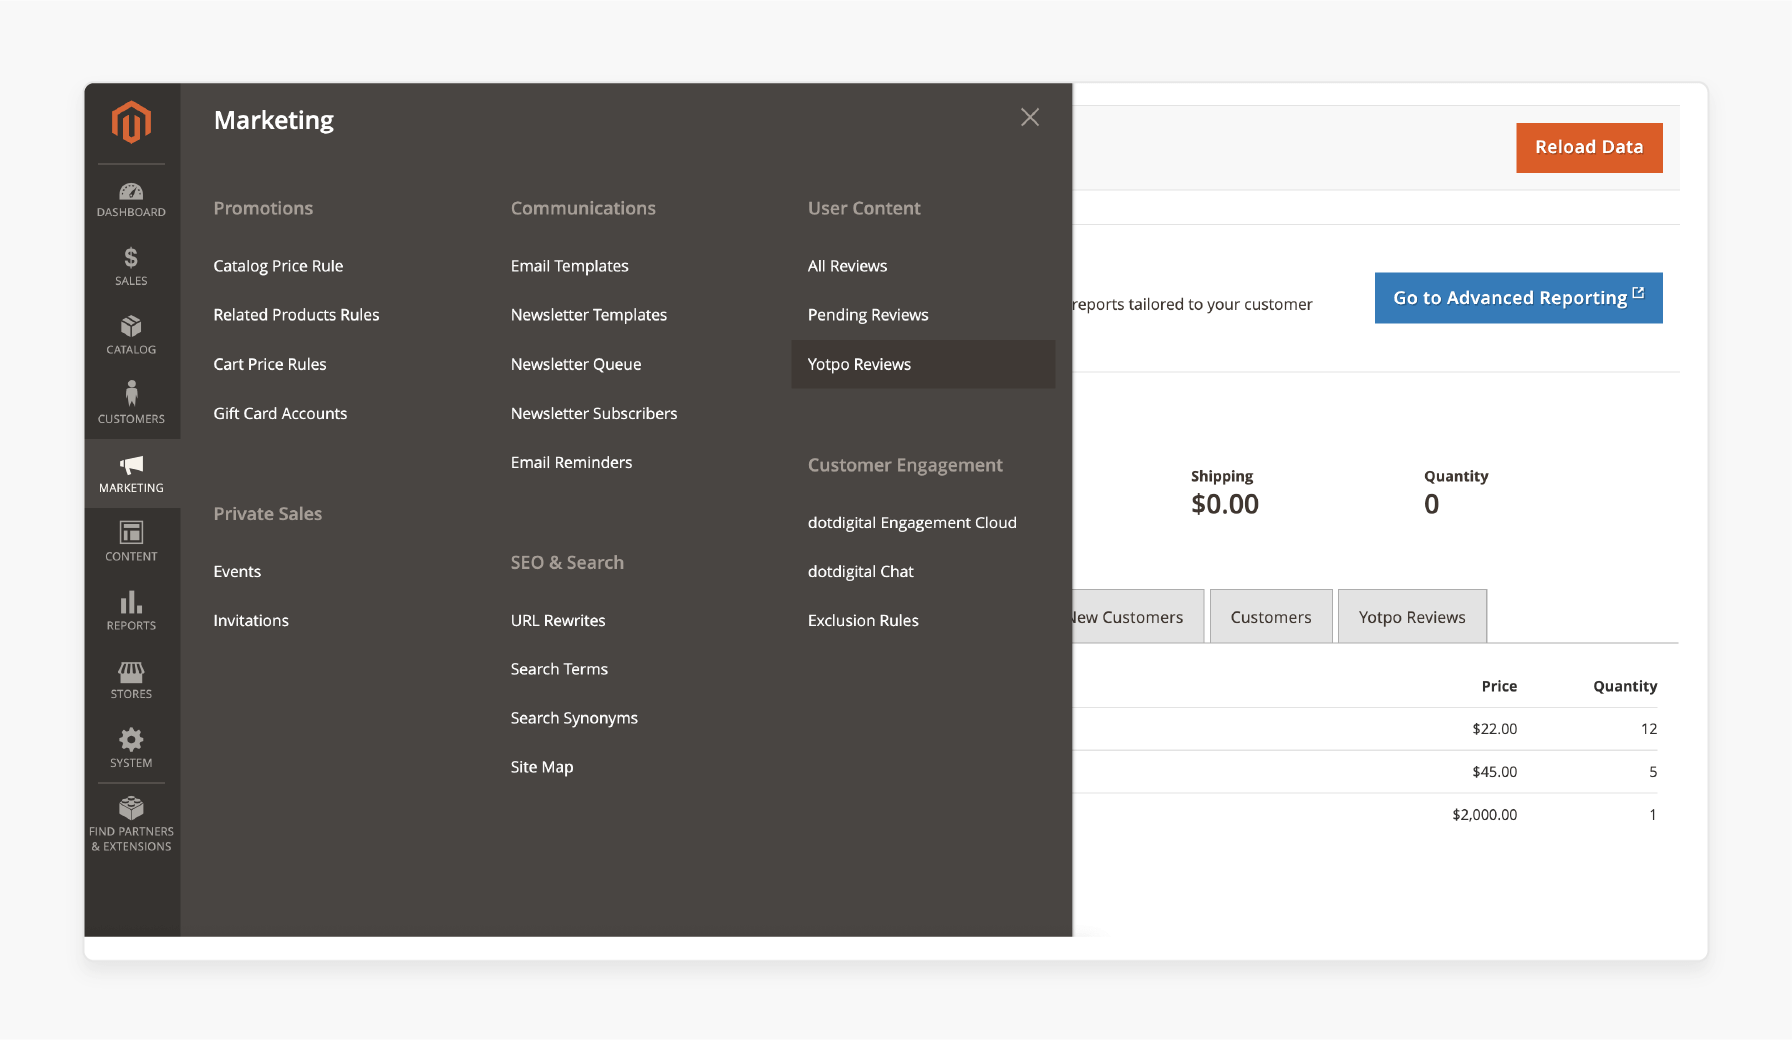
The Marketing section manages promotions, email campaigns, and SEO tools. It makes products easier to find and allows you to set up discounts. For Adobe Commerce users, it provides tools to enhance marketing and engage customers.
-
Promotions: Create discounts using catalog or cart price rules.
-
Communications: Manage emails, newsletters, and notifications.
-
SEO & Search: Analyze customer search terms and optimize product discovery.
-
User Content: Manage reviews (All Reviews, Pending Reviews, and Yotpo Reviews).
-
Customer Engagement: Use tools to improve interactions with customers.
6. Content

The Content menu lets you create and edit content pages, widgets, and themes. Using the Magento 2.3.0 platform, you can update content without coding. It also supports managing five modules, making store design easier to customize.
-
Elements: Create and edit CMS pages, widgets, blocks, and variables. It is done with the WYSIWYG editor. No coding is required.
-
Design: Manage your store's appearance. You can install new themes, including your Magento 2 theme. It schedules theme changes for events.
7. Reports
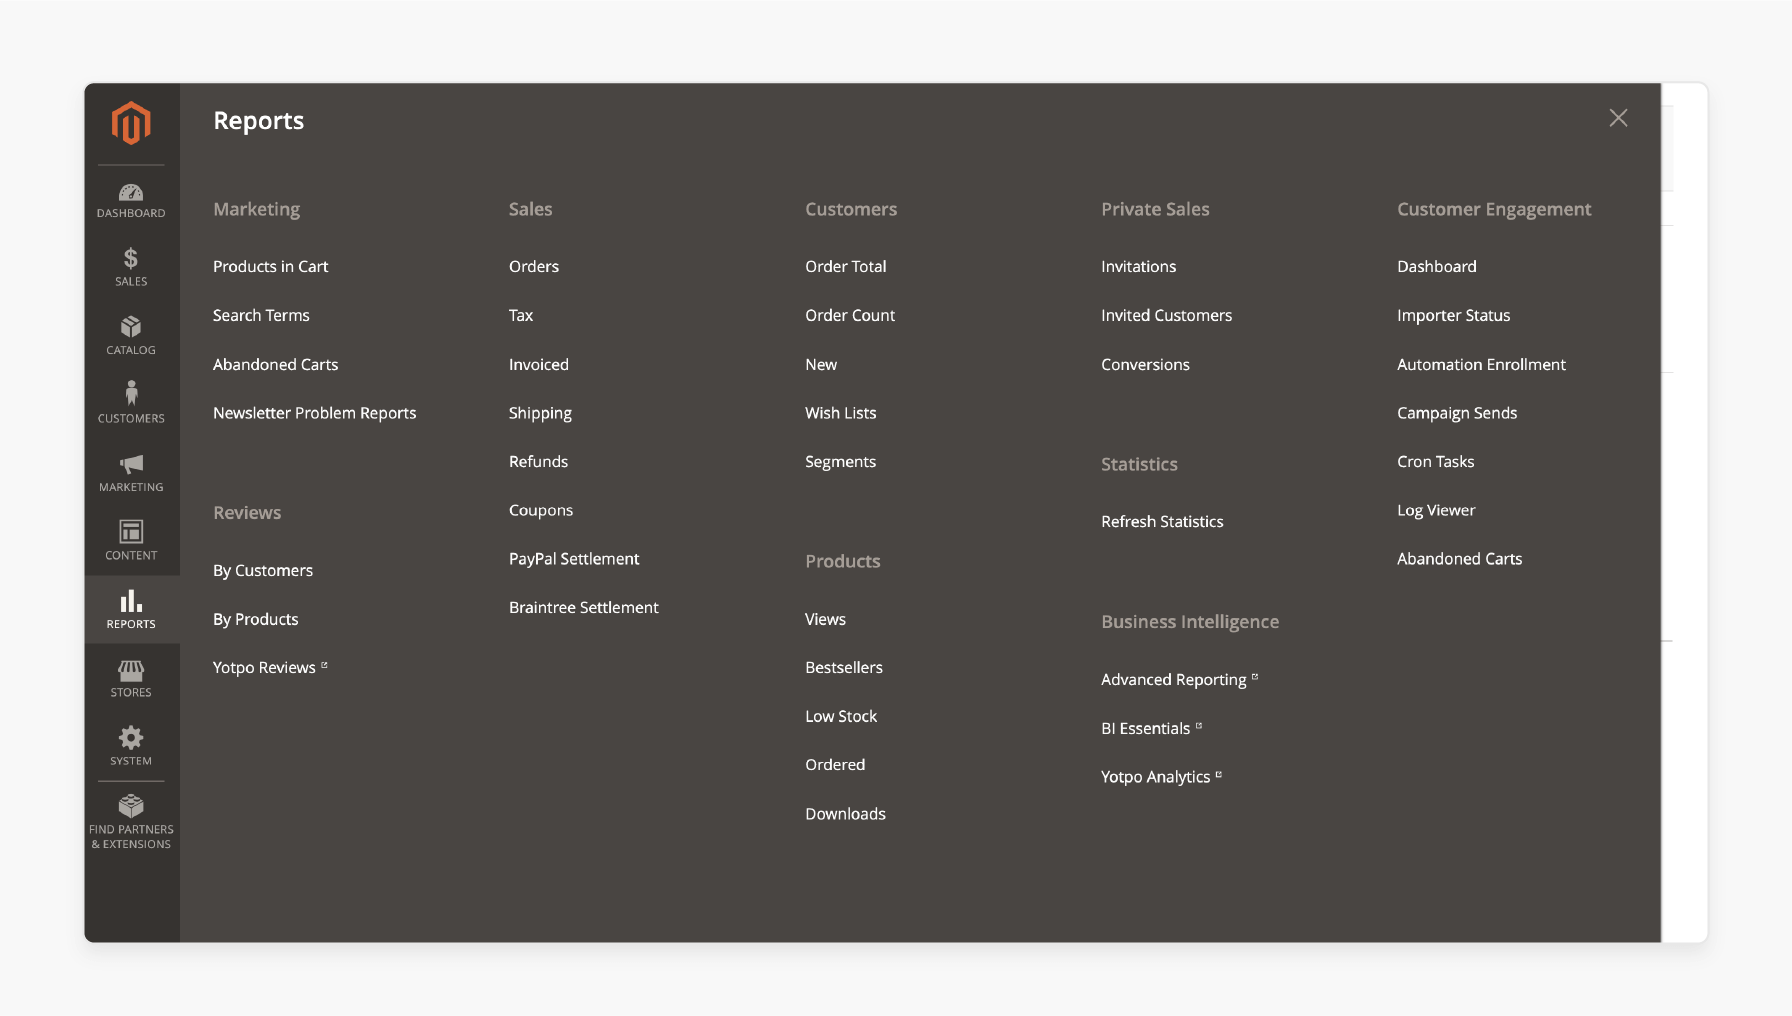
The Reports section provides analytics on sales, customers, and marketing performance. These insights help you identify trends and improve store performance. You can also optimize your Magento marketplace account using this data. Reports include:
-
Marketing
-
Sales
-
Reviews
-
Products
-
Customer Engagement
-
Business Intelligence.
8. Stores
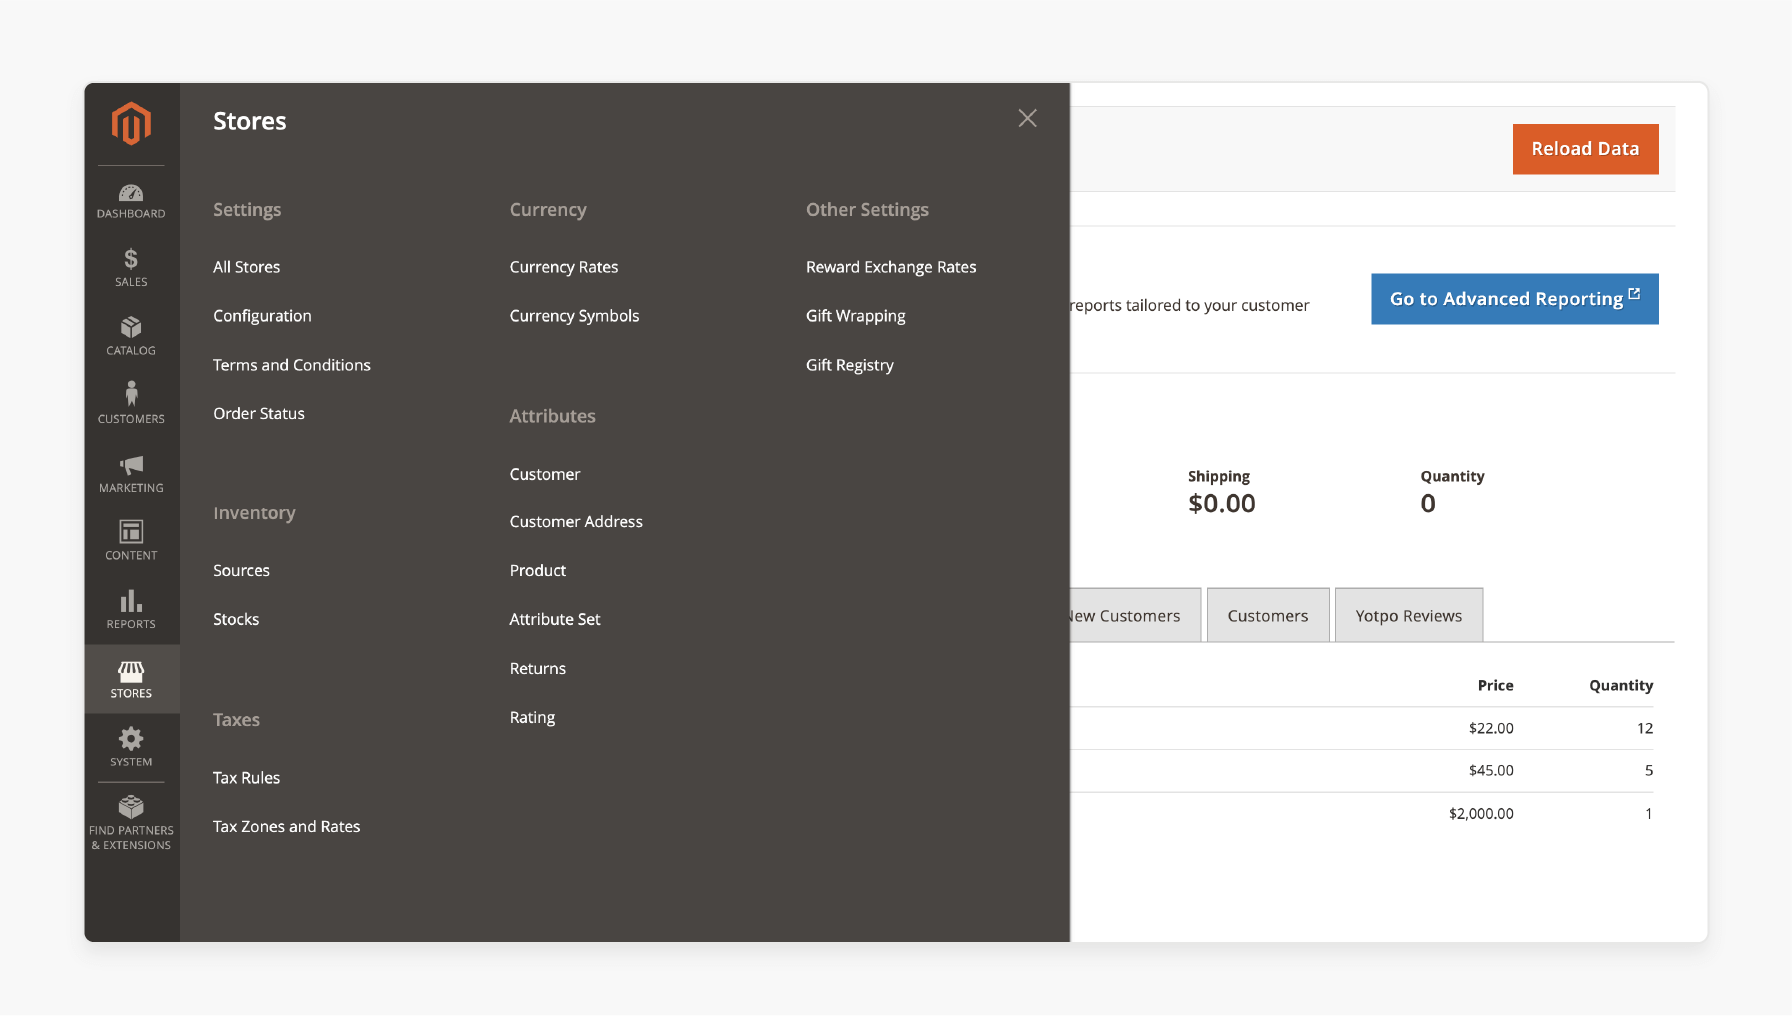
The Stores menu configures taxes, currencies, and store hierarchy. It also allows you to set file system configurations. This ensures smoother backend operations and supports store scalability. Key options include:
-
Managing your store hierarchy (websites, stores, and views)
-
Configuring taxes and currency rates
-
Setting up attributes and customer groups.
9. System
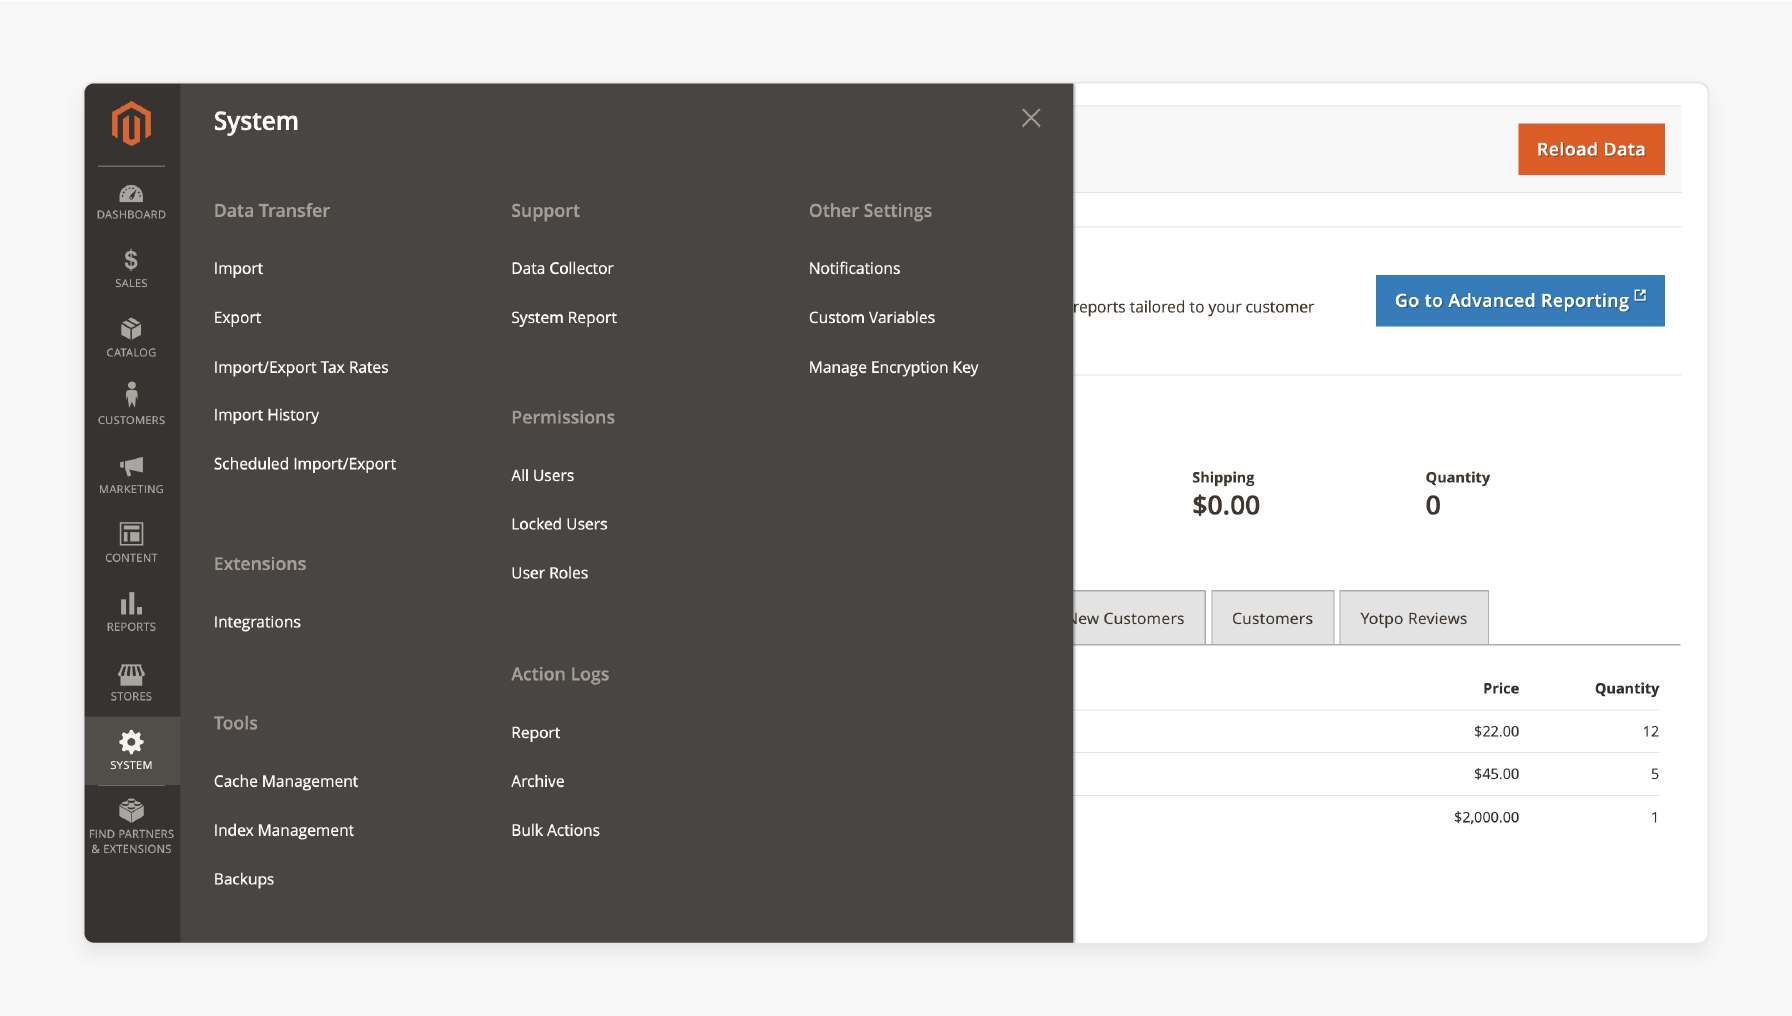
The System menu manages admin panel tasks. It includes data import/export, user permissions, and extensions. You can also remove the sample data, use ssh, or run the -f command for tasks. It includes installing sample data or fixing a php fatal error. These include:
-
Importing and exporting data
-
Managing user accounts and permissions
-
Reviewing security settings
-
Installing extensions and integrations
-
Optimizing store performance
10. Find Partners & Extensions
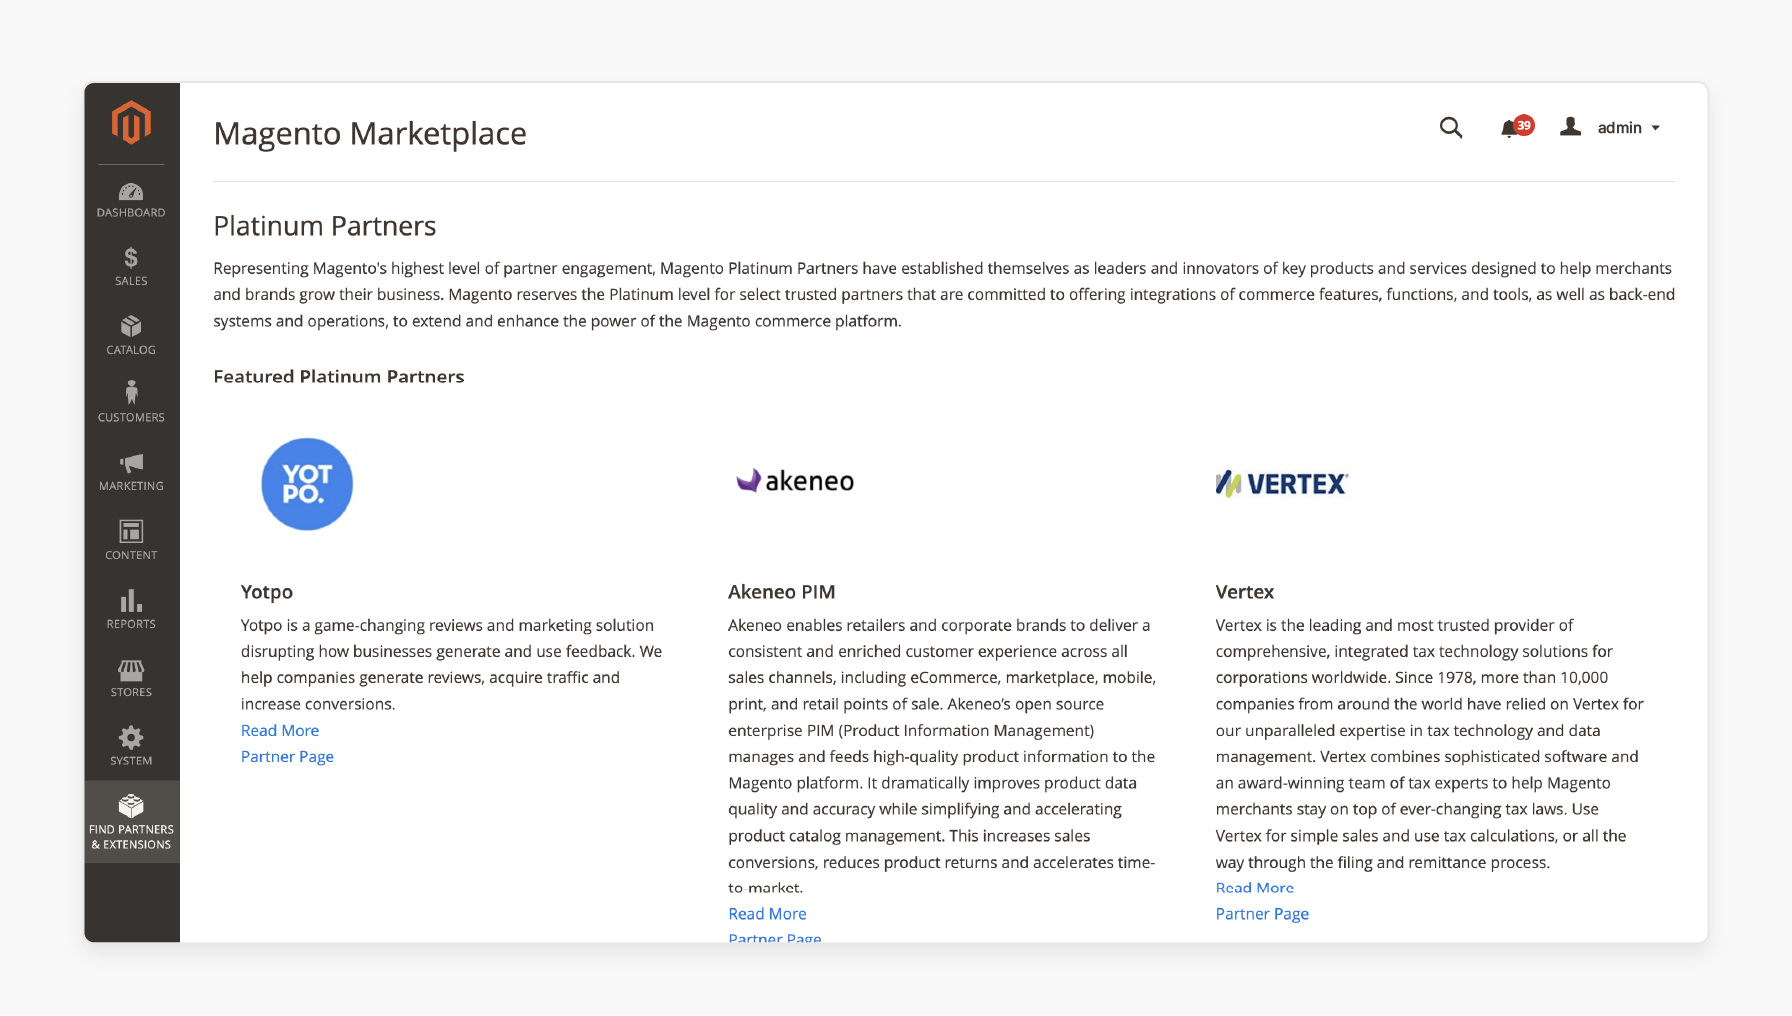
The Find Partners & Extensions section links you to your Magento 2 marketplace account. You can explore one of the following options:
-
Certified Magento platinum partners
-
Extensions.
These extensions help improve the features and performance of your Magento 2 version storefront.
3 Steps to Install Magento 2 Demo Data Using Command Line and Interface (CLI)
Step 1: Download Magento Packages
-
Visit the Magento Marketplace to download the latest Magento 2 package.
-
Save the file in an accessible location for uploading.
Step 2: Upload Files to Your Server
-
Use a file transfer tool like WinSCP or Filezilla to upload the Magento zip file to your server.
-
Extract the file to the Magento root directory.
-
For shared hosting, use the unzip feature in your hosting control panel.
-
To manually extract the file, use the following commands based on the file format:
`# For .tar.gz files
tar zxf
# For .zip files
unzip
- Set the correct permissions to avoid errors during the installation:
`chmod 777 -R var
chmod 777 -R app/etc
chmod 777 -R pub.`
This step ensures Magento has access to modify necessary directories.
Step 3: Run the Magento Setup Wizard
- Open a browser and navigate to the URL of your Magento installation:
http://www.example.com/magento2.
-
Replace
example.comwith your domain or local server path (e.g.,localhostor127.0.0.1). -
Click Agree and Set Up Magento to begin.
1. Readiness Check
-
Click Start Readiness Check.
-
Fix any errors displayed during the check. For troubleshooting, refer to Magento Stack Exchange for solutions.
-
Click Next to continue once all checks pass.
2. Add Database Information
-
Enter the database details, including:
-
Database name.
-
Username.
-
Password.
-
-
Click Next when finished.
3. Web Configuration
-
Enter the store’s URL (e.g.,
http://www.example.com). -
Specify the path for the admin panel (e.g.,
admin\orbackend).
4. Customize Your Store
-
Select the default time zone for your store.
-
Choose the default currency for transactions.
-
Pick the default language for the store.
-
Expand the Advanced Modules Configuration section to enable or disable specific modules.
5. Create Admin Account
-
Fill in the admin credentials, including:
-
Username.
-
Email address.
-
Password and confirmation.
-
-
Click Next to finalize this step.
6. Install Magento 2 Sample Data
-
Click Install Now to start the installation process.
-
Wait for the message confirming the successful installation of Magento and the sample data entities.
11 Best Practices for Using Magento Demo Data
| Best Practice | Details |
|---|---|
| Purpose of Demo Data | Use demo data to test and explore Magento features. Avoid using it on live websites to prevent confusion. |
| Remove the Data for Production | Always uninstall sample data before going live to avoid confusing customers. |
| Install Sample Data Correctly | Follow the steps to install Magento sample data using guides. Ensure it matches the correct version of Magento 2 for compatibility. |
| Use the Command Line | Perform installation or removal tasks using the command line. It is for quick and error-free results. |
| Test Store Features | Test checkout processes, workflows, and extension behavior using demo data. |
| Backup Before Making Changes | Create a backup before modifying or testing demo data. This prevents data loss during changes. |
| Customize Demo Content | Edit demo data to fit your business needs. Update products, categories, and prices to match your store. |
| Test Store Speed and Performance | Check loading times and optimize settings using demo data. Prepare for the actual product count and customer traffic. |
| Understand Limitations | Demo data has limits and may not cover all features. You cannot uninstall it partially, so plan its use carefully. |
| Leverage Demo Data for Training | Train your team with demo data. It offers a safe way to practice Magento features without affecting live operations. |
6 Key Benefits of Installing Magento 2 Sample Data
1. Quick Setup for Testing
Sample data includes ready-made products, categories, and attributes. This saves time as you do not need to create these from scratch. It lets you focus on other important store settings.
2. Realistic Store Simulation
Sample data provides a realistic storefront. It includes products, customer accounts, and orders. These help your store in a real-world environment, especially when using Magento hosting.
3. Improved Workflow Testing
You can test important workflows like checkout, shipping, and payments. This ensures that everything works smoothly for your customers. It is before you launch the store.
4. Validation of Features
Sample data gives you a safe way to test plugins and new features. It helps you find and fix issues without affecting live data or store performance.
5. Theme and Design Testing
Pre-designed products and layouts make it simple to test themes and designs. You can see how your changes look on the storefront without adding real products.
6. Seamless Team Training
Teams can practice using Magento features with sample data. It provides a safe environment for learning without risking any changes to a live store.
FAQs
1. How can I install sample data for Magento 2 on a local setup?
To install demo data, ensure your server meets Magento2 requirements. Run the command bin/magento sampledata:deploy to deploy the data. Next, use bin/magento setup:upgrade to complete the process. This sets up your testing environment locally.
2. Is installing sample data necessary for development?
Magento sample data is not required, but it is functional. It saves time by providing pre-configured products, categories, and orders. This helps developers test features and workflows without building everything from scratch. It is also helpful for testing themes and extensions.
3. What does the sample data installation process involve?
The sample data installation involves deploying sample products, categories, and orders. It also upgrades the database schema to integrate the demo content. These steps create a realistic testing environment to explore store features and workflows.
4. What are the benefits of using sample data on a demo store?
Sample data on a demo store allows you to explore Magento features in a realistic environment. It helps you test workflows and configurations without impacting live data. This ensures a better understanding of how the store will perform.
5. Does Magento hosting impact the installation of sample data?
Magento hosting plays an important role in installing sample data. Reliable hosting ensures the server has enough resources to handle the installation. This prevents delays or errors and provides better performance for your store.
6. What role does the Magento2 repository play in sample data deployment?
The repository contains the files needed to deploy sample data into your store. You need authentication keys from your Magento account to access the repository. It ensures you can download and integrate the correct data for your store.
Summary
Magento 2 Demo Data is a set of preloaded products, customer accounts, and orders. It helps create a realistic store environment for testing and development. Developers and store owners can use it to explore Magento features, test workflows, and customize designs easily.
Consider the following benefits:
-
Quick Setup for Testing: Saves time and helps you focus on configuring your store.
-
Realistic Store Simulation: Mimics real-world conditions for better testing.
-
Improved Workflow Testing: Ensures everything works as expected before launching your store.
-
Theme and Design Testing: Pre-designed products make it simple to test themes.
Explore managed Magento hosting to optimize Demo Data for seamless testing and development.


