Steps to Add Magento 2 Add Customer Address Attribute
Ready to enhance your customer experience and streamline data collection? Magento 2 add customer address attribute feature gives you the flexibility to customize your store's customer address fields.
In this tutorial, we will explore the benefits and configuration steps of the add customer address feature.
Key Takeaways
-
The ecommerce customer address feature extends default address fields.
-
Tailor the checkout process to meet your business and customer needs.
-
Reduce shipping errors with detailed and customized address information.
-
Follow easy instructions to add and configure custom address features.
-
Implement strategies for clear labeling, proper data validation, and mobile optimization.
-
How to Configure Custom Customer Address Attributes in Magento?
-
How to Use Custom Customer Address Feature in Email Templates?
-
Best Practices for Creating Custom Customer Address Attributes in Magento 2?
What is Magento 2 Customer Address Attribute?

Magento 2 customer address attribute refers to custom fields that store additional information related to a customer's address in Magento store.
The address attribute can be used to capture more details beyond the default address fields, such as:
-
Custom delivery instructions
-
Special requirements
-
Business Information
Address attributes enable store owners to tailor the checkout process or customer account pages to fit specific business needs.
These features can be configured as required or optional fields. They can appear in both the front end and back end. They ensure more flexibility in managing customer address information.
Why Set Up Magento 2 Add Customer Address Attribute?
1. Personalized Data Collection
-
Adding a customer address feature allows businesses to gather specific information. The information isn’t available through default fields.
-
For example, you can collect details like:
1. VAT numbers
2. Additional phone numbers
3. Special delivery instructions
-
It is especially useful for businesses that need more than just the basic address details. It helps fulfill orders properly or meet regulatory requirements.
2. Tailored Checkout Experience

-
Custom address features help businesses offer a checkout process tailored to their customers’ needs.
-
The flexibility allows you to request only the information relevant to your operations. It ensures that customers aren’t overwhelmed with unnecessary questions.
-
It also ensures that the data collected is actionable and beneficial for both the customer and the store.
3. Improved Order Accuracy
-
Adding specific fields helps reduce the chances of errors during shipping. These include detailed delivery preferences or business-related information.
-
It means fewer mistakes in deliveries and more accurate handling of customer orders. It ultimately leads to fewer returns or customer complaints.
4. Enhanced B2B Transactions
-
B2B businesses should be able to capture additional details like:
1. Tax information
2. Company name
3. Internal reference numbers
-
Custom address attributes enable businesses to meet these specific needs. It facilitates smoother transactions and ensures compliance with business regulations and standards.
5. Increased Customer Satisfaction
-
Customizing address fields to meet specific customer needs results in a smoother shopping experience.
-
Customers appreciate when a business can accommodate their requirements. These include providing fields for special delivery instructions.
-
It not only leads to improved customer satisfaction. It also helps build long-term loyalty as customers feel understood and valued.
How to Configure Custom Customer Address Attributes in Magento?
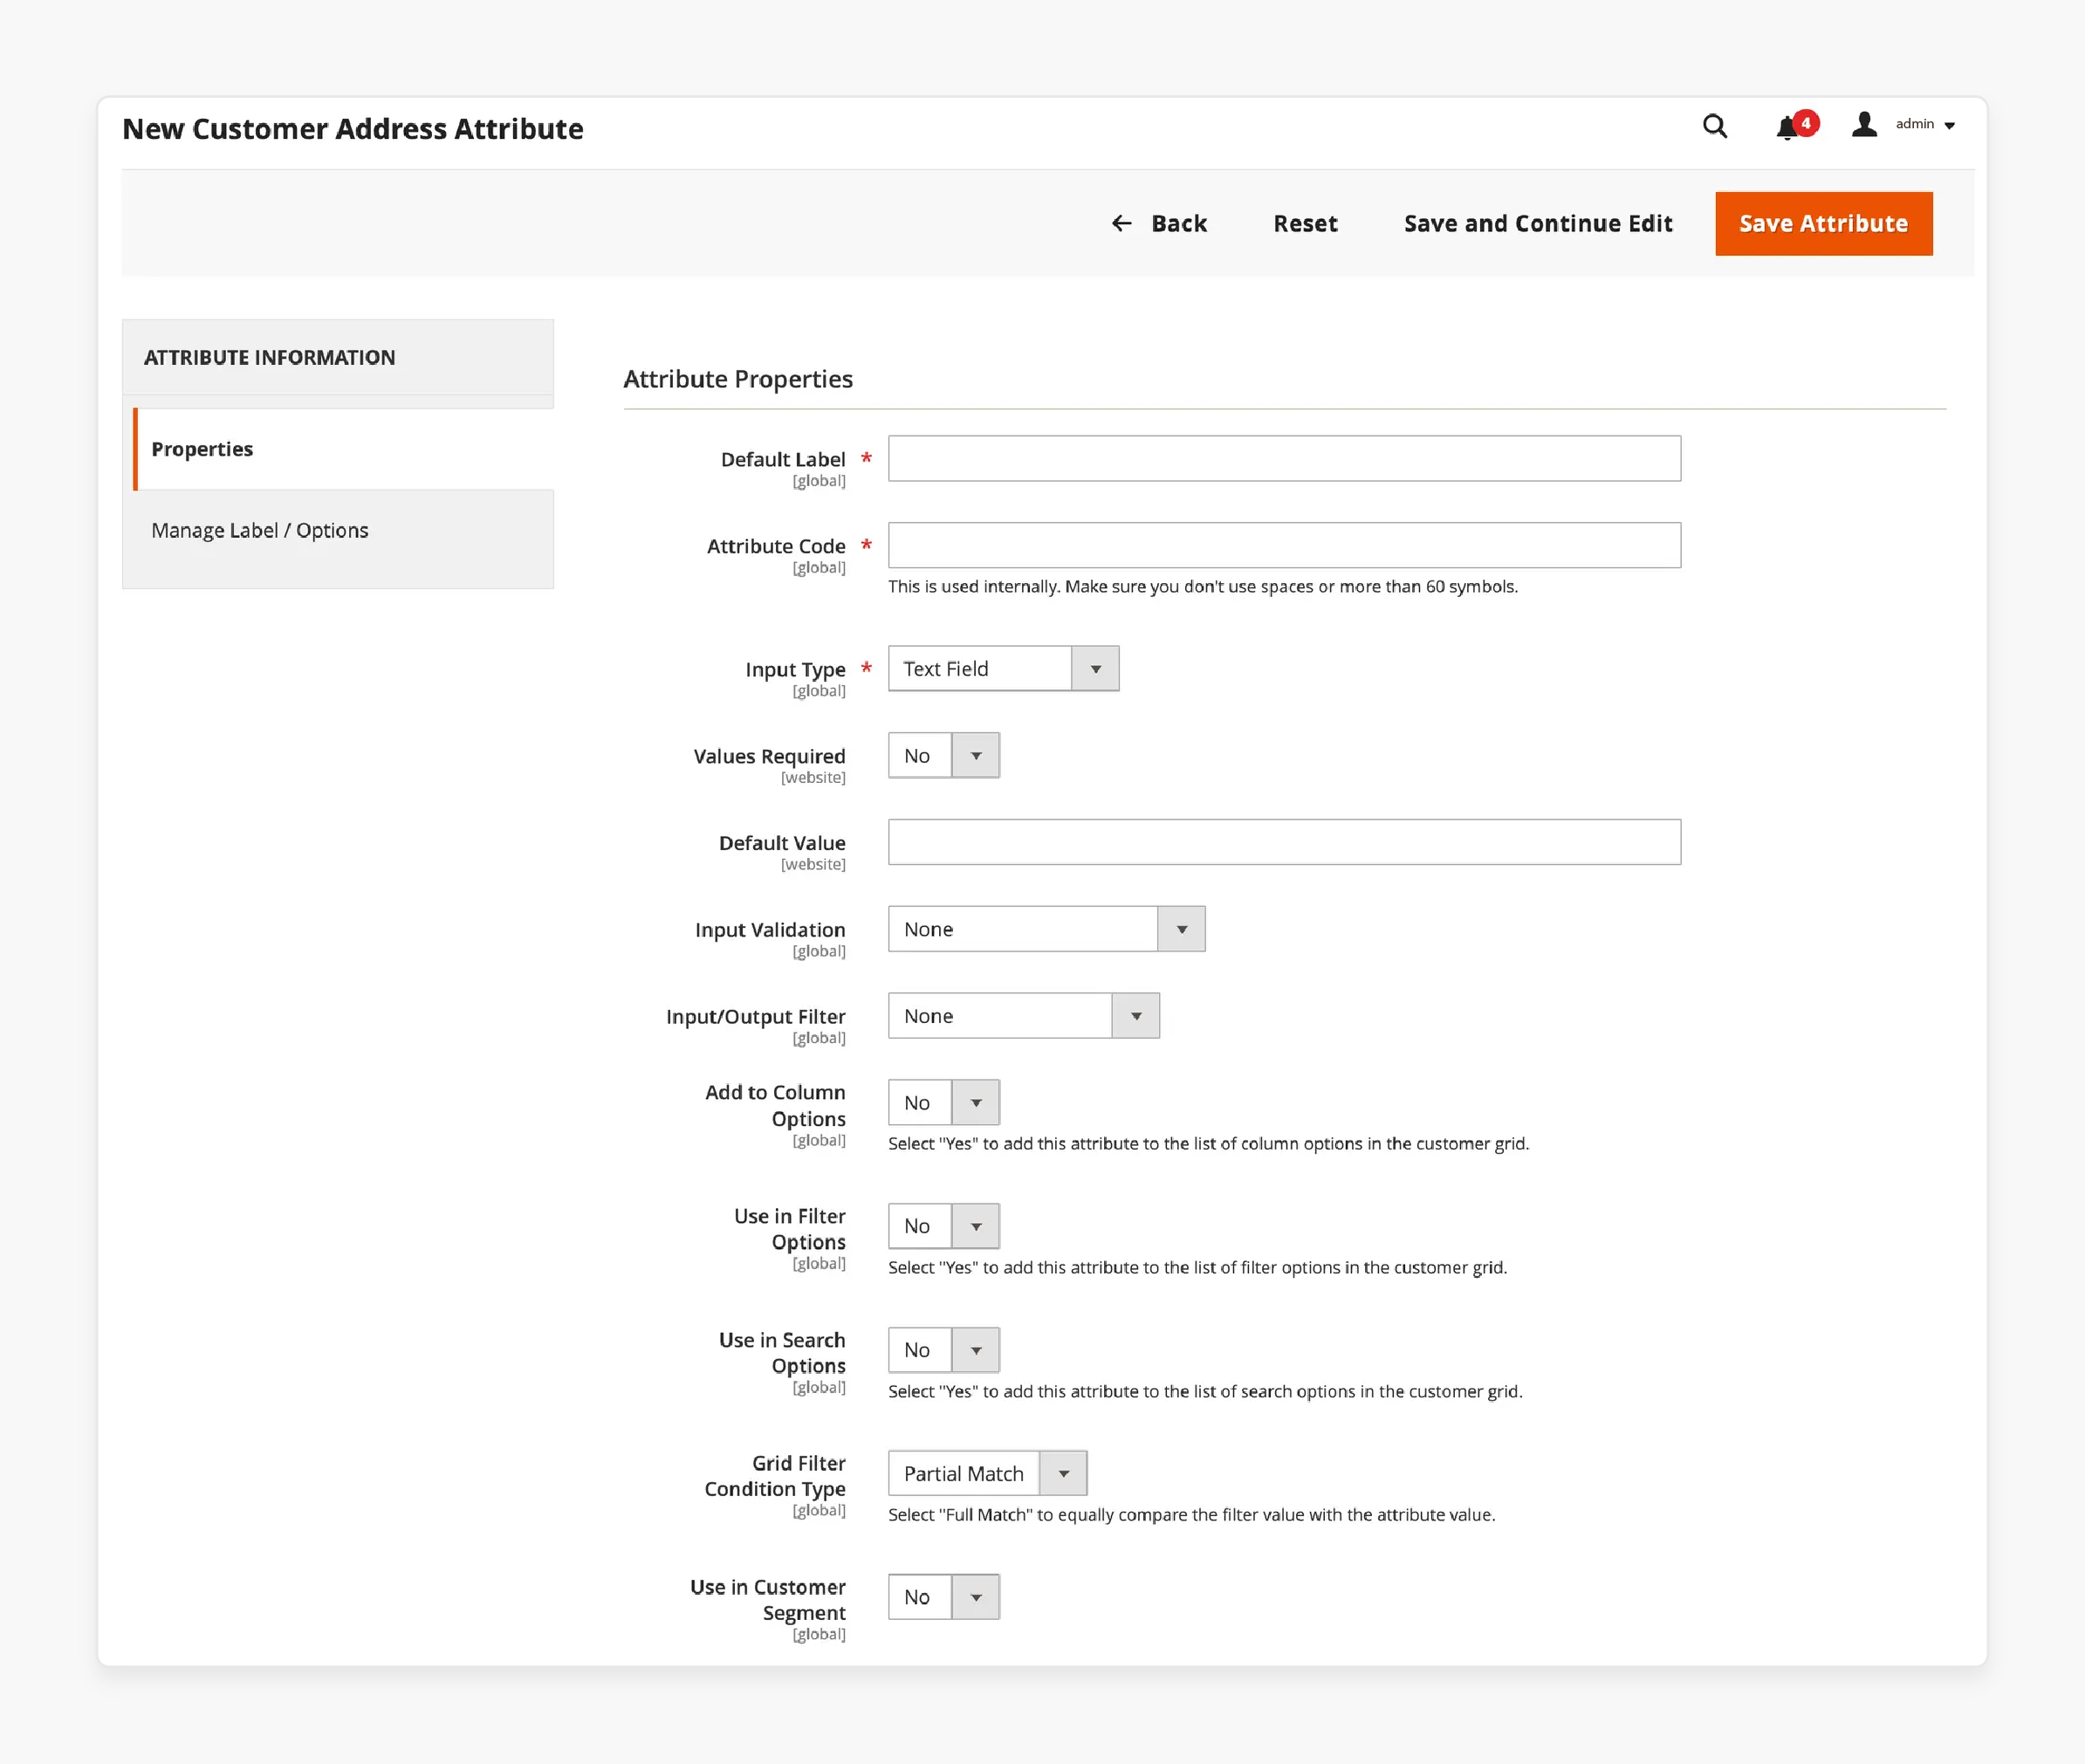
Step 1: Complete the attribute properties

-
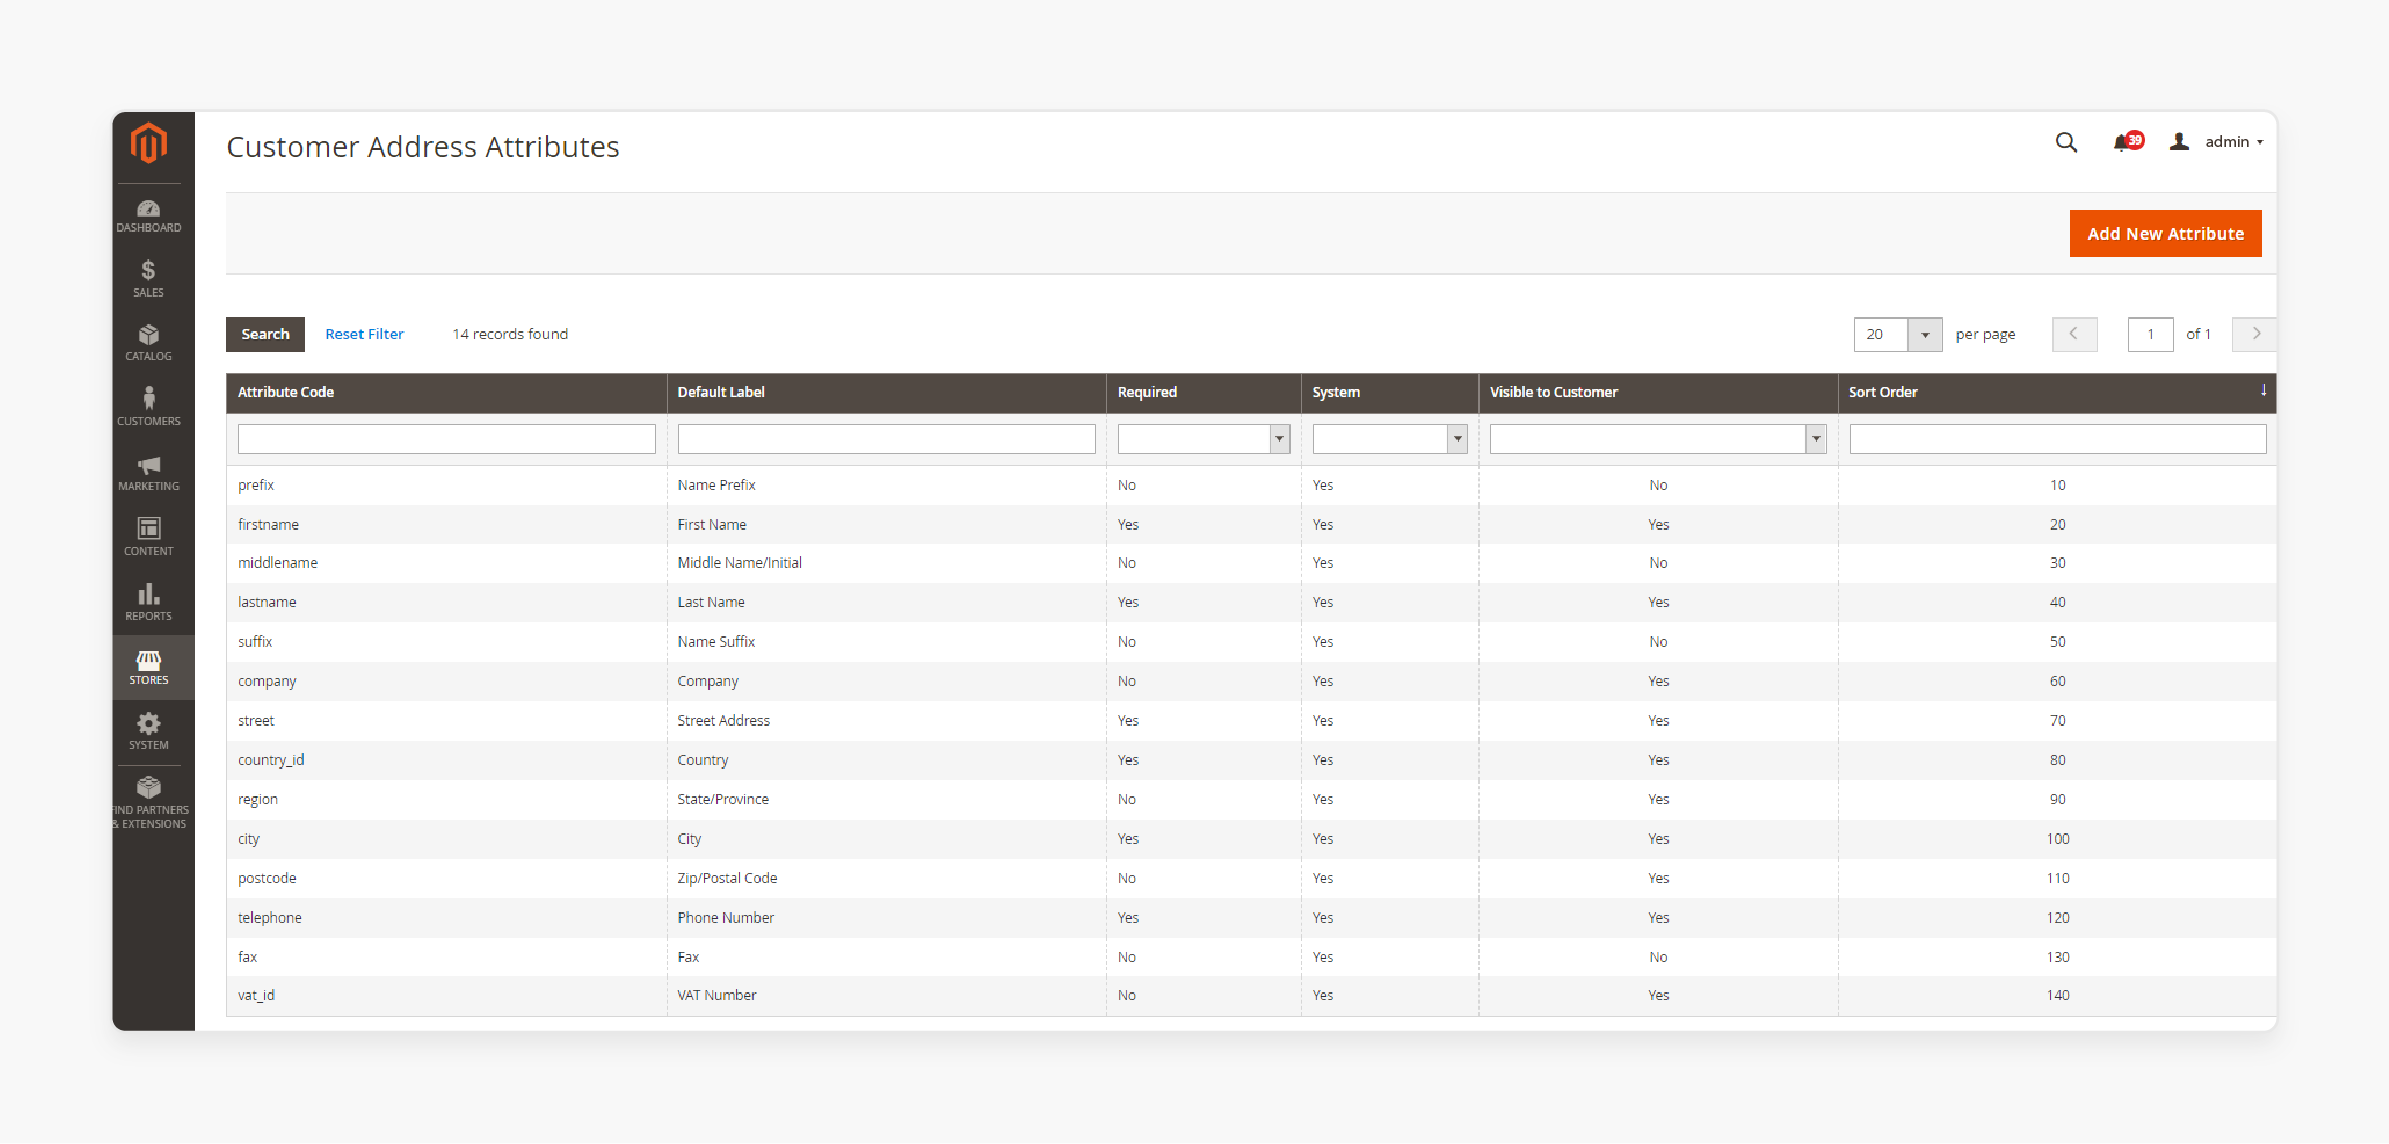
Go to Stores > Attributes > Customer Address in the Admin sidebar.
-
In the upper-right corner, click Add New Attribute.
-
In the Attribute Properties section, enter a Default Label and Attribute Code.
-
To determine the type of input control that is used for data entry, set the Input Type (e.g., Text Field, Dropdown, Yes/No).
-
If the customer must enter a value in the field, set Values Required to Yes.
-
To assign an initial value to the field, enter a Default Value.
-
To check the data entered into the field for accuracy before the record is saved, set Input Validation to the type of data to be allowed in the field.
-
To apply a preprocessing filter to values entered in a text field, text area, or multiple line input type, set Input/Output Filter.
-
Configure Customer Grid and Segment properties, like adding the attribute to column options, filters, and search.
Step 2: Complete the storefront properties

-
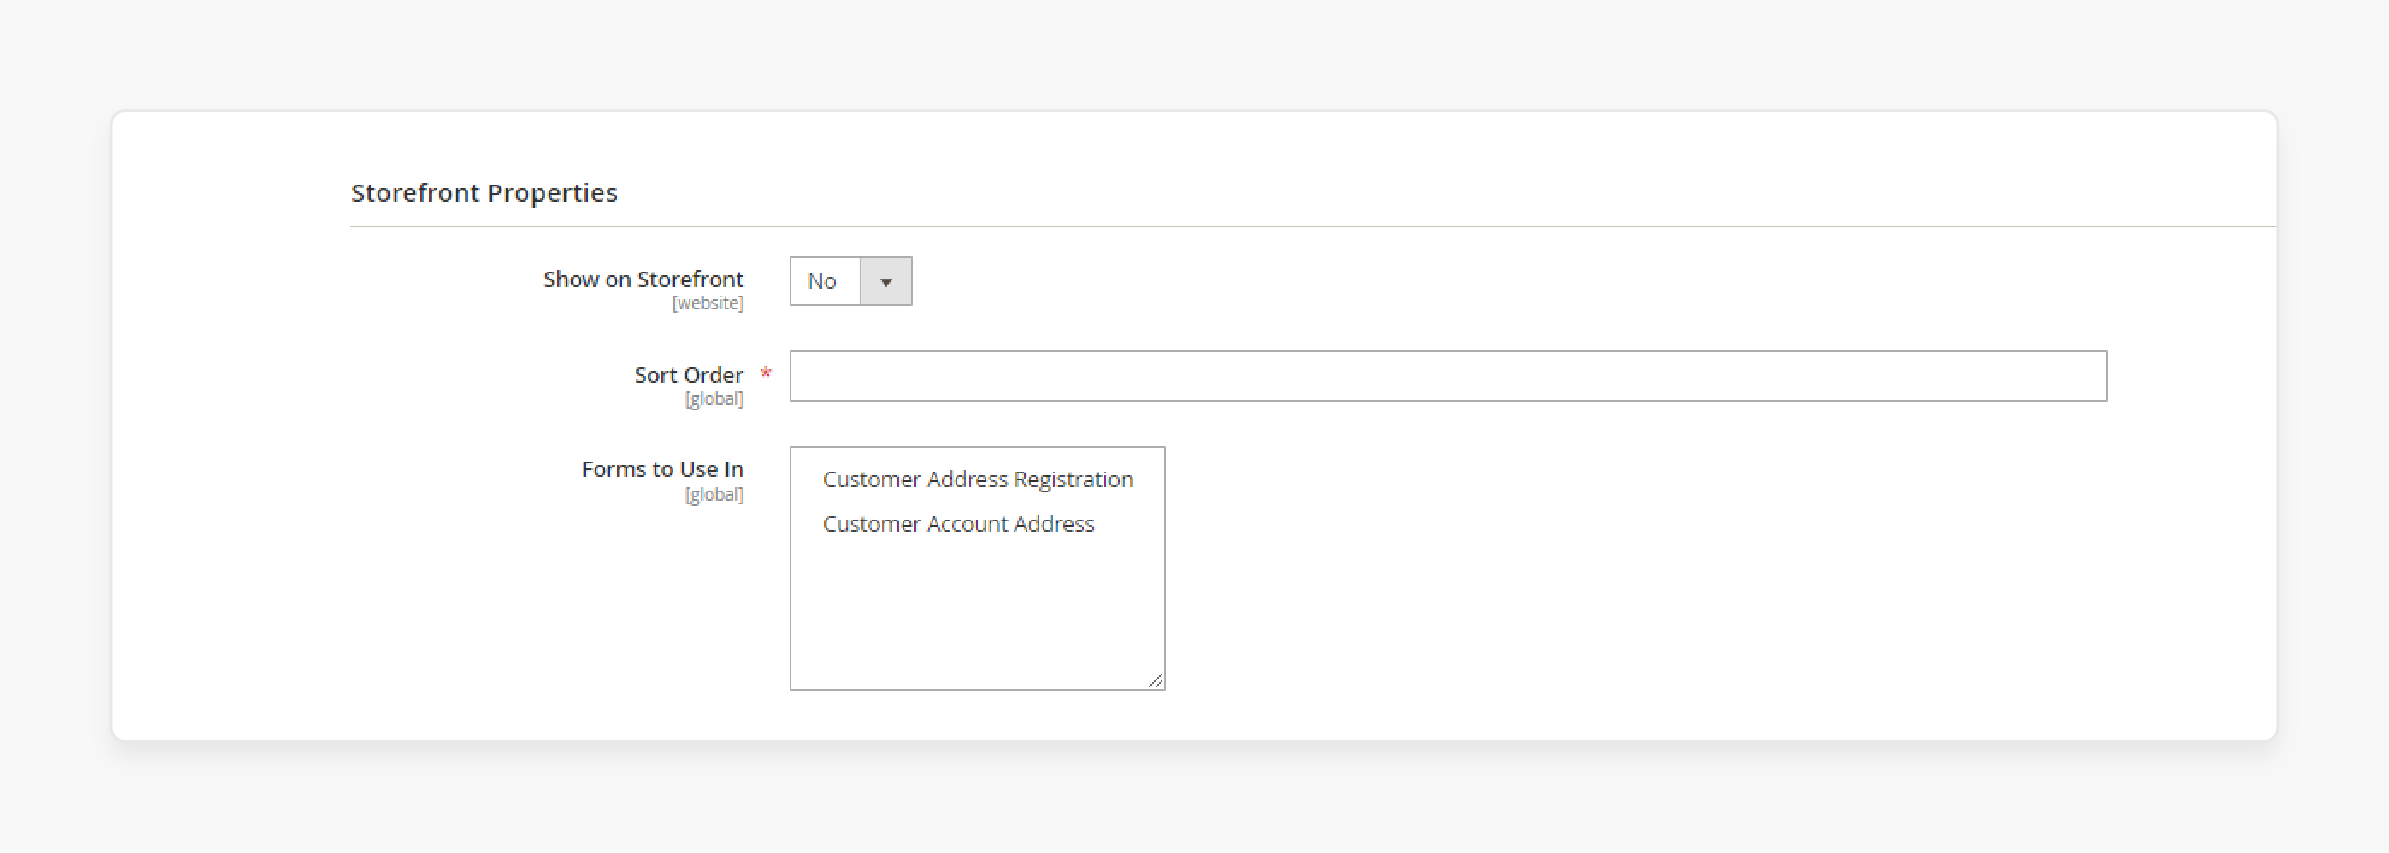
Scroll down to the Storefront Properties section.
-
To make the feature visible to customers, set Show on Storefront to Yes.
-
Enter a number in the Sort Order field, which determines its order of appearance when listed with other features.
-
Set Forms to Use for each form that includes the feature.
Note: To choose both options, hold down the Ctrl key (PC) or the Command key (Mac) as you click each form.
-
Customer Address Registration
-
Customer Account Address
Step 3: Complete the label and save
-
In the panel on the left, choose Manage Labels/Options.
-
Under Manage Titles, enter a label to identify the attribute for each store view.
-
When complete, click Save Attribute.
How to Use Custom Customer Address Feature in Email Templates?
1. Retrieve Customized Attributes
-
Before, you could use custom address attributes in email templates. You need to ensure that these custom fields are correctly captured and stored in the customer or order data.
-
Customized attributes might include fields like:
1. Delivery Instructions
2. Apartment Number
3. Business Name
-
If your Magento setup does not automatically pull these customized attributes into the email system. You may need to write custom code.
-
You may also use a third-party extension to make the attribute available for email template use.
2. Modify the Email Template
-
Magento email templates use a variable system to insert customer-specific information into emails dynamically.
-
To include your custom address features. You will need to identify the correct variable that represents your custom field and insert it into the email template.
-
For instance, if you have created a customized attribute like "Delivery Instructions," you would add a variable similar to this: {{var order.getShippingAddress().getCustomAttribute('delivery_instructions')}}.
-
It ensures that the value entered by the customer is included in the email sent to them.
3. Update Transactional Emails
-
Common emails can be enhanced with customized attributes. These include:
2. Shipping notifications
3. Invoice emails
-
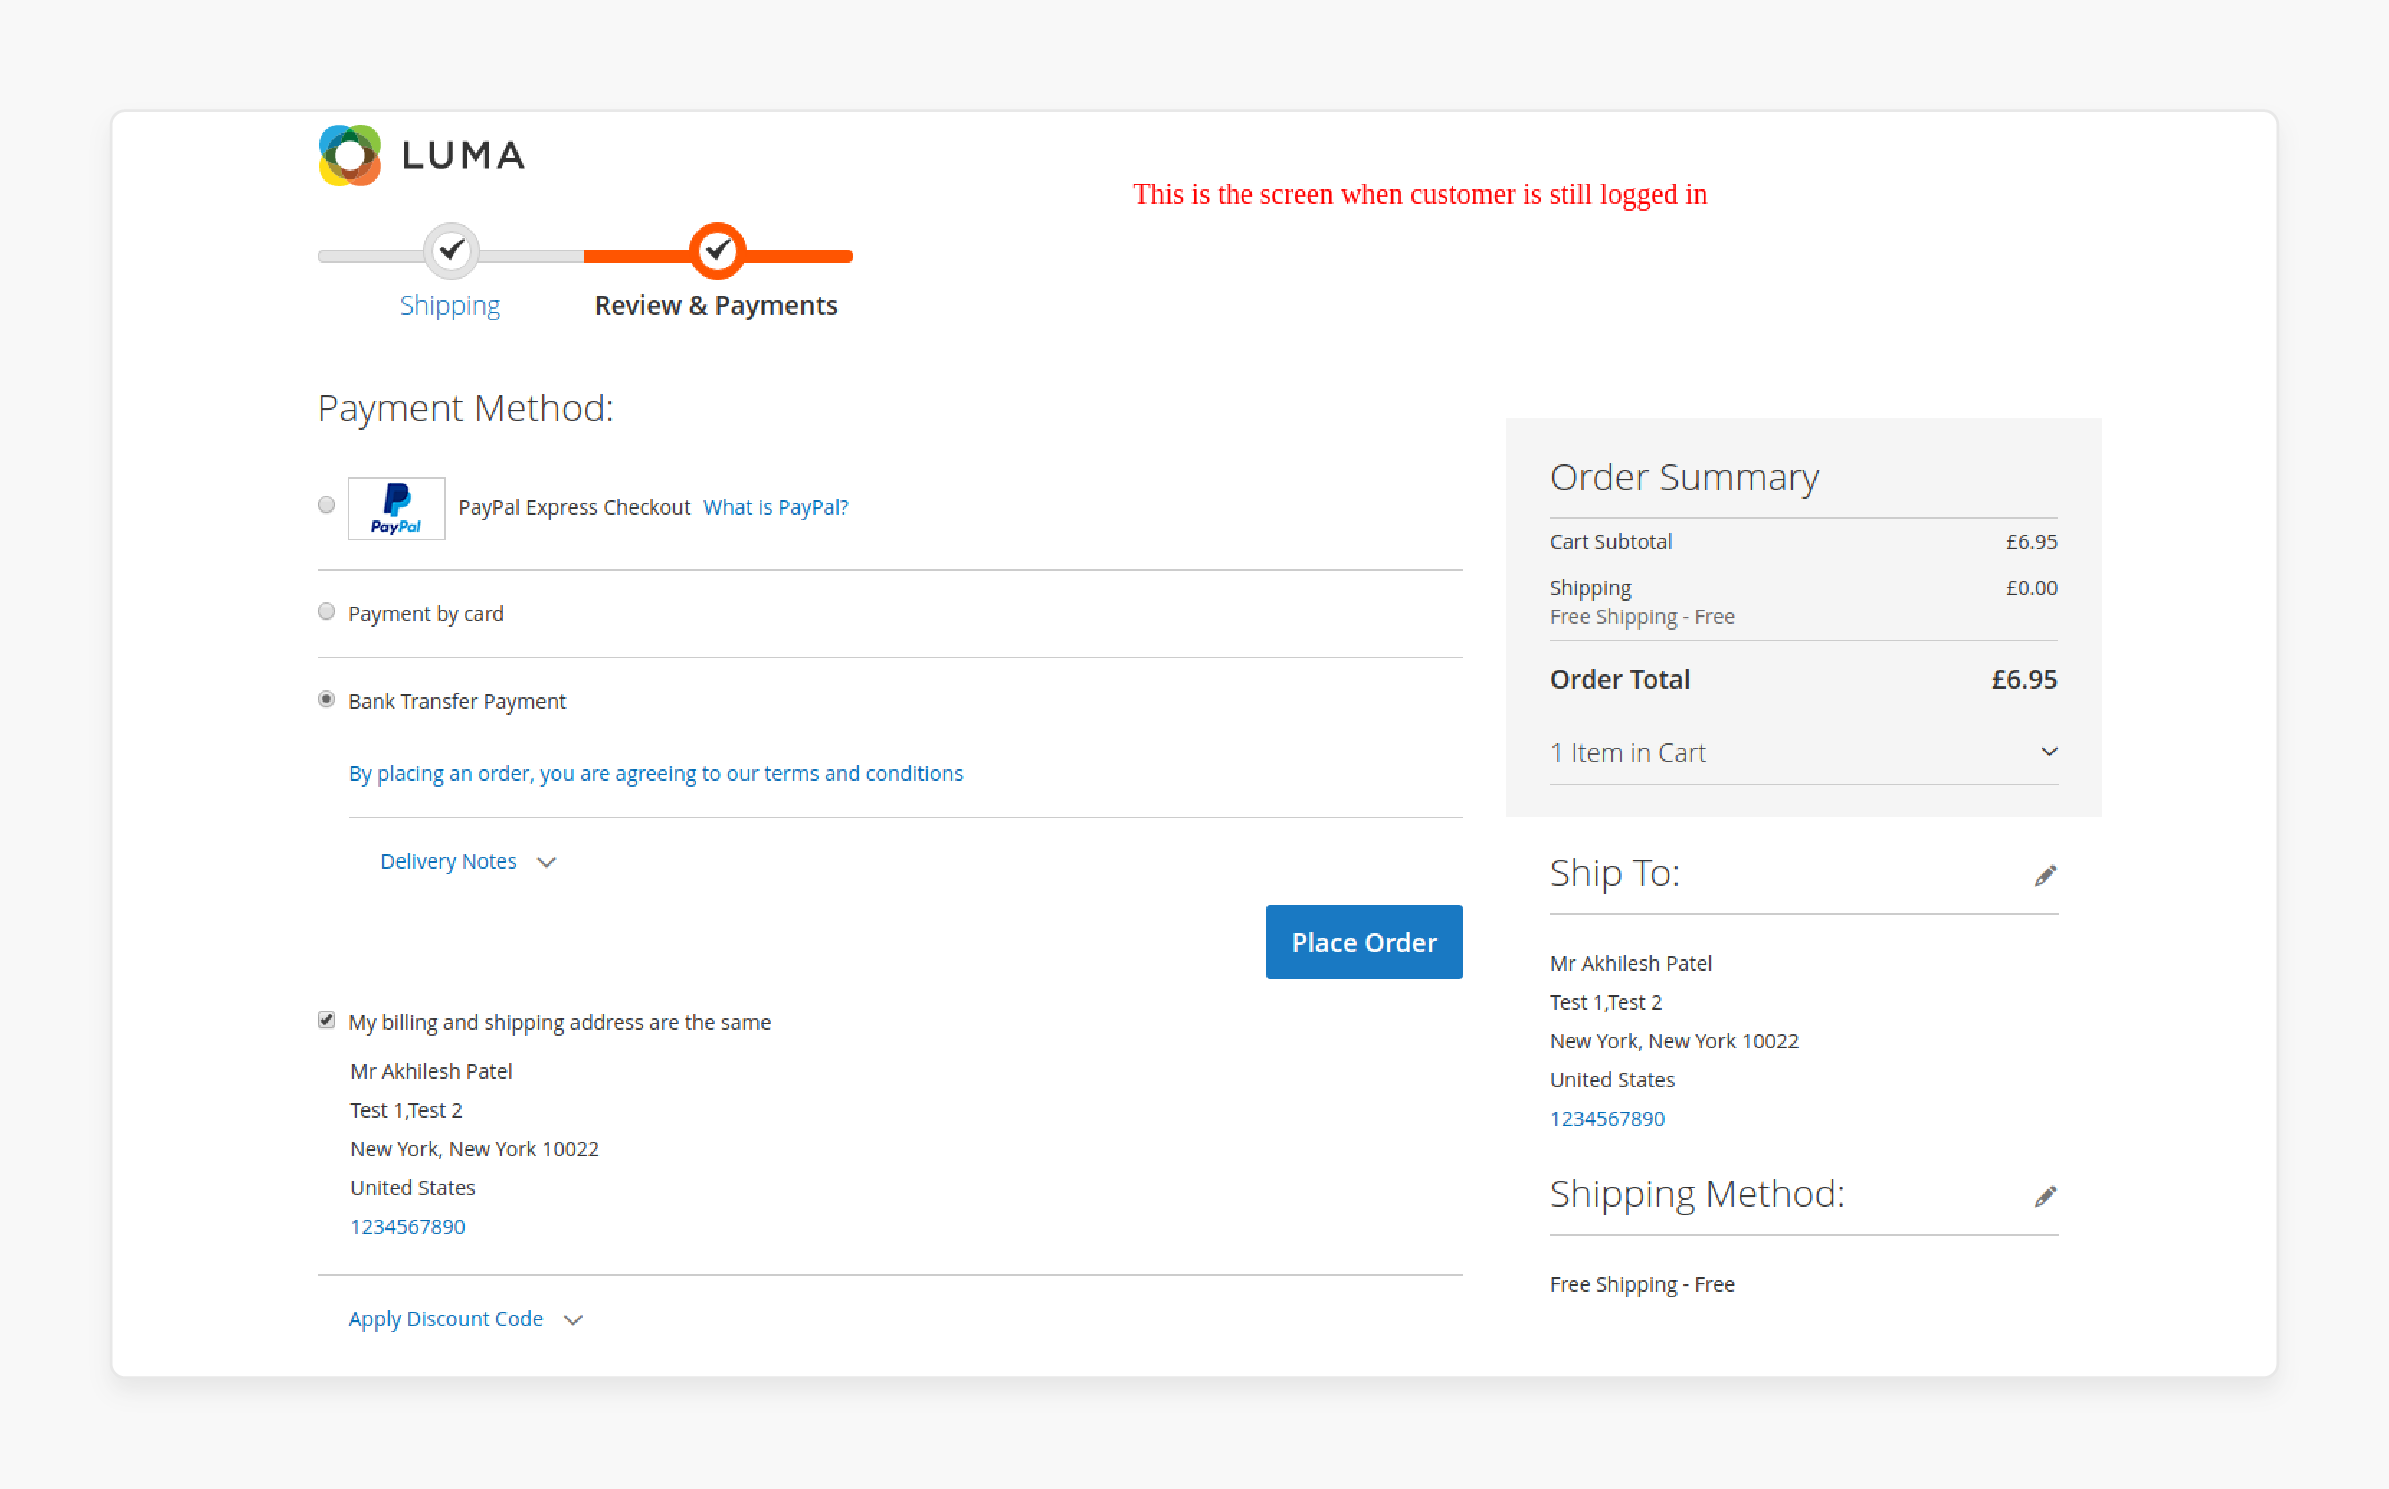
For example, if your customers include delivery instructions during checkout. The information can be added to their order confirmation email. It helps reassure them that their request has been received.
4. Test and Validate
-
After modifying the email template, you should test it across different scenarios.
-
It includes making sure that the customized attributes are populated correctly for various orders. It also ensures that the format and readability of the email template are intact.
-
Testing ensures that the information is correctly displayed. It enhances customer communication and reduces confusion.
Best Practices for Creating Custom Customer Address Attributes in Magento 2?
| Best Practices | Explanation |
|---|---|
| 1. Define the Purpose Clearly | Before adding any custom address attribute, identify the purpose it serves. You should identify whether it is for: Better order management Customer segmentation Shipping preferences Compliance requirements You should clearly define the attribute’s purpose. It ensures that the added field enhances functionality and doesn’t clutter the user interface. |
| 2. Choose the Right Data Type | Magento 2 offers multiple data types for customized attributes, such as: Text fields for open-ended responses like "Delivery Instructions." Dropdowns for specific options like "Shipping Method Preferences." Checkboxes for Yes/No queries like "Contactless Delivery." Choosing the correct data type ensures accurate data collection and improves user experience. |
| 3. Make Attributes Optional Unless Essential | Avoid forcing customers to fill out unnecessary fields. Make customized features optional unless they are critical for the order or customer profile. The approach enhances the user experience. It also prevents cart abandonment during checkout. |
| 4. Keep Attribute Labels Clear and Descriptive | Use clear and concise labels for the attributes to avoid confusion. The label should tell customers exactly what information is required or optional. For example, "Preferred Delivery Time (Optional)" is better than simply "Delivery Time." |
| 5. Consider Field Placement | Ensure that customized features are placed logically in the customer address form. These include near similar or related fields. For example, if you are asking for apartment numbers or special delivery instructions. You should place those fields under the default address fields. |
| 6. Validate Data Input | Use proper validation rules to ensure correct data entry. For example, if the feature requires a phone number or zip code. You should ensure that the input matches a valid format. It can reduce issues during the order fulfillment process. |
| 7. Enable Backend Access | Ensure that custom features are accessible in the Magento admin panel. It is used for easy editing by customer service or administrative staff. It ensures that the data can be updated manually if needed. It also helps improve overall customer support efficiency. |
| 8. Leverage Customer Attributes in Reports and Emails | If applicable, make sure that custom address features are accessible for use in transactional emails and reporting. It can help streamline customer communications and provide more insightful data for business operations. These include personalized follow-up emails or targeted marketing campaigns. |
| 9. Optimize for Mobile Users | Since many customers shop on mobile devices, ensure that custom address fields are optimized for mobile. Test the display and functionality of these fields on various screen sizes. It helps guarantee a smooth and intuitive experience. |
| 10. Consider Future Flexibility | When adding custom features, think about the future growth of your business. Will these fields remain relevant as your customer base expands? Ensure that the custom attributes can be easily modified, updated, or removed without affecting existing customer data. |
| 11. Comply with Legal and Security Requirements | If your custom address features involve collecting sensitive customer information: VAT numbers Delivery preferences Ensure that your Magento store complies with data protection laws like GDPR or CCPA. Implement the necessary encryption and consent collection to safeguard customer data. |
| 12. Enable API Support (Optional) | If your store uses external services or third-party platforms. Ensure that your custom address features are accessible through the Magento API. It allows you to integrate with external systems for tasks such as: Order fulfillment Marketing Customer relationship management (CRM) |
FAQs
1. How do I create a custom address feature in Magento?
You need to use PHP to define the attribute properties and add them via a custom module. Start by writing a PHP script that specifies the attribute's label, type, and other configurations. Once the script is executed, the new address feature will be available.
2. What PHP code is required to add a new address feature in Magento?
You need to define the attribute in the module’s InstallData or UpgradeData script using Magento's EAV setup. The PHP code should specify details like attribute code, type, input method, and whether it’s required. It ensures the new address feature is properly integrated.
3. How can I configure Magento to display custom address features?
Navigate to Stores > Attributes > Customer Address in the Magento admin. Then, the storefront properties will be adjusted to show the attributes for new customers. Proper configuration ensures that the new address feature appears correctly.
4. How do custom address features affect new customer registrations in Magento?
It enhances the registration process for new customers by allowing them to provide additional information. Using PHP and proper configuration, the custom attribute is integrated into the address forms. It ensures that new customers can fill out these fields during signup.
Summary
Magento 2 customer address attributes allow store owners to collect additional information beyond the standard address details. The tutorial uncovers the benefits of the attribute, including:
-
Gather unique information like VAT numbers and special delivery instructions.
-
Customize the checkout process to request only relevant and necessary data.
-
Reduce shipping errors by capturing detailed delivery preferences.
-
Collect essential business details such as company names and tax information.
Boost your Magento store with a custom customer address feature. Choose our managed Magento hosting for better integration and exceptional performance.


